6 Attachment(s)
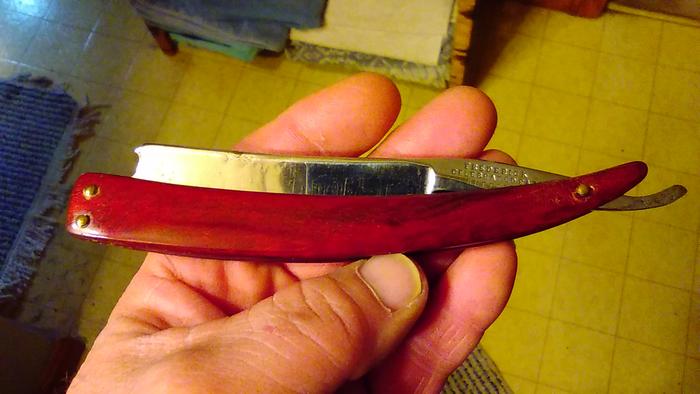
Warrented Cast Steel finally complete
This one was quite a learning experience. Too many SRP members to thank for advice and tips. Hopefully, you'll know who you are as I mention the tips.
I received this with some thin damaged bone scales and an uneven blade grind. SRP put my mind to rest about the uneven grind and suggested I give it a quick hone to see it it was worth my time. I did, and it took an acceptable edge for a quick check. So, on to making my first set of scales. Horn was suggested, so I picked some honey horn. I hadn't worked with horn before, it was nice to work with once I got a feel for it. Once I'd settled on a design, I mocked the pattern up with some tongue depressors (another SRP tip) and tried it on a strop, seemed to work well. I based the thickness of the scales on a W&B I had apart and tapered them .125" to .110" at the pivot. I tend to like slightly thicker scales. I had hoped to use the lead wedge the razor came with, but my scale design prevented that. So time to make my first wedge. Stuck with lead and used bullet casting alloy. It was fairly easy to shape once I went to a hammer/anvil (thanks again SRP) and finalized the angles with some sand paper. I liked the idea of copper for collars, but hadn't seen any available. I had picked up a doming block suggested by SRP for another project and figured why not? :shrug: Since I was already using bullet lead I used the noses from FMJ 45 cal bullets to form the collars. After a bit of tinkering I was satisfied with them. Time for final assembly. Got the wedge pinned nice and tight and moved to the pivot with the help of some tape (thanks again SRP). Got the pivot tight enough to hold the blade open under it's own weight. Blade centered nicely with a bit of "directional" peening (once again thanks SRP) Sanded/polished the wedge flush with the scales, then polished the pins (thanks? SRP). Gotta say, not a fan of polishing pins. But, it looks so much better I'll be sucking it up and going back to a couple of previously "completed" projects. I was hoping to test it out last weekend, but I did a close inspect of the edge and wanted to go back to the hones. I decided to do some stuff with the family (trip with the wife to an antique store which led to a post I'll be putting up in Show and Tell) and didn't get time. So, the plan is for this coming weekend. While I'm sure I would have gotten a functional razor on my own, I've no doubt it would have taken me much longer and had a lower quality. There's some less perfect areas and a couple of things I may do differently in the future, but overall I'm pleased with the outcome (hopefully it will scare the stubble off my face). Thank you all again for sharing your knowledge and getting me off to a proper start in restoring razors. :bow On to the pics.
Attachment 304546 Attachment 304547
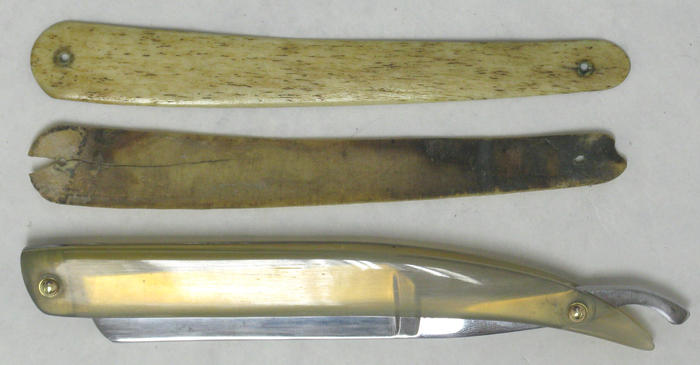
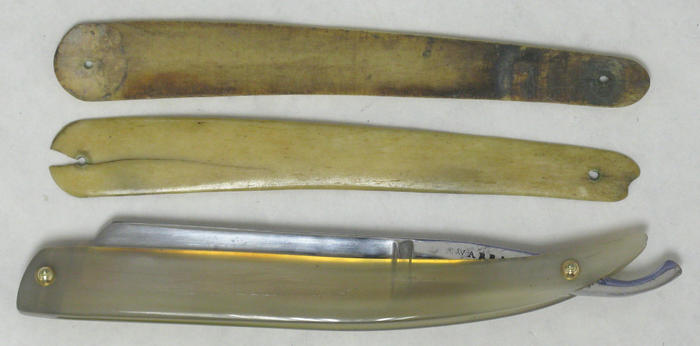
Old scales with finished razor
Attachment 304542 Attachment 304543
Attachment 304544 Attachment 304545