
Results 1 to 9 of 9
 LinkBack URL
 About LinkBacks
-
05-15-2009, 03:24 AM #1Senior Member


- Join Date
- Mar 2008
- Location
- Dale City, VA
- Posts
- 574
Thanked: 182 Wade & Butcher Extra Hollow Ground Razor
Here is my latest restoration learning experience on an ebay special:
This was then:
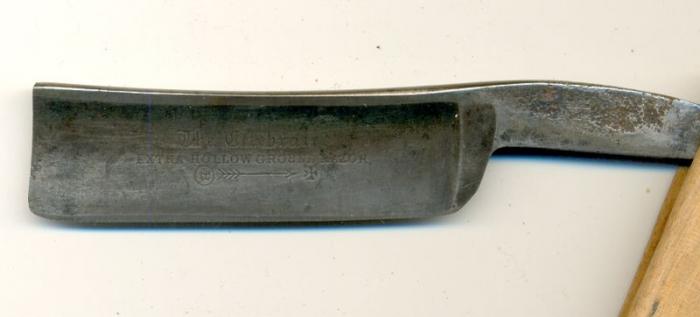
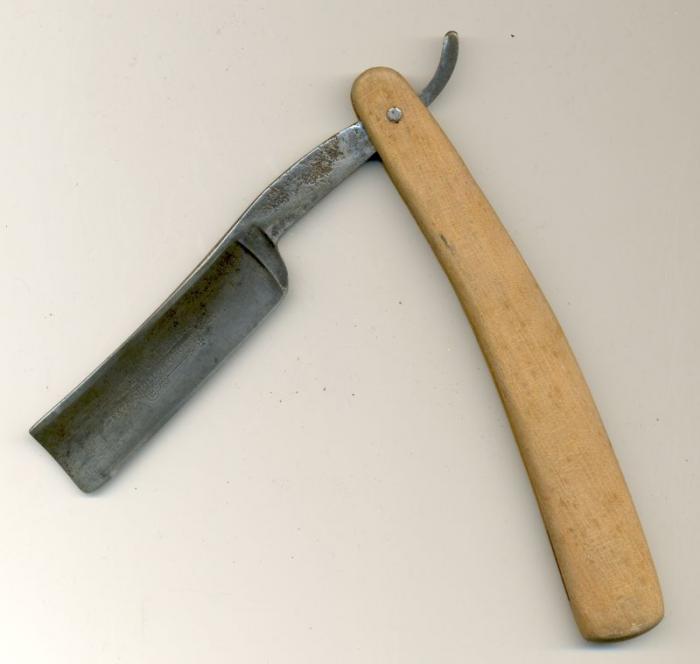

The blade is just shy of 7/8ths. There was nothing left of the tang stamp, so I wanted to see how much I could smooth out that area before hand sanding became no fun anymore") , and I tried to clean up the rest of the blade as well.
, and I tried to clean up the rest of the blade as well.
I didn't want to do any sanding over the etching until I get a LOT better at hand sanding a blade. It's the only proof left that it's a Wade & Butcher. Oh, and I decided to go ahead and replace the one-piece scales.
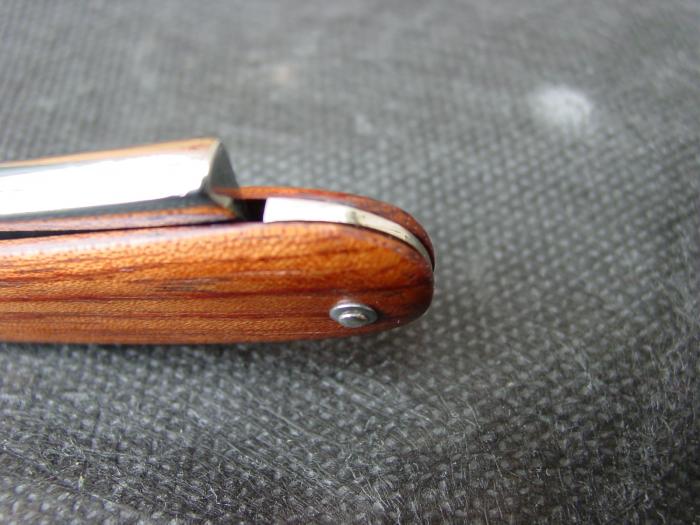
This is now:
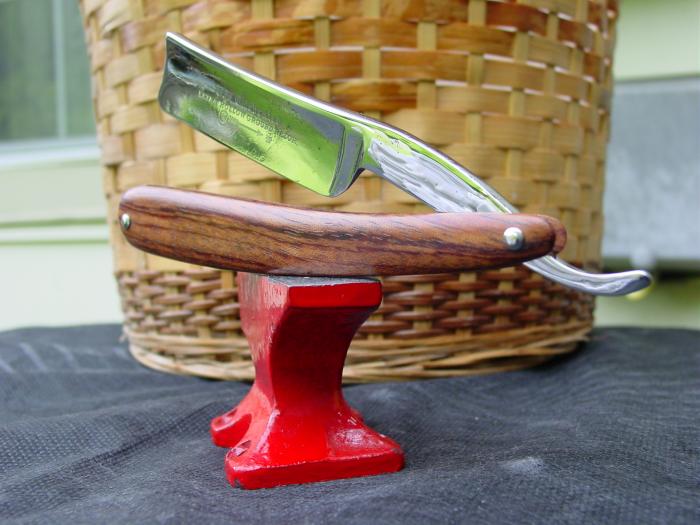
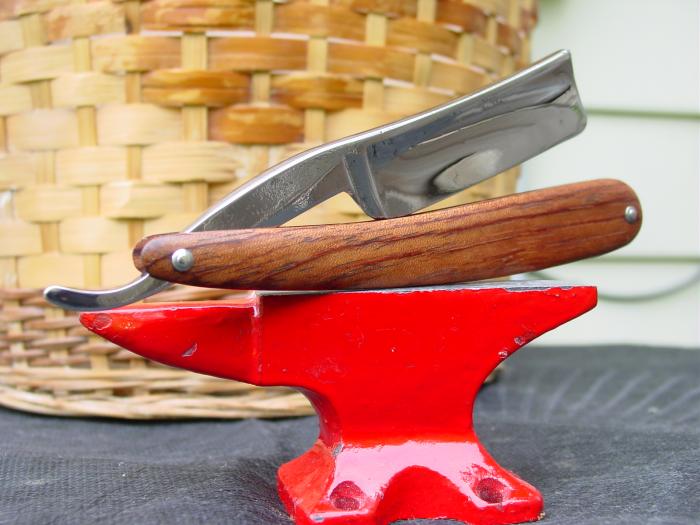

The scales are Bubinga, finished with pure tung oil, and Renaissance wax. The spacer and pins are nickel silver, with domed stainless steel washers.
These aren't the first wood scales I've made, but they are the first I've completed and posted (more are in the works). This is also the first time I used a metal wedge.
During the initial fitting, I discovered that I had made the wedge way too thick, so after lots more filing everything seemed to work out.
There are a few pits left in the blade that I didn't chase to the bottom.
This --> is from me to all of you hand sanders (you know who you are!) who flush out every last pit and blemish. Maybe one day I'll develop the patience to get there.
Now to hone it and shave with it. In the meantime, I had a lot of fun on this one, and learned some lessons I hope will reveal themselves in my future efforts.
As always, questions, comments, critiques and criticisms are always welcome. Thanks!
-
05-15-2009, 03:28 AM #2Professional Pedantic Pontificator
- Join Date
- Apr 2009
- Location
- Monmouth, OR - USA
- Posts
- 1,163
Thanked: 317
Very nicely done, and I wouldn't have done any more around the etching either. I have a non-name I got off ebay that is etched "Extra Hollow Ground" on the blade, and I'm going to go right past that because it doesn't have any historical value, but for a W&B you made the right choice.
-
The Following User Says Thank You to VeeDubb65 For This Useful Post:
mrbhagwan (05-15-2009)
-
05-15-2009, 03:56 AM #3Senior Member
- Join Date
- May 2009
- Location
- 3-day delivery. All ways.
- Posts
- 371
Thanked: 20
I just started my own project today! Its great to have examples like this to keep me going.
Would you share with us your process in brief? Like grit progression then MAAS etc.? I'm just at 220 grit right now and plan to go buy the higher grits this weekend, but I'd like an idea of how to get to your fantastic results!
Thanks in advance!
-
The Following User Says Thank You to Ichinichi For This Useful Post:
mrbhagwan (05-15-2009)
-
05-15-2009, 05:08 PM #4Senior Member
- Join Date
- Mar 2008
- Location
- Dale City, VA
- Posts
- 574
Thanked: 182
Hi Ichinichi,
I consider myself a beginner too - the restorers here set the bar high - most important, they make it seem like fun and seeing their work made me want to give it a try. I may never reach their plateau, but it's still a fun hobby, and when you get something right, it's neat to accomplish something you didn't know you could do.
To answer your question, I would have started with 220 if I had some on hand, but I used 320 (lots and lots of it, sanding until all the grit was gone from the paper) then I went to 600 grit (again, working until the paper is smooth), then I used a tumbler as detailed in this very popular and informative thread. I use pet-store grade corncob and Turtle Wax premium rubbing compound and let the blade run for a few days. I then hand polish with Mother's Mag & Aluminum polish and a soft cloth.
If a tumbler isn't in your budget, please reference Bruno's excellent guide in the Wiki for great advice on hand sanding.
Hope that helps!
-
The Following User Says Thank You to mrbhagwan For This Useful Post:
Ichinichi (05-15-2009)
-
05-15-2009, 11:29 PM #5The Shell Whisperer


- Join Date
- May 2008
- Location
- Sin City
- Posts
- 5,597
Thanked: 3384
Poncho,
you should be extremely proud!
You are doing an extremely fine job, well above the average imo.
Continue doing what you're doing.

əˌfisyəˈnädō | pərˈfekSH(ə)nəst | eS'prəSSo | düvəl ləvər
-
The Following User Says Thank You to Maximilian For This Useful Post:
mrbhagwan (05-16-2009)
-
05-16-2009, 12:33 AM #6Comfortably Numb

- Join Date
- Jan 2009
- Location
- Charlotte, NC
- Posts
- 2,095
Thanked: 668
very cool, great job!
-
The Following User Says Thank You to Del1r1um For This Useful Post:
mrbhagwan (05-16-2009)
-
05-16-2009, 03:32 AM #7The Great & Powerful Oz


- Join Date
- May 2008
- Location
- Bodalla, NSW
- Posts
- 15,596
Thanked: 3748
Major improve on the before pics & very nice scales. Great finish & nice lines
The white gleam of swords, not the black ink of books, clears doubts and uncertainties and bleak outlooks.
-
The Following User Says Thank You to onimaru55 For This Useful Post:
mrbhagwan (05-16-2009)
-
05-18-2009, 09:53 PM #8Senior Member

- Join Date
- Nov 2008
- Location
- Texas
- Posts
- 243
Thanked: 41
Nice work! Love the finish on those scales
-
The Following User Says Thank You to huntmol For This Useful Post:
mrbhagwan (05-20-2009)
-
05-20-2009, 02:45 AM #9Senior Member
- Join Date
- Mar 2008
- Location
- Dale City, VA
- Posts
- 574
Thanked: 182
Just an update as I shaved with this razor today -
I could really hear the stubble being cleaved away with this hollow grind compared to a wedgier, quieter chopper, but the end result was very smooth. Sheffield steel strikes again.
Thanks for all of your very kind words and encouragement, and thanks for just stoppin' by to have a look.
I hope to enjoy my next project as much as this one.


 Reply With Quote