3 Attachment(s)
Koch & Rau Restore, My First
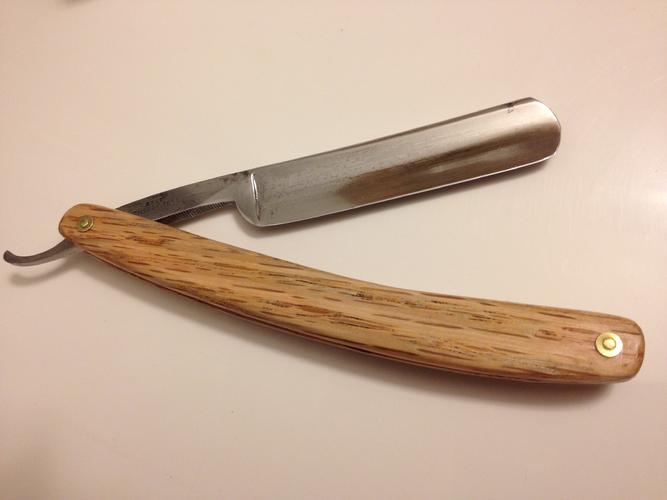
My second attempt at a restore. The first attempt being polishing and pinning a blade with to many pits along the edge to salvage. This blade is a Koch & Rau 5/8s, silver steel from the 20's or 30's, thanks to Neil Miller for the ID. Some pitting on the spine that I left as I didn't want it to effect the honing. It was pretty clean to begin with but it really shone once it came out of the tumbler. I actually wanted to use a different blade that had been cleaned and polished only to discover that the pivot hole in the first would need a sleeve so I used the blade that was handy.
I'm limited to an apartment workshop so most of the work is done at the kitchen table or if it's dusty, in front of a window fan. I started with a piece of 3/8"x 2" red oak slat from Home Depot. No sense in messing up something expensive at this point. Jig sawed a pair of scales and them double sticked (stuck?) them together. Using an orbital palm sander I shaped, formed and thinned the scales to about 3/32". Hand sanded them up to 2000k and them broke them apart. I decided on a CA finish so I coated the inside first and after that coat dried, attached them to my little scale stand by putting a couple of pieces of gaffers tape on the finished side of the scale as I knew that would peel off without pulling the CA off. Then I put foam tape on the screw heads and lined the gaffers up to the foam.
15 coats of CA and a day and a half later, I started the sanding process which proved to be quite an exercise in frustration. Shiny hills and dull valleys for another half day. Gave up on getting a mirror polish until the next one, settled for what I got with this one.
The wedge was salvaged from a broken set of scales and glued and pinned in place. Sanded the scale to size and started with the CA in that area. It made a bit of a mess but now I just wanted to finish it.
Pinning was interesting. I got to a point where I had peened both ends of the brass rod but soon figured out that I had a bit to much rod. Not wanting to file off the pin and start over, I just tapped away until the blade got fairly tight in the scales. I'll probably redo that.
All in all, I'm pleased. I honed it and got a good shave with it this morning which is all that really matters.
It will never be Prom Queen but I'll always remember it as my first.
Attachment 103182
Attachment 103183
This is the stand for doing the CA. Foam tape stuck pretty well. Thanks to Glenn with the help on the drying time. I had a question about curing time for thin and medium coats. Glen suggested a 1/2 hour for thin and 1 hour for medium.
Attachment 103184