Sounds to me like the steel is too soft. Either over tempered, pulled from quench too soon, or overheated during buff.Quote:
Originally Posted by gregg71
Have you measured the bevel angle?
Printable View
Sounds to me like the steel is too soft. Either over tempered, pulled from quench too soon, or overheated during buff.Quote:
Originally Posted by gregg71
Have you measured the bevel angle?
Sure looks good, hate it that it just has no soul. I've done it quite a few times my friend. Last batch of knives I made I warped one, tried to straighten...snapped it. Best I did anyways, it was grainy.
Lovely looking razor. Pity about the issues you are having.
I think they were right. I suspect to the thinly grind edge (0.8 mm) before the HT. Because the situation has improved, that took off the edge but not enough.Quote:
Originally Posted by bluesman7
Yest. It is perfect, 16° with one layer of tape.Quote:
Originally Posted by bluesman7
Just do not practice the heat treatment. It has made by other master.
I am sorry about it.Quote:
Originally Posted by shooter74743
If it were mine, i would do a couple of things. I would take it to a coarse stone (not grinder) and take 2-3mm off the edge by honing at about 45 degrees. Then re-hone and shave.
If it is still a bad HT, you can still learn from it. Make a pattern off it. Then, if it were mine I would put it in a vice straight up and down and break it in the vice to see what the grain is doing. That way not all is lost and you can "see" what is wrong.
I will do this and I will see.Quote:
Originally Posted by shooter74743
In addition I will make a simple razor fort test.
My plan for the HT:
I leave at least 1 mm (3/8") thikness of the edge.
soaking: 805C / 1480F, 8-10 min.
quenching oil: 50-60C / 130F, 30-60 sec
tempering: after cooling to room temperature, 205C / 400F, 2x1h (between cooling to room temperature) or 1x2h
What do you think? This should work, isn't it?
Tim Zowada wrote about this:
"
First, the blade must be properly normalized and spherodize annealed. Then,
If using a gas forge, for O-1:
1. Heat to 1500F - All "shadows" are gone. No soak at temperature. It is too easy to overheat in a forge. This is why I would prefer 1084 or 1095 over O-1 in a forge.
2. Immediatly quench in warm (160F/70C) oil (Park AAA) - rapid agitation of blade.
3. Interrupt quench when blade reaches about 400F/204C (pseudo martemper)
4. Air Cool to room temperature.
5. Temper at 380F two times.
"
My question is the 3. point. How importance to interrupt at this temperature? What is the significance of this?
Interesting. I just read a bit about martempering in Verhoeven's book. It helps prevent quench cracks. I will have to give this a try. Might be a bit tricky to interrupt at the right time thoughQuote:
Originally Posted by gregg71
An other guy's recipe. Sorry but I dont rememeber hes name, I copied from SRP.
"Heat to 1450 F and hold for 15 minutes. This is called soaking, and it allows the carbon to dissolve back into the iron.
Quench in Parks AAA quench oil, preheated to 130 F. This is a slow cooling oil. You could also use vegitable oil or any number of other oils, but this stuff was designed specifically for heat treatment. For about $10 a gallon, I'd rather just use the best.
After a minute, take the steel out and allow it to air cool. When it's cool enough to touch, put it in the oven to temper it. I temper at 425 F for two hours. Allowing the steel to cool down in one hour cycles isn't necessary."
One minute or less? Cool enough to touch: this is the room temperature or higher?
NO. 1mm is smaller than 1/16", 3/8" is equal to 6/16" which is way too thick for final grind. .Quote:
Originally Posted by gregg71
I would leave my rough grind about 1.5 to 2 mm, which is between 1/16 & 1/8". Our measuring system here in the U.S. is not near as good or simple as the Metric system. With this being a worldwide forum & Americans being the oddball out when it comes to measuring, most of us here on this forum can work in mm & cm pretty easily. Heck, I've even gotten better and I am a bit slow.
I believe any of those HT recipe's would work if your rough grind blade edge would be thick enough to hold the heat until the steel hits the quench.
Yes, sorry. 1/16" = 1,59 mm. For me much more simple to use the Metric system. :)
Than I will grind it about 1.5 - 2 mm. I jus read that somebody is leaving the total thickness before the HT: ~6 mm. Thanks!
While we can discuss this till the cows come home, if the blade doesn't shave, I would remove the scales. They are nice. Then clamp the blade in a vise with the shoulders so that the blade section sticks out, and hit it with a hammer to break it.
What will happen will give you a lot of information that you really need in order to understand what went wrong, and what you can do to change it. Most people here who make blades will break them sometimes to learn from. While it is a shame to break a blade that is 'finished', it will also teach you things you cannot learn otherwise.
I am suspecting the whole heat treat process you used. I am curious why you did not normalize the blade. Normalizing helps the grain structure, so if you do not have a good foundation to start with everything else is doomed from the start.
I agree with Bruno, snap that blade and look at the grain structure. I would then take a piece of it and try heat treating it again after normalizing, then retest.
Is there any need to normalise if you're not forging?
Thanks!
For those switching measurement systems there is only one conversion to commit to memory.Quote:
Originally Posted by shooter74743
And it is exact.
1 inch == 2.54 cm or 25.4 mm
== is short for exactly. It was close for a long time but about 1957 the measurement folk
made the relationship exact.
Thus 1/8" is (2.54/8)cm or (25.4/8) mm
Today I type "convert (1/8)inch to mm" into Google.
An anti scale compound can be a thin glaze of pottery mud (slip) mixed with carbon (powdered charcoal).Quote:
Originally Posted by JDM61
Commercial products exist.
The goal is a thin layer that keeps oxygen in the furnace from burning off the carbon in the steel but not so thick
to be a concern at quench time. This has a lot of value on the initial high temp heating including
slowish heating to relieve strain.
As for hardness try small strips of the same steel with little investment in shaping.
Heat, harden, quench and temper each differently so you can compare how they feel
on a hone or under a file.
Preheating and strain relief is worth paying attention to.
The initial heat and quench should max out the hardness of the steel (and brittleness). Tempering is to
calm the brittleness and chipping. Modern hones can sharpen harder steel so a thick spine and sturdy
edged razor can be a lot harder than can be sharpened on an old school Arkansas stone. Your design
and grind will bound the ideal hardness.
Tempering at a lower temp for a longer time gives more control.
Speedy Metals Information for O1 Tool Steel
For tempering wrapping in foil to protect from further oxidation is sometimes
done. Aluminum foil will oxidize "get" some of the oxygen from makes
some sense for tempering depending on the furnace.
One distraction....
Lead+tin and molten salts for tempering have their place with enough ventilation.
Heat Treatment of Steel
The molten lead+tin is used by Thiers-Issard for some blades with special controls and government
dispensations for historic and quality reasons. I suspect it allows them to make a razor with a harder
final R hardness.
Power tools for polishing can be gosh hot and hard on the temper.
Sorry I misunderstood this. I do not use such a compound. It sounds good. How much influence the standard HT process? What brand would you recommend?Quote:
Originally Posted by niftyshaving
What do you mean preheatin? The furnace, end/or quenching oil?Quote:
Originally Posted by niftyshaving
Thank you for your useful advices!
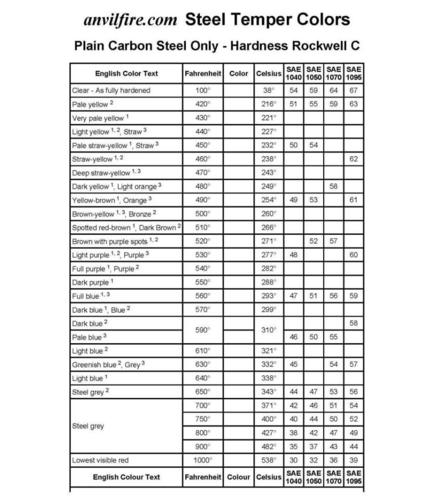
Attachment 219956
Here is a useful chart for you. If it is not clear enough for you, pm me your email and i will send it to you via email.
Thank you so much, it is very useful for me. But just now it was broken the thermocouple in the furnace. :( Yesterday ordered a new one.
An other useful pic from the Wikipedia:
Attachment 219974
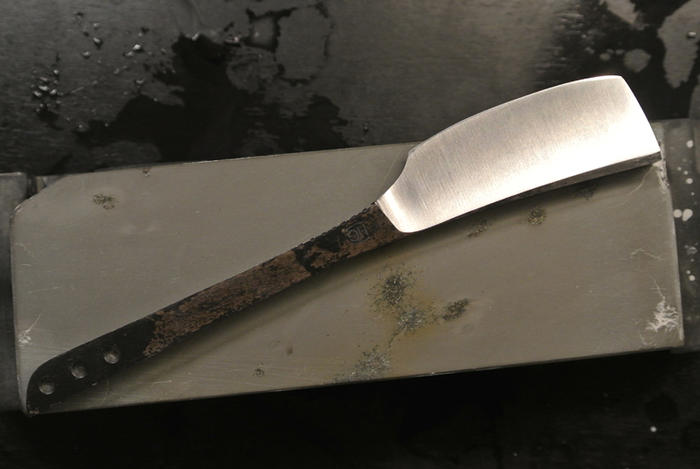
It seems to succeed. I will refine the edge, but everything looks good.
This is worked for me:
I leaved 1.5 mm thikness of the edge.
soaking: 805C / 1480F, 8 min.
quenching oil: 50-60C / 130F, 20 sec
tempering: after cooling to room temperature, 200-205C / ~400F, 2x1h (between cooling to room temperature)
After the shave test:
Attachment 220580
Thank you for all the help!
Blade looks great! Sounds like you got it right this time.
Thank you very much!
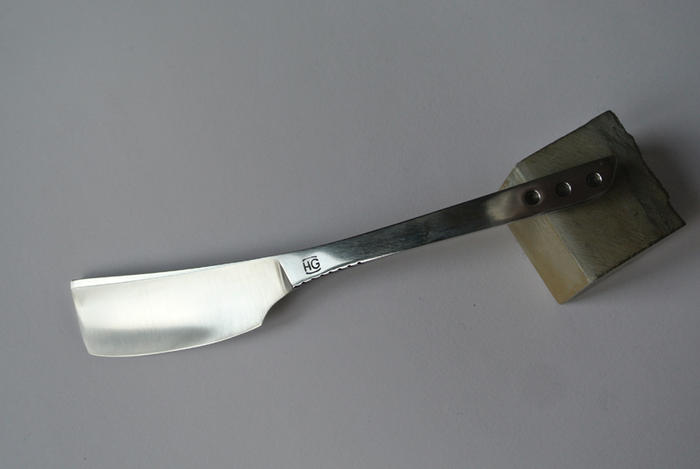
....and couple of hours later (sorry for the bad pic):
Attachment 220651
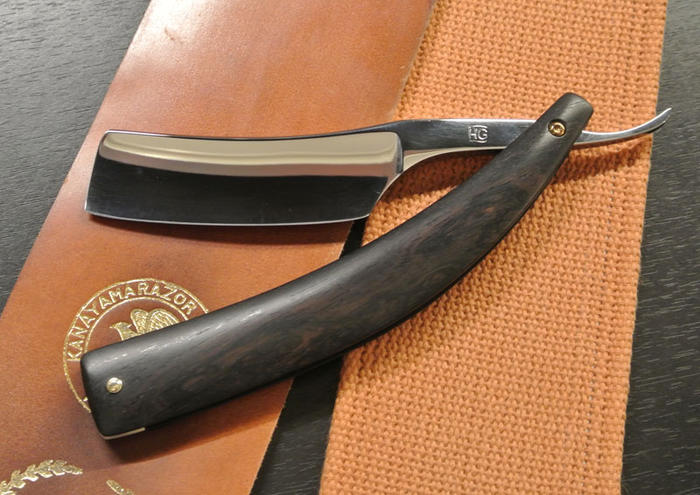
Update!
I created the original razor again.
My process:
I leaved 1.5 mm thikness of the edge.
soaking: 805C / 1480F, 8 min.
quenching oil: 55C 20 sec
tempering: after cooling to room temperature, 210C 2x1h (between cooling to room temperature)
After this I sanded a few tenths of millimeters from the edge.
Conclution after the test: I got the best, smooth, sharp edge ever. I am very happy, and thank you for your help! :)
The owner is also very satisfied with the razor.
Attachment 221383
Awesome looking razor!