
Results 11 to 20 of 20
 31Likes
 LinkBack URL
 About LinkBacks
-
05-04-2022, 12:25 PM #11Senior Member


- Join Date
- Mar 2015
- Location
- Akron, Ohio
- Posts
- 11,939
Thanked: 4300
Nice looking razor.!
Yes..a careful cleaning with 3M should clean that up pretty good.
3M will remove some etching, if rubbed hard and long. Always test a small spot with a q- tip. If the etch is actually a stamp/engraving, there shouldn't be a problem, but it will lighten the black, within the letters. So don't use a rag, use something like paper, or a piece of leather from an old belt. Anything without loose fibers that can get into the etch/engraving.
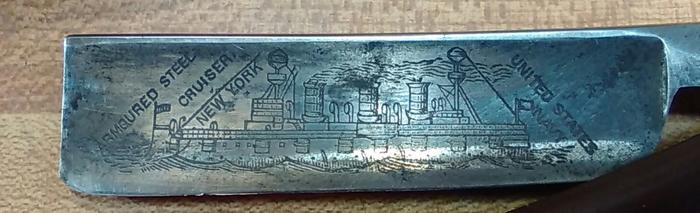
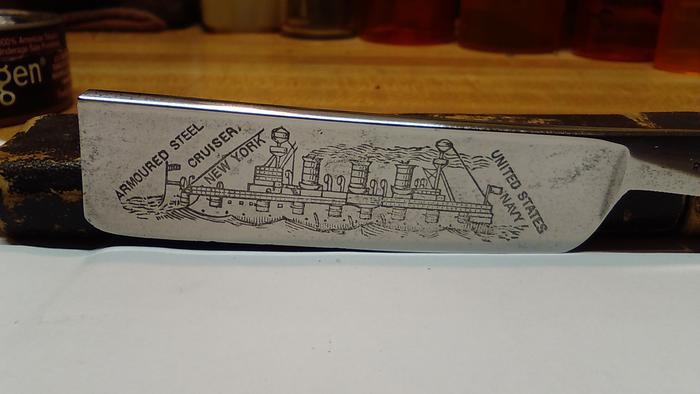
Your razor would go well with the one I just finished. Its engraved into the metal. Light high grit sanding, and 3M brought it back.
 Mike
Mike
-
05-04-2022, 01:53 PM #12Junior Member

- Join Date
- May 2022
- Location
- Fort Mill SC
- Posts
- 17
Thanked: 0
Wow! That razor looks amazing! Thanks for the tips, hopefully I can get a similar result.
outback likes this.
-
05-05-2022, 02:30 AM #13Senior Member

- Join Date
- Dec 2018
- Location
- Gainesville, FL
- Posts
- 5,903
Thanked: 597
That etching looks fairly defined but it (3M Marine) will lighten the dark parts. You can darken it with some gun blue then relieve the high part with some film. That is a rather advanced technique though. There are some threads about it. Geezer made a good one. I'll see if I can find it.
Here ya go. Gnaw on this one for a while. It will really advance your game and improve your results.
https://sharprazorpalace.com/worksho...ml#post1422751Thehorndog88 likes this.Iron by iron is sharpened, And a man sharpens the face of his friend. PR 27:17
-
05-05-2022, 03:44 AM #14Junior Member
- Join Date
- May 2022
- Location
- Fort Mill SC
- Posts
- 17
Thanked: 0
Can’t argue with those results! You have any more links to how to use the lapping film and gun blue? Hate to be a total noobie but don’t want to get ahead of myself.
Last edited by Thehorndog88; 05-05-2022 at 04:05 AM.
-
05-16-2022, 04:24 PM #15Junior Member
- Join Date
- May 2022
- Location
- Fort Mill SC
- Posts
- 17
Thanked: 0
 Originally Posted by PaulFLUS

The bluing really does help the etching pop! Is that all the blue you can get off or do I need to go to .5 micron or something else? Or did you kinda have to settle with some bluing?
-
05-16-2022, 09:05 PM #16Skeptical Member


- Join Date
- Nov 2016
- Location
- Colorado Springs
- Posts
- 10,476
Thanked: 2182
I personally never could get the bluing to work right. Good luck. Hopefully someone chimes in to help.
Thehorndog88 likes this.It's just Sharpening, right?
Jerry...
-
05-16-2022, 10:21 PM #17Junior Member
- Join Date
- May 2022
- Location
- Fort Mill SC
- Posts
- 17
Thanked: 0
Yeah it’s been a challenge but it’s all new to me but it’s been fun learning the ropes. Even if it doesn’t come out perfect I’m still pretty happy with my first project. Originally Posted by Gasman
-
05-17-2022, 01:38 AM #18Senior Member
- Join Date
- Dec 2018
- Location
- Gainesville, FL
- Posts
- 5,903
Thanked: 597
I think it might help you to look at this link:
https://www.wikihow.com/Acid-Etch-St...cid-Etch-Steel
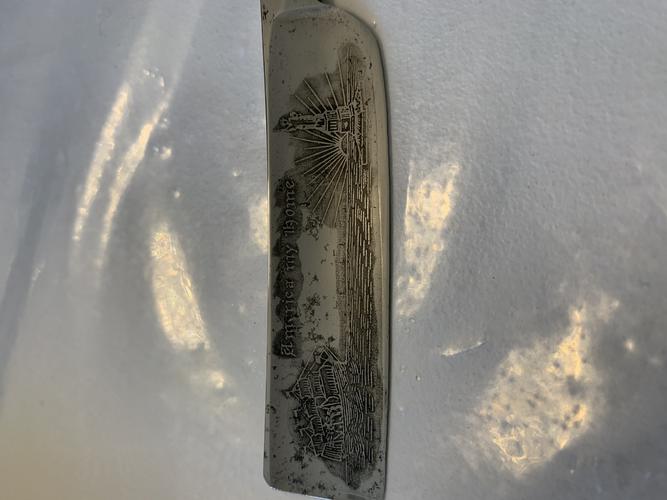
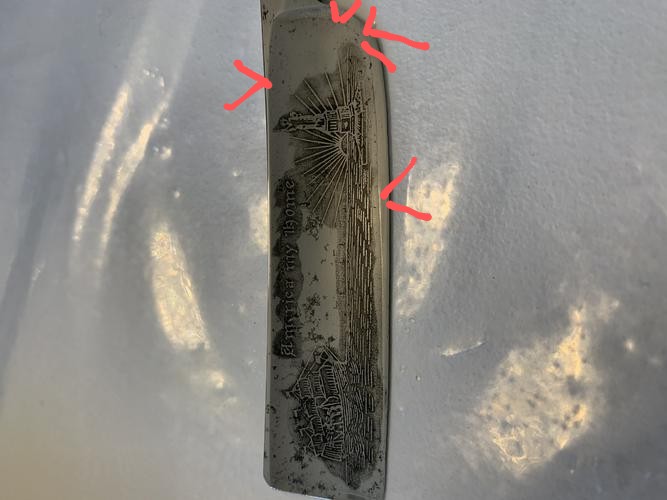
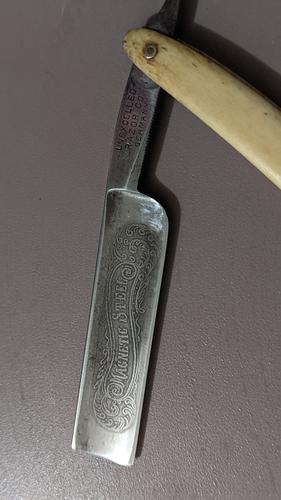
In your case the etching has already been done but it might help you to see how it is done to begin with. What I mainly see is that you have surrounded the resist with the acid, in this case gun blue, but have left the majority of the etch untouched. At least that is what it looks like from what I can see. The etched part is like a frame or window around the resist. The arrows show the edges of the etch.
The link I sent explains it pretty well. You need to fill the whole "window" with the bluing and leave a darkened background behind the raised part. Use something hard like a dowel rod or deep well socket that will go the whole way across the etch preferably as close to the angle of the curve of the hollow as you can. Wrap the lapping film as tightly around the rod as you can get it so it will hit the high part of the resist and the unetched part of the blade outside the etch. You want it to skip over the etched part. Try to keep the bluing inside the window as much as possible as any you get outside will have to be removed recessing the high part a certain amount. You don't want to create more work for yourself than possible.
Here is an example on one I did.
Last edited by PaulFLUS; 05-17-2022 at 01:48 AM.
Steve56 and Thehorndog88 like this.Iron by iron is sharpened, And a man sharpens the face of his friend. PR 27:17
-
05-17-2022, 01:30 PM #19Senior Member
- Join Date
- Dec 2018
- Location
- Gainesville, FL
- Posts
- 5,903
Thanked: 597
You don't really want to get it off, at least not most of it. You want it darker but it doesn't look right unless you get the whole etch. It looks too dark because it doesn't create a framed picture but it will lighten up some with a little more work. You can also use a heavy paper instead of film like packing paper or a paper bag. Originally Posted by Thehorndog88
Last edited by PaulFLUS; 05-17-2022 at 01:37 PM.
Thehorndog88 likes this.Iron by iron is sharpened, And a man sharpens the face of his friend. PR 27:17
-
05-19-2022, 02:48 AM #20Junior Member
- Join Date
- May 2022
- Location
- Fort Mill SC
- Posts
- 17
Thanked: 0
Appreciate the help man, that does help make sense of everything. I’ll have to try again and see how it goes.
PaulFLUS likes this.


 Reply With Quote