
Results 11 to 20 of 26
 25Likes
 LinkBack URL
 About LinkBacks
-
06-09-2014, 01:56 AM #11Senior Member

- Join Date
- Oct 2011
- Location
- Moses Lake Wa.
- Posts
- 162
Thanked: 20
Second, on the Scrubbing Bubbles. If you want it to really shine after the scrub, use some Mothers Polish, old tooth brush and a clean cloth, this will make it shine like new. If you do decide to bend it back, make sure the doors are open. Use great care because they are both tougher and more brittle then it looks. They are great shavers, and it is a crime they no longer make them
-
06-09-2014, 08:04 PM #12Junior Member
- Join Date
- Jun 2014
- Location
- Southern Colorado
- Posts
- 10
Thanked: 0
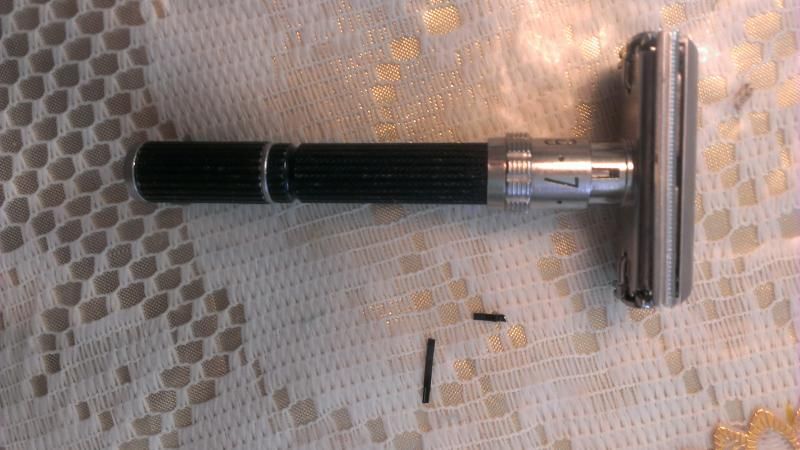
Well guys, sorry I got busy last night. Well I let it soak overnight in hot water and I put some dish soap in there since I don't have any scrubbing bubbles in the house, I let it soak all night and this is what I saw at the bottom of the glass this morning. The metal spring at the adjuster (sorry I don't know the correct term) was sitting at the bottom of the glass. Am I screwed now?
-
06-09-2014, 10:04 PM #13Senior Member


- Join Date
- Feb 2008
- Posts
- 32,564
Thanked: 11042
Not necessarily. First of all, if the ring turns it still should move the base plate up or down which is what adjusts the blade exposure. I've heard of guys repairing these. I have one that I took apart, and put back together, but the spring was broken and I never replaced it. The adjustment works but is not held in place by tension from the spring. So you have to manually adjust it and hold it while you shave. Anyway, here is one on how to disassemble an adjustable. I haven't watched it so I cannot vouch for it. Originally Posted by LilRobert


LilRobert likes this.Be careful how you treat people on your way up, you may meet them again on your way back down.
-
The Following User Says Thank You to JimmyHAD For This Useful Post:
LilRobert (06-10-2014)
-
06-09-2014, 10:47 PM #14Junior Member
- Join Date
- Jun 2014
- Location
- Southern Colorado
- Posts
- 10
Thanked: 0
Thanks for the information JimmyHAD, that's good to know that it will still work with out the spring also thanks on the video as well. Well I did spent a few hours this afternoon trying to rebuild the spring. This is my progress on it so far. I just need to bend it to the shape of the original and clean it up some more. I just hope I get it bent correctly when I bend it to shape. Originally Posted by JimmyHAD
-
06-09-2014, 11:11 PM #15Member
- Join Date
- Oct 2012
- Location
- Sydney Australia
- Posts
- 74
Thanked: 8
Shaved with one of these razors for the first time yesterday, awesome shave, I found it gave a smoother shave than my modern adjustable with less effort. Enjoy!
LilRobert likes this.
-
06-10-2014, 12:31 AM #16Senior Member
- Join Date
- Feb 2008
- Posts
- 32,564
Thanked: 11042
Well good luck with it. Check around, you may be able to find someone who has a replacement spring, or check ebay for a cheap replacement, and scavenge the spring out of it. Originally Posted by LilRobert
Be careful how you treat people on your way up, you may meet them again on your way back down.
-
06-10-2014, 12:50 AM #17'with that said'


- Join Date
- Aug 2010
- Location
- Walla Walla in WA State USA
- Posts
- 11,156
Thanked: 4230
Hey Jimmy Originally Posted by JimmyHAD
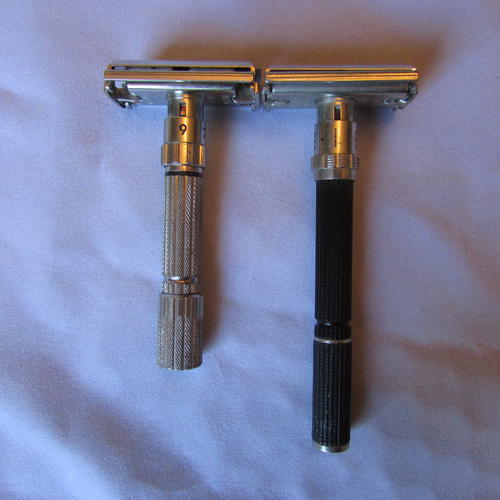
I just watched the video and While I Do believe it is 'Overly Simplistic' but it would make sense. I have the identical razor in the video and the OP's. The OP's has what I believe is a press fit piece at the bottom instead of a threaded piece so that would be something to deal with. Here's the picture that I'd sent him showing how the slots look very similar and that a donor razor might work for replacement parts. It would be really cool if he can restore his grandfather's razor all on his own by making the replacement spring work.
 Our house is as Neil left it- an Aladdins cave of 'stuff'.
Kim X
-
The Following User Says Thank You to cudarunner For This Useful Post:
LilRobert (06-10-2014)
-
06-10-2014, 01:32 AM #18Junior Member
- Join Date
- Jun 2014
- Location
- Southern Colorado
- Posts
- 10
Thanked: 0
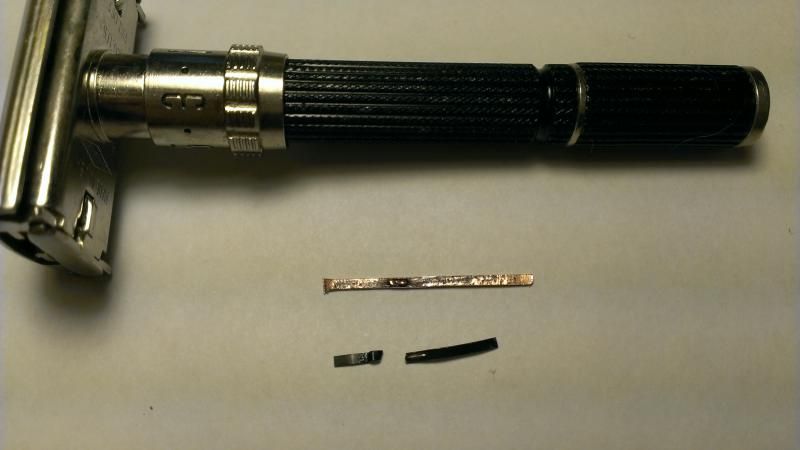
Thank you guys so much for all the feed back it really means a lot to me. Well I am going to give it a shot and see if the spring I made works. Money is a little tight for me right now and if I have the skills to make one I think I will go that route first. I always like a challenge and this is a good challenge for me. This spring is a natural bend, I didn't temper the cooper just because of how thin the cooper has to be. If this one fails me I will make another one where I temper the cooper. So the top one is the old spring and the bottom one is the one I made this afternoon. I know the one I made is a little longer then the original one, I just haven't cut it to size yet. Now it just pulling the razor apart and to see if the spring I made works. Thanks again everyone for your feedback.
 cudarunner likes this.
-
06-10-2014, 01:51 AM #19Senior Member
- Join Date
- Feb 2008
- Posts
- 32,564
Thanked: 11042
Not sure if we're talking about the same thing but ....... when I was new I bought a '34 Aristocrat open comb where the TTO doors didn't function by turning the knob on the end of the handle. You had to push up on the knob and then turn to lock down. I investigated it some, and found that it was a press fit. I used pliers with some thin leather as a 'softener' and pressed the end of the tube just over the knob. Tightened up and the TTO was back in action. Originally Posted by cudarunner
Be careful how you treat people on your way up, you may meet them again on your way back down.
-
06-11-2014, 08:29 PM #20Junior Member
- Join Date
- Jun 2014
- Location
- Southern Colorado
- Posts
- 10
Thanked: 0
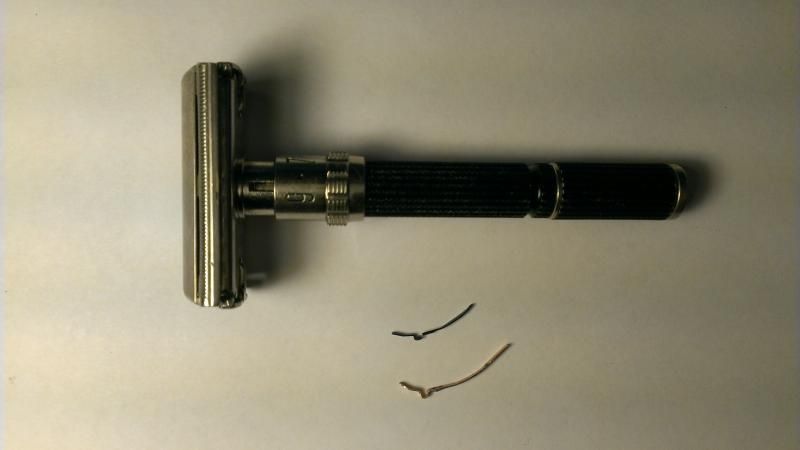
Hey Guys I got a spring made that the works on the razor, it took 6 attempts to get it correct but I got one made. Now I am having problems getting aligned correct now. The spring is works I am just having issues getting everything aligned correctly now. Can anyone give me any pointers on getting it aligned correct?


 Reply With Quote