
Results 1 to 8 of 8
 22Likes

Thread: W&B FBU for a Shorty project
 LinkBack URL
 About LinkBacks
-
08-16-2019, 06:32 PM #1Senior Member


- Join Date
- Feb 2019
- Location
- Salida, CA
- Posts
- 600
Thanked: 94 W&B FBU for a Shorty project
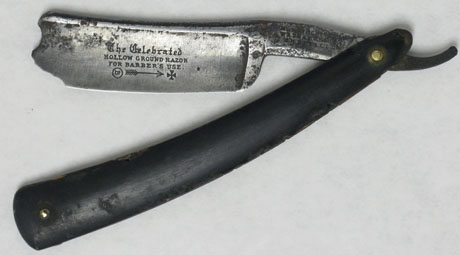
Ever since seeing some of the shorty projects in the Workshop, I've been keeping my eye out for the right blade at the right price. Found a bid/make offer on the bay for a 7/8 W&B FBU with a messed up toe. The minimum bid seemed a bit high so I made what I thought was a reasonable offer and it was accepted. Got it in the mail a couple of days ago and this is what came out of the package.

My first thought was...Why did he put in such a large box? Then I slid it out an did a double take
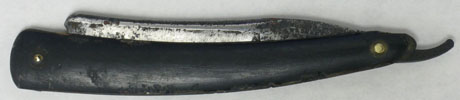
It's not a 7/8...
It's an 8/8
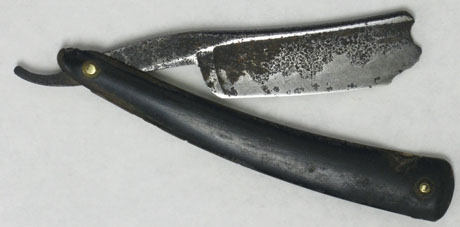
There's some pretty deep pits on the back side, but most are up by the spine. There's one near the bevel that gives me a little concern, but at worst I'll have to shorten it more than I want or loose some width. The scales have a bunch of bug damage, but nothing that can't be repaired. Hopefully I can save the original bullseye collars. I think this is going to look huge after it's shortened. Looking forward to the challenge.
Thanks for looking.O'Toole's commentary on Murphy's Law: Murphy was an optimist.
-
08-16-2019, 07:44 PM #2www.edge-dynamics.com


- Join Date
- Feb 2013
- Location
- London
- Posts
- 3,066
Thanked: 512
I would like to see that transformed from junk into a nice blade. Keep us posted please.
Once I bought a lot from an auction house, one blade just had a photo of the tang. When I recieved the razors I couldn't belive it, that razor was just a tang the rest was missing.
Unbelievable
-
08-16-2019, 08:29 PM #3Senior Member
- Join Date
- Feb 2019
- Location
- Salida, CA
- Posts
- 600
Thanked: 94
Will do, I'll post progress in the what are you working on thread. Got one ahead of it and I'm still mulling over ideas.
Uh, I guess it was an accurate photo?

 O'Toole's commentary on Murphy's Law: Murphy was an optimist.
-
08-16-2019, 11:59 PM #4Skeptical Member


- Join Date
- Nov 2016
- Location
- Colorado Springs
- Posts
- 10,475
Thanked: 2182
Thats too bad it is broken like it is. I hope you can pull it out. That pitting on the back is bad. Good luck. I will be watching.
It's just Sharpening, right?
Jerry...
-
08-19-2019, 03:05 PM #5Senior Member

- Join Date
- Apr 2012
- Location
- Diamond Bar, CA
- Posts
- 6,553
Thanked: 3215
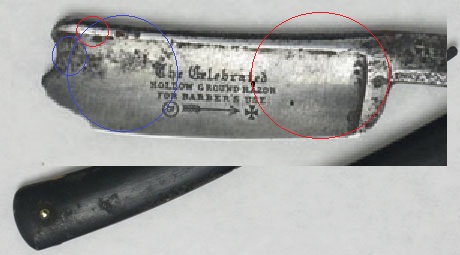
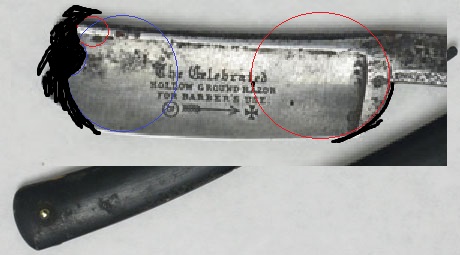
Looks like a fun project. If you play around in paint you can see what some subtle changes would make. I just overlaid a bunch of circles to approximate the existing curves and move the tip and notch, and re-shape the heel.
You really will not lose that much length, probably a little more than a ¼ inch.
I would do a hot vinegar soak, to remove the active rust and dirt, then an Evaporust soak, probably just a couple hours to darken the blade and etch the pits, then a Simple Green soak 15-20 minutes to stop the acid etch.
Hand sand with 600 and buff with green compound or sand to 2000. This will keep the pitting dark, honing should remove any pitting on the edge.
Add a set of rusticated horn or micarta scales and re-pin with the old collars.
You end up with a cool Rat Rod Shorty.
-
The Following User Says Thank You to Euclid440 For This Useful Post:
JellyJar (08-20-2019)
-
08-20-2019, 01:54 AM #6Skeptical Member
- Join Date
- Nov 2016
- Location
- Colorado Springs
- Posts
- 10,475
Thanked: 2182
Nice way to go about playing and making ideas. Too fancy for me but very cool.
It's just Sharpening, right?
Jerry...
-
08-20-2019, 02:33 AM #7Senior Member
- Join Date
- Feb 2019
- Location
- Salida, CA
- Posts
- 600
Thanked: 94
I like the tip idea. I was initially thinking a straight cut and then put the notch back in, but your idea will save a lot more of the blade. I've heard of the hot vinegar soak but haven't tried it, same with Evoporust. This is never going to be a beauty queen so, I may give it a shot. Originally Posted by Euclid440

There's one pit near the bevel on the back side just in front of the etch that I'm a little concerned about, so I'll put it on the bevel setter first. I haven't looked at the scales really closely, but I think I can shorten and re-use the originals. Get some practice coloring epoxy and filling bug bites. Hopefully, I can save the original collars, if not I can fake a patina on some new ones. Never looks like truly aged originals, but tones down the "new"O'Toole's commentary on Murphy's Law: Murphy was an optimist.
-
08-20-2019, 09:01 AM #8www.edge-dynamics.com
- Join Date
- Feb 2013
- Location
- London
- Posts
- 3,066
Thanked: 512
Be careful with old tarnished razors and hot vinegar, chemicals can cause stress on the metal and lead to cracking.


 Reply With Quote