
Results 18,391 to 18,400 of 20496
 91260Likes
Thread: What are you working on?
 LinkBack URL
 About LinkBacks
-
04-22-2020, 09:19 PM #18391Senior Member


- Join Date
- Mar 2015
- Location
- Akron, Ohio
- Posts
- 11,937
Thanked: 4300
He didn't say he new how to spell, but he nose how ta reed.

Just ribbing ya, Jerry. I got fat finger syndrome, too.
Came out great.! Most would never know what had been done to it,Mike
-
The Following User Says Thank You to outback For This Useful Post:
Gasman (04-23-2020)
-
04-22-2020, 09:39 PM #18392Senior Member

- Join Date
- Oct 2010
- Location
- 50 miles west of randydance
- Posts
- 9,573
Thanked: 1352
Spell check makes fat finger typing look good sometimes!
-
04-22-2020, 10:53 PM #18393Senior Member

- Join Date
- Dec 2018
- Location
- Gainesville, FL
- Posts
- 5,896
Thanked: 597
Then there's the dreaded auto correct which I call, "that deaf chick in my phone."
Iron by iron is sharpened, And a man sharpens the face of his friend. PR 27:17
-
04-23-2020, 03:17 AM #18394Skeptical Member


- Join Date
- Nov 2016
- Location
- Colorado Springs
- Posts
- 10,475
Thanked: 2182
I can take it. No mater how many give me guff on my spelling.
All of you that have been around me for years know i cant spell or write. Most the time i need help. I know that Mike has about given up on me trying to correct my spelling. The way i see it is I dont care and everyone knows what i ment so...
Thanks for the comments on the razor. I got the bevel set then my stepson came over and needed help with his truck. I might get it finished tonight so i can shave with it tomorrow. It took bevel set without too much issue. A decent grind. Ive delt with a lot worse!It's just Sharpening, right?
Jerry...
-
04-25-2020, 12:31 AM #18395Senior Member
- Join Date
- Dec 2018
- Location
- Gainesville, FL
- Posts
- 5,896
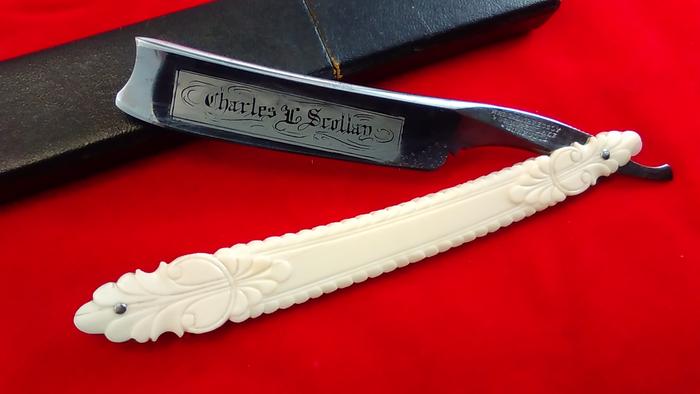
Thanked: 597 Tonsorial Gem: Ivory/bone?????
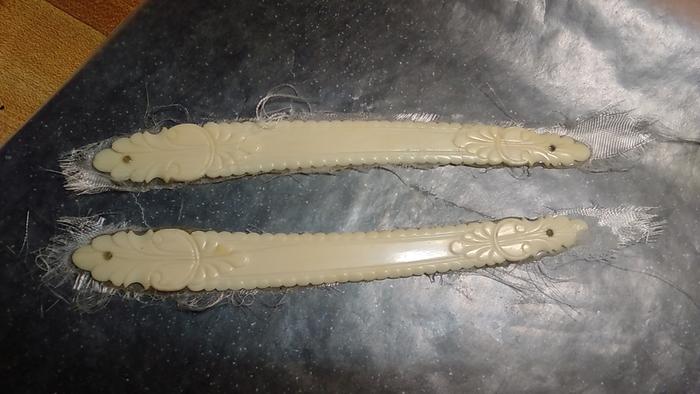
I thought sure I had posted about this one and there was discussion about whether the scales were bone or ivory and there was a consensus that they were bone. If I remember correctly I was pretty convinced they were ivory but was then persuaded that they were not. I searched like crazy but could not find that discussion. Maybe I'm confusing them for another one.....
ANYWAY...after the W&B medium sized hollow ground discussion and the scales that appear to be ivory on one side and bone on the other I started thinking about this one again and pulled it out of the box.
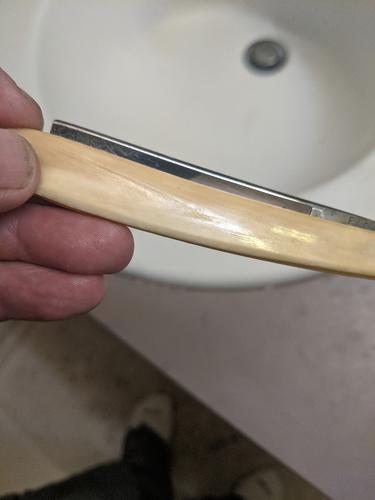
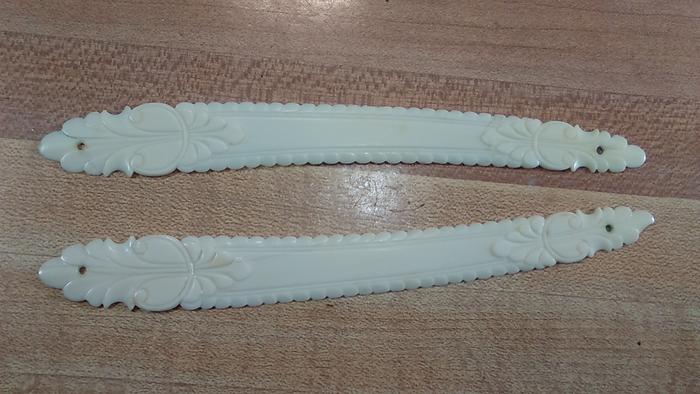
After cleaning them up with some Simple Green there is definitely grain in them and they are definitely not man-made. After thinking that scales were perhaps ivory before and being wrong I don't trust my own judgement now. Also I read somewhere earlier that a hot needle will not leave a dark spot on ivory but will on bone (a test I did on these before) but just today read something to the contrary. Am I right that these are in fact ivory? And if so what is the best way to repair a break at the wedge pin?
CA?
Thanks in advance for any input.Iron by iron is sharpened, And a man sharpens the face of his friend. PR 27:17
-
04-25-2020, 01:38 AM #18396Senior Member

- Join Date
- Feb 2013
- Location
- Haida Gwaii, British Columbia, Canada
- Posts
- 14,389
Thanked: 4821
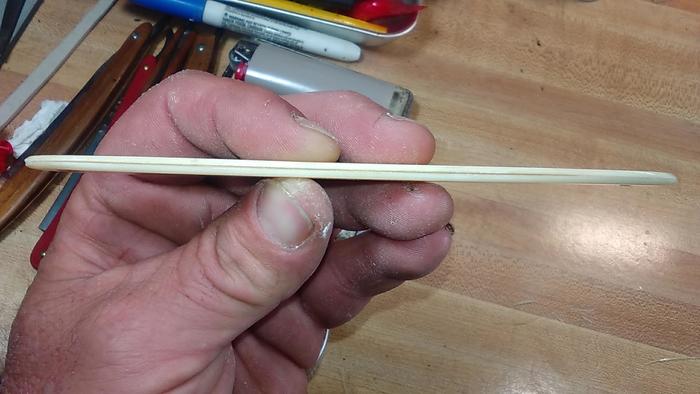
The very best way is to epoxy them and then use the crazy light weight fabric that outback has use in the past as a liner. Thinnest liners around and almost invisible. Next best would be a crazy thin bone liner. Then G-10, also very very thin. 1/32 of an inch sounds like really thin liners, but they are not when you see them done. I have done a couple and to be honest I much prefer outback method. Silver or brass liners will work well too. It depends in part on how visible you would like the liners.
It's not what you know, it's who you take fishing!
-
04-25-2020, 01:58 AM #18397'with that said'

- Join Date
- Aug 2010
- Location
- Walla Walla in WA State USA
- Posts
- 11,156
Thanked: 4230
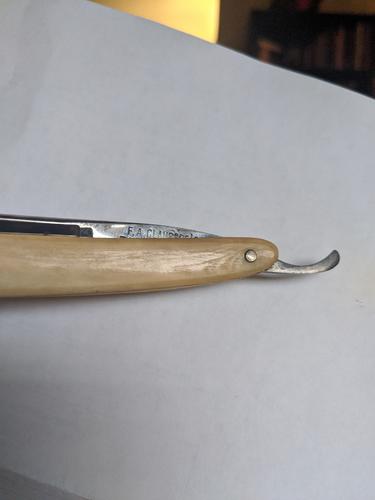
I've only handled a couple of razor with Ivory scales and they were pinned washerless. It's my understanding that it was traditional to NOT use any external washers when pinning Ivory.
While small, your pic shows washers.
If you would prefer brass to reinforce the scales I picked up a sheet at Hobby Lobby and it's right about 1/64th" thick. 1/64th" is .015625 and I mic my piece at .01615 and it cuts very easily with scissors.
Just a thought.Our house is as Neil left it- an Aladdins cave of 'stuff'.
Kim X
-
04-25-2020, 02:32 AM #18398Senior Member
- Join Date
- Dec 2018
- Location
- Gainesville, FL
- Posts
- 5,896
Thanked: 597
Thanks Roy. I could do a liner, that's true. It would be nice if I could fix them without though. Not sure how well gluing works on bone or ivory. I think the collars were one of the reasons why folks persuaded me that they were not ivory in the first place. Now that I can see the grain though it makes me rethink it. Who knows, those pins or even scales may not be original. Maybe.someone did a rescale and didn't get the memo about the collars.
outback likes this.Iron by iron is sharpened, And a man sharpens the face of his friend. PR 27:17
-
04-25-2020, 03:06 AM #18399Senior Member
- Join Date
- Mar 2015
- Location
- Akron, Ohio
- Posts
- 11,937
Thanked: 4300
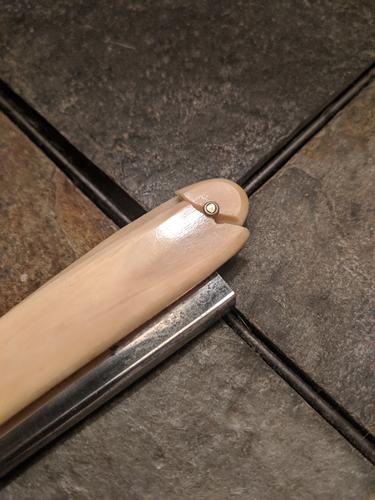
The way they broke. ( clean ). I'd say ivory.
I fixed a set for JP5, by taping wax paper to a clean flat surface, to keep them from sticking to my work surface, then CAing the pieces together.
Then cut two pieces of 3/4 oz. woven fiberglass for each scale, applied T-88, structural epoxy to the inside of the scales, lay the two strips of glass on and place glass side down, against the wax paper, and applied a weight, ( pinning anvil/ RR track ) to push out any air and excess resin.
Keep an eye on things, shifting will occur till all air and excess resin have been removed. Once cured, ( 48hrs. Minimum ) you can lift them from the wax paper, and trim the excess glass n resin from the edges of the scales.
As long as there's no wrinkles in the wax paper, and your work surface is clean n flat, there's no sanding needed to be done in the inside of the scales.
Your ready to pin them up.!!

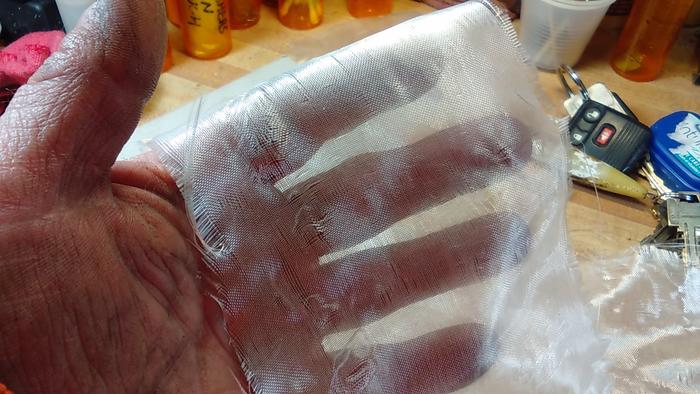
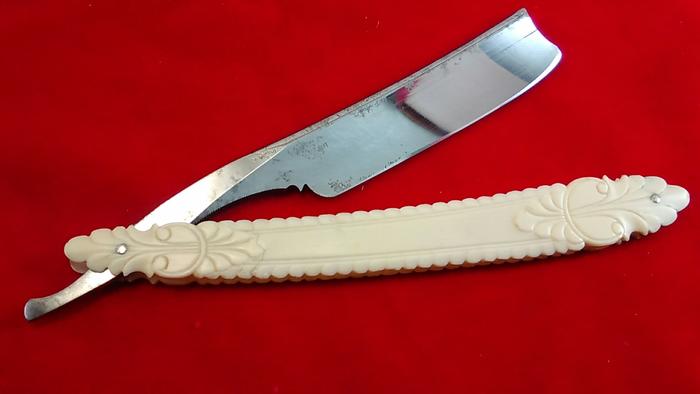
The little chip at the tip of the show side scale, was repaired with baking soda and CA. Thanks to Roy, for that tip.Last edited by outback; 04-25-2020 at 03:14 AM.
Mike
-
The Following User Says Thank You to outback For This Useful Post:
PaulFLUS (04-25-2020)
-
04-25-2020, 03:10 AM #18400Senior Member
- Join Date
- Feb 2013
- Location
- Haida Gwaii, British Columbia, Canada
- Posts
- 14,389
Thanked: 4821
That is the number one repair.
-
The Following User Says Thank You to RezDog For This Useful Post:
outback (04-25-2020)


 Reply With Quote