
Results 1 to 7 of 7
 34Likes
Thread: Getting organized
 LinkBack URL
 About LinkBacks
-
01-16-2020, 12:21 AM #1Senior Member


- Join Date
- Aug 2015
- Location
- Montreal
- Posts
- 853
Thanked: 128 Getting organized
So our renos are basically done now. We added an onsuite and kinda made a walk in closet. The walk in was finished with IKEA PAX closet sytem that we built in. Just on pure luck we have about 1/2" on either side and about 2 1/2" on top. Actually had to build them standing up in position. My wife has one side and I have the other, we each got to design the shelves/drawers etc as we wanted. My side included 2 sliding trays with the intention of moving my straights to them. My wife has just 1 sliding tray for jewelty or something. So my plan was to build an insert for the trays to hold the straights and I finally got around to doing something about it. Basically its a wooden frame with slots for the straights, kinds modeled on the box I made a few years ago. see link https://sharprazorpalace.com/worksho...r-storage.html
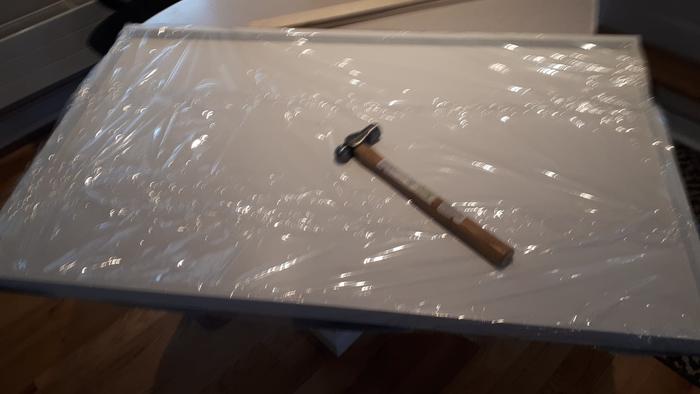
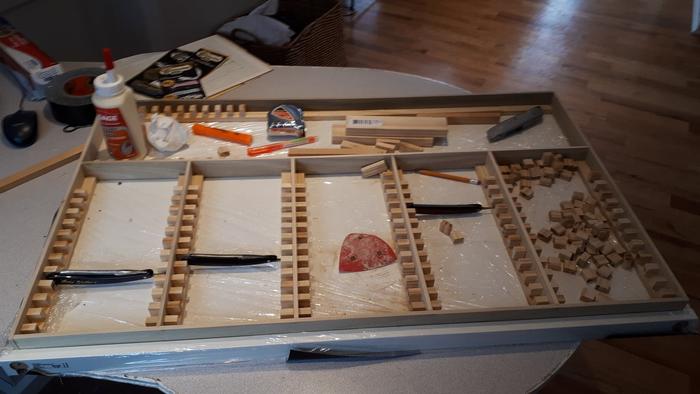
I`m starting with the larger of the two trays. First step was covering it with saran wrap so nothing would get glued to the tray. I planned to build in the tray to make sure it fitted and because it gave some stability while just starting out
Here is the insert basic shape is done, I have 5 rows in front going vertically and 1 row will go horizonally at the back to make it easier to get at the straights as the tray doesnt come compeltey out when pulled forward. The straights will go perpedicular to the rows.
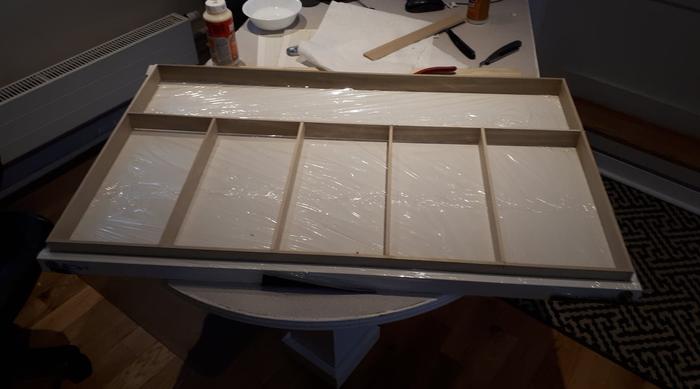
Basically I need to make the spacers for the individual slots, Going to use some rectangular finishing stock a little under 1/2" by 3/4" cut up to add to either side of the row seperators (see above thread about the storage box, same thing but not done in 1 piece.
Now the big question is do I stain it, similar to the box or paint it? I like stain but my wifes side has IKEA trays that are grey in color so trying to match might be nice. I also thought of doing the exterior of the insert grey with the internals stained, what you guys think?
Last edited by AlanQ; 01-16-2020 at 12:26 AM.
-
01-16-2020, 02:22 AM #2Senior Member


- Join Date
- Feb 2013
- Location
- Haida Gwaii, British Columbia, Canada
- Posts
- 14,389
Thanked: 4821
I like cloth liners, so I would go cloth inside and paint the outside trim to match the rest of the closet. Big projects always remind me of how to eat an elephant, one bite at a time. As long as the outside matches and everything looks great, the inside truly only needs to meet you ideas.
It's not what you know, it's who you take fishing!
-
01-16-2020, 02:25 AM #3Senior Member
- Join Date
- Aug 2015
- Location
- Montreal
- Posts
- 853
Thanked: 128
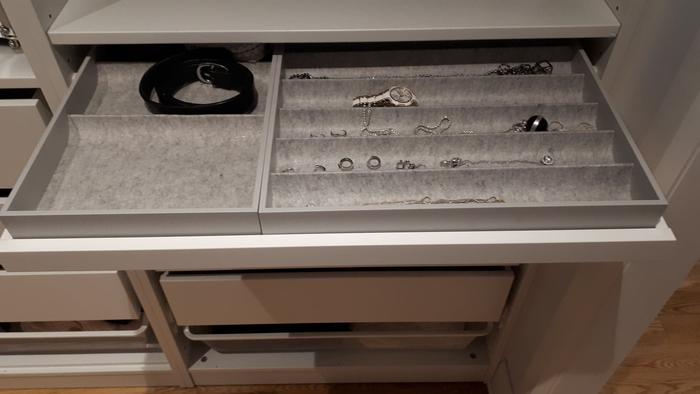
The bottom will be a grey felt liner, same color as seen in pic of my wife's tray
-
01-16-2020, 02:55 AM #4Senior Member

- Join Date
- Oct 2010
- Location
- 50 miles west of randydance
- Posts
- 9,573
Thanked: 1352
Matching to me is a real if not impossible pain in the rear to accomplish.
Contrast it with a completely different color in my opinion.
-
01-16-2020, 01:40 PM #5Skeptical Member


- Join Date
- Nov 2016
- Location
- Colorado Springs
- Posts
- 10,476
Thanked: 2182
Nice work and start on it. It can be a lot of fun building.
JOB15 likes this.It's just Sharpening, right?
Jerry...
-
02-02-2020, 02:28 PM #6Senior Member
- Join Date
- Aug 2015
- Location
- Montreal
- Posts
- 853
Thanked: 128
Update o my progress.
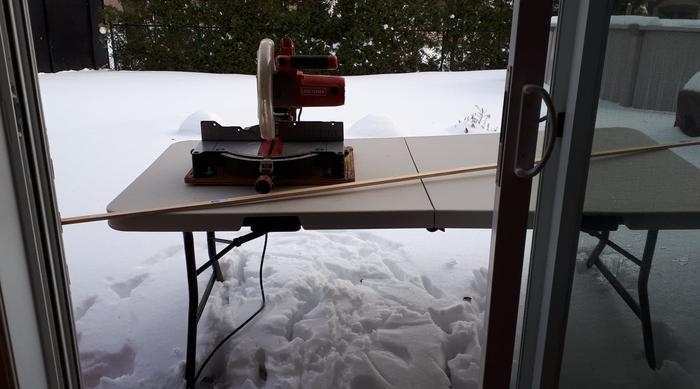
Going much slower than I hoped as manpower shortage at work has resulted in me having very little time off
That and SWMBO figured out I was cutting wood in the family room (Guess I didn't dust well enough afterwards) So now I have to do it outside.
-
02-02-2020, 02:48 PM #7Senior Member
- Join Date
- Aug 2015
- Location
- Montreal
- Posts
- 853
Thanked: 128
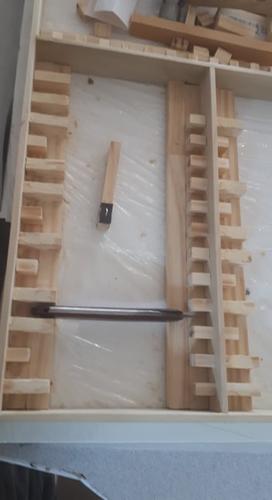
Ok so here's what happened I messed up (what a surprise!)
I worried to much about making my organizer fit my larger straights I forgot about the smaller ones. I had to extend the separators by doubling the width. No biggie but would have been easier if I had figured it out sooner. Will use plastic wood to smooth over the joints and try to make them look like one piece. Fortunately I didn't do them all so some will have the proper size from the start.
In this pic You can see on the right the straight is barely on.
Here is the solution. with the same shorter razor and only the separators extended on the left so far. The stick at the top is wrapped with sandpaper to do the sanding after the plastic wood. Needless to say the question of staining vs painting has now be resolved and paint it shall be. Unfortunately more overtime coming up so I wont get much done till I get more time off (a week Tuesday)


 Reply With Quote