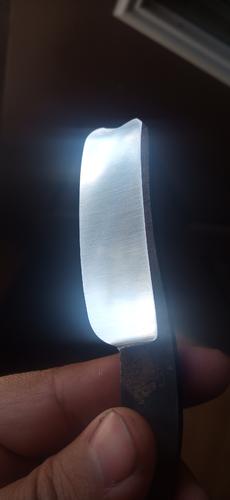
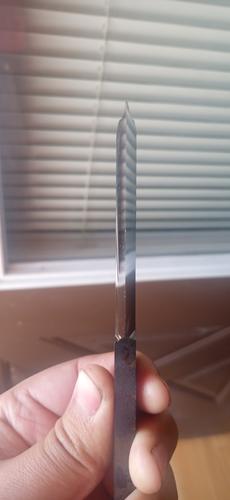
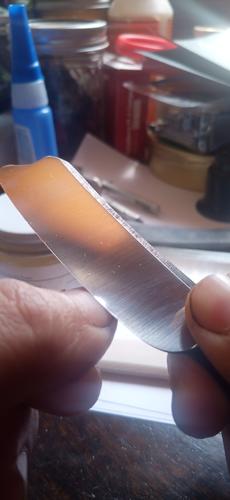
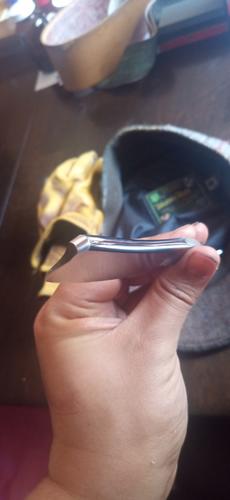
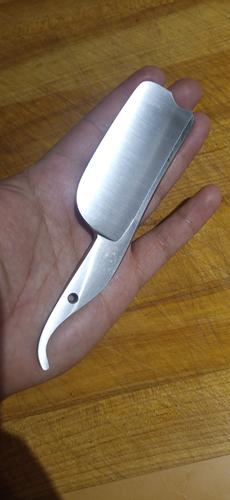
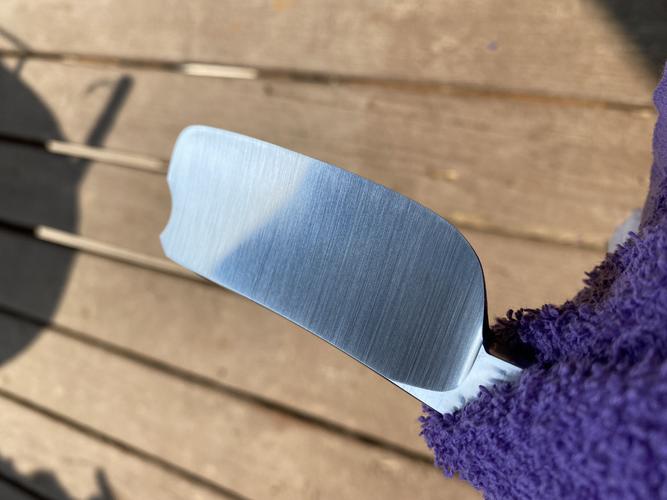
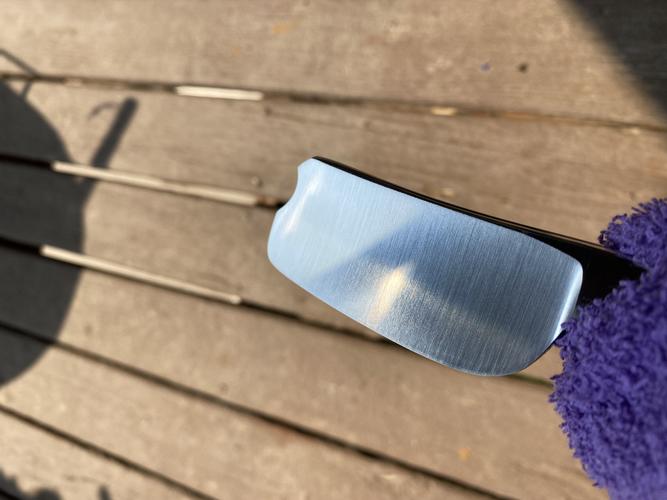
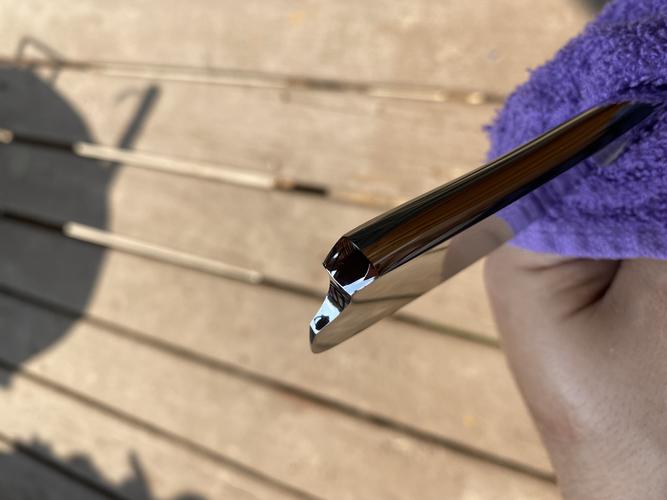
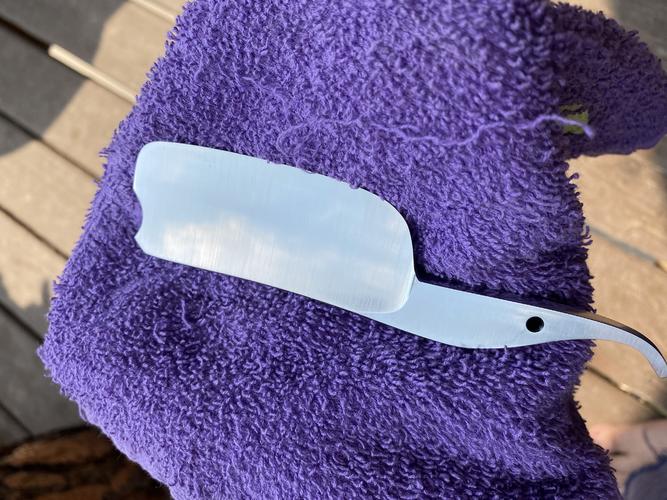
Working up this blade, a smiling full hollow, finished up the preliminary grinding before HT. Just need to drill the pivot, you really don't want to forget to do that before hardening!
Attachment 332927
Attachment 332928
Attachment 332929
Printable View
Working up this blade, a smiling full hollow, finished up the preliminary grinding before HT. Just need to drill the pivot, you really don't want to forget to do that before hardening!
Attachment 332927
Attachment 332928
Attachment 332929
I’m in the middle of finishing a bellied full hollow. That damn line was really difficult for me to get straight and even. Are you keeping it or grinding it out after heat treat?
Are you using a jig? I use a homemade version of a knife grinding jig, I make my primary hollow then paint the blade with layout dye. I then scribe a line where the belly should land according to a hollow grind calculator I use online. I use the corner of the wheel and watch as I creep up to the scribe line. When it's pretty much there I then do some passes to smooth everything out to get a nice crisp line. I blend my bellies into the edge grind to get a bit of extra thinness but I think once I get the knack I'll start leaving them in. Looks more impressive to have that nice clean line I think. Might get in the way of sharpening decades down the road if left in however.Quote:
Originally Posted by jfk742
There were some old American razors that had the Korn Patent grind which had the belly left distinct. Also the Clauss New Departure razor.
No jig, all free hand. I haven’t fooled too much with jigs for grinding. One side came out awesome, the other not so much. It’ll do what I made it for so there’s that. Can’t wait to see that finished up.
Yeah my weak side grinds were never as good so what I ended up doing is just flipping the blade on my strong side so that it is edge down. Works especially well on a full hollow because you're already inside your primary grind so don't need to observe the edge thickness. I started out freehand but the jig is just more consistent imo.Quote:
Originally Posted by jfk742
I look forward to the progress pictures. It’s looking good.
Took the hollow all the way back to make a completely shoulderless grind. Been working on a batch of 5 7/8 razors, 4 wedges and this one hollow grind. Decided to freehand it and it came out good. Used some cork belts up to 800 grit to blend the belly into the edge grind but still left it quite distinct visually. The wedges were ground up to an A5 Trizact belt. As an aside if you're into grinding and have never tried the Trizact belts you really must, impeccable finishes, it's all I use apart from a 40 grit Blaze to do all my rough work and my cork belts.
After 40 Grit Ceramic.
Attachment 333254
Finished at 800 grit cork.
Attachment 333255
Attachment 333258
Attachment 333256
Other razors I'm working on.
Attachment 333257
All these are going into horn scales with faux ivory wedges.
Faux Ivory?
Bone can be made with and found at a pet store. I think it would match the horn better.
I use a museum grade artificial ivory from Masecraft called col.849 but I have some of the Dave Warther Resin Ivory on the way so I'll compare the two. Both are extremely visually accurate, the Warther stuff has a black-light additive to check it is in fact artificial otherwise it's accurate enough to fool experts on inspection. Good enough for a small wedge. I'd like to use bone for scales at some point but just haven't got round to it.Quote:
Originally Posted by Gasman
Very nice mate
This is 8/8 with a 36 primary then a 2 hollow
Attachment 333270
Attachment 333271
I would live to see some of that masecraft faux ivory if you have a picture of a razor in a set of scales.
I’ll have to try some cork belts. How do they compare to scotch bright? The razors are looking good!
Those are looking really nice
Huge fan of the Korn Double Concave grind !!!!
I have a thread about the Masecraft Ivory in the workshop section. Shouldn't be too far down the list. There's a photo in there but it's pretty hard to capture the nuances, especially after polishing the scales. I'm looking forward to the Warther ivory getting here, they have two types, +R and +S, one is a flat-sawn effect and the other has the Schreger line patterning you'd get in quarter-sawn.Quote:
Originally Posted by jfk742
I much prefer the cork belts over the Scotchbrite/non-woven belts since they don't seem to round surfaces as much as they're much stiffer surfaced. I really can't stand it when all the lines on a razor kind of melt together. The cork belts really complement the Trizact belts, there really isn't any need for anything else apart from some coarse ceramics for roughing out. Once I get into the 400-800 grit range I will alternate between Trizact and cork, the cork softens any errant scratches from the Trizact, I rarely find myself having to go back down to a lower grit. Using layout blue or a Sharpie helps too, I color all over the blade faces so when I'm grinding, any deep scratches from a previous grit will be very obvious.
It's very important to work up the grits. I'll rough everything in with 40 Grit ceramic, then go to Trizacts A300, A160, A65, A45, Cork 400, Cork 600, A30, Cork 800, A20, A16, A5. Sounds like a lot but it's actually pretty fast since you're working sytematically and in batch form. I ground all the faces on those razors from post heat treat to finished in about 3 hours whilst taking liberal coffee breaks.
It's hard to capture just how fine and even the Trizact finishes are. Also to note, this is a wedge grind (10 inch contact wheel) and the edge flexes under the thumb like a hollow. You want to grind your faces just to an apex and no further. I do this when I move to the A300 Trizact and from then on you're just removing the previous scratches. Grinding to an apex will ensure a tiny bevel when you finally hone the razor. My grinder has a VFD with reverse and when I'm creating the faces I have the belt rotating away from me, much easier to grind that way (only when freehanding)
Attachment 333281 Attachment 333282
Attachment 333283
I have used this in the 1/8 sheet looks great but is flexible and gets worse when thinned out more when shaping, have a piece of the block version but played with it yetQuote:
Originally Posted by thp001
Yeah you need to leave it a bit thicker otherwise it's too flexible, I've only used it on two razors so far but have used it on quite a few knives since you have the tang as backing. The Warther ivory is a cast resin so should be much stiffer and have the ability to go plenty thin, if so I'll make the switch over. Both are plenty good for wedges. I've been working in horn a lot recently, trying to do things the old ways just using files, scrapers, a coping saw for all the shaping with a bit of crocus cloth and polish for the finishing. I prefer natural materials but obviously with ivory you have to use synthetic, I mean, there's mammoth ivory but it's quite expensive. Once I get the Warther ivory I'll probably do a review/comparison post with the Masecraft stuff.Quote:
Originally Posted by Substance
Any progress to report? Love to see what other makers are up to.
I'll have a bit more to post next week, been fairly busy recently since we are now haying our fields.Quote:
Originally Posted by jfk742
I did get some work done yesterday afternoon on a few of the wedge grind razors, all grinding done apart from putting the undercut in and polishing the barber notch. I have some of the scales made up but won't get a chance to set the blades in until next week and also finish off the other razors. I also have a 10/8 razor pre-ground for HT and some full hollows in rough ground state.
Attachment 333841
Attachment 333842
Attachment 333843
Attachment 333844
Finishing the 10/8+ razor, spine, grob and barber notch taken to a full polish, tang and blade left in a glazed finish. For the polish I worked up through my selection of Trizact belts, ending at 5 micron and then going first to a felt belt loaded with compound then a buffing wheel. For the glazed surfaces I worked up to the 5 micron then went back down to an 800 grit cork belt running about 25% speed, slowly drawing the blade across the wheel until the finish was even. Just needs undercuts which I always put in last. This blade is somewhere between a quarter hollow to wedge when done, it was ground on a 10 inch contact wheel but the edge gets quite thin at these blade widths so when you pluck the edge it has the sound of a hollow grind. Always grind so that the edge flexes under the thumbnail. Going to mount this blade in brown horn scales with brass pins and washers, lead wedge. Blade is 1095.
Attachment 334295 Attachment 334296
Attachment 334297 Attachment 334298
Attachment 334299 Attachment 334300
That is a gorgeous big blade. It looks heavy enough to wipe whiskers away under its own weight.
Can’t wait to see it when it is fully dressed in scales and hardware.
Finishing up some of the smaller razors, example below. Waiting on some more horn for the big chopper, couldn't quite squeeze two scales out of the pieces I have.
Attachment 334737
Attachment 334738
That already looks fantastic!
Nice looking progress. The classic lines and horn bring it together well.