
Results 1 to 10 of 25
 87Likes
Thread: Drilling out pins
 LinkBack URL
 About LinkBacks
-
05-13-2014, 06:22 AM #1Senior Member


- Join Date
- Apr 2011
- Location
- Bethlehem, Pa.
- Posts
- 950
Thanked: 555 Drilling out pins
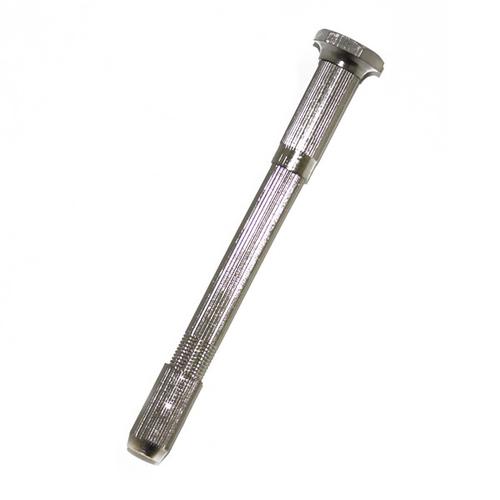
Some time ago Glen asked for contributions to razor restoration. So tonight while squeezing in this piece I figured I'd contribute this. I'm sure it's been done a million times but here is how I drill out pins for what it's worth.
This Schwan Barber Supply Co. Aristocrat just came in today. It's mine. Basically in nice shape but the scales had to come off to do a proper restoration. Now you can simply file off the pins/washers but if you want to work on a blade, or keep the washers, or just not be bothered with the possibility of cracking a nice set of scales then drilling is the way to go I think. I like these scales and I wanted to preserve them and not booger them up. Yeah, you can make new scales, take off the bolsters and swap them. But it's not the same as having the originals with the bolsters inlaid in the scales. And I love fancy bolsters.
The first step that I do is to simply file the existing peened pin flat. Don't try drilling into a curved surface. The bit will squirrel all over the place and make a mess.
Once the pin has been filed flat you need some way to center the drill bit. What you need is a small divot for the drill bit to center on and not scoot all over the place.
For this I use a very small ball cutter in my version of a Dremel. It is very tiny and you really don't need one this small. For reference I have it against my finger and I could almost clean out my fingerprint with it.
But it does a good job. I have larger ones that do the job just as effectively. Also , a small stone will work just as well.
I'm showing both ends, but I did all four pins using this method.
Last edited by mycarver; 05-13-2014 at 07:05 AM.
-
The Following 12 Users Say Thank You to mycarver For This Useful Post:
-
05-13-2014, 06:30 AM #2Senior Member
- Join Date
- Apr 2011
- Location
- Bethlehem, Pa.
- Posts
- 950
Thanked: 555
Now once I've made the small divot for a drill bit to center on I head to the drill press.
When you chuck a 1/16th bit in the drill press don't leave much of the bit sticking out. If you leave any length of the bit sticking out it will want to flex, wander and shoot all over the place. Bury it deep so just maybe a half inch sticks out. This keeps it nice and rigid.
I'm almost ready to drill but first I put a large wood block on the table of the drill press. Being that a razor isn't flat I don't want to just lay it on the flat surface. I position the block so I can just catch the opposite pin/washer on the lip of the block. Why you may ask?
Well this way , if my centering divot isn't exact, or the bit does wander and a razor will not lay flat, I can roll the razor side to side, or tilt it front to back to get the drill bit to go where I want it to.
In these shots I'm again using my finger for reference as to how deep I set the drill bit.
In the next shots you can see how I can rock the razor should the bit wander off course and I can compensate for that and get it to go in another direction by rocking , tilting or rolling the razor to keep the bit drilling as closely down the center of the pin as I can get it.Last edited by mycarver; 05-13-2014 at 06:51 AM.
-
The Following 4 Users Say Thank You to mycarver For This Useful Post:
Baxxer (05-13-2014), JoeSomebody (05-13-2014), randydance062449 (05-14-2014), Slawman (12-10-2015)
-
05-13-2014, 06:38 AM #3Senior Member
- Join Date
- Apr 2011
- Location
- Bethlehem, Pa.
- Posts
- 950
Thanked: 555
Now at this point things should be going well. Be sure to use a bit that is sharp .
Also. If you're doing a set of plastic scales be sure to not let heat build up. Sharp bits cut cooler and require less pressure to drill. Pressure and a bit just spinning in the pocket just builds heat. And what happens if it's just a pin/washer set up on plain scales? You will melt them real quick.
Drill a bit then switch to the other end. Or just dip it in some water to keep things cool.
If you're drilling accurately you should be able to drill right through the center of the washers and straight down the pin.
The first two shots show I'm centered in the washer and drilling just the pin.
The last two shots show the washer just came right off ( actually they run up the drill bit) and it's just the pin left to drill.
You could stop here and your chances are very good at removing the scales as there is very little "flare" to the pin to keep the scales in place. Once the old peen is removed and the washers fall off , with care , the scales can be removed.
But I took it a bit further as you will see.Last edited by mycarver; 05-13-2014 at 06:59 AM.
-
-
05-13-2014, 06:47 AM #4Senior Member
- Join Date
- Apr 2011
- Location
- Bethlehem, Pa.
- Posts
- 950
Thanked: 555
If you decide to push it further as I do here be forewarned! Now is the time the bit has the greatest chance of slipping out of it's little pocket that is in the end of the pin. If you're the least bit off and you're pressing the bit to go deeper the chances are good that it will slip off the end of the pin , drill along side it , and now you have an extra hole where you didn't want one. That's a mess.
The only reason I went further is the bolster was acting like a washer and keeping the scales tightly together. I needed to drill deeper than the surface of the bolster.
But either that, stupidity or over confidence kept me going as I saw I had a very good center. Lets face it. You're using a 1/16 bit to drill straight down on a pin that is the same size. A nice trick. But the other thing to consider is most pins aren't ramrod straight. They're bent and if you try to drill all the way, the chances are good that the bit will go off course and damage the scales.
I was able to drill over half way through the thickness of the scales and this allowed the scales to just fall off without any effort or prying to get them loose. I guess I got lucky.
But there is no real good reason to go this far. The goal is to remove what was left of the old peening job and get the scales off without any undue risk to them
For these shots in the bottom of the hole you can see the pin.
Once I got the scales off, and what was left of the pins I popped one back in each hole to hold it to show how centered I was. One was ever so slightly off but that amount of metal won't give much fight to keep a scale in place.
I completed the razor tonight and here is how the new pins and old washer ended up looking.
Aren't those bolsters just the bomb? And the entire razor, blued shaft, polished scales /blade is just so good looking.Last edited by mycarver; 05-13-2014 at 07:02 AM.
-
The Following 15 Users Say Thank You to mycarver For This Useful Post:
baldy (05-13-2014), Baxxer (05-13-2014), BobH (05-13-2014), ChopperDave (03-22-2015), Dzanda (05-14-2014), Hart (05-13-2014), jaycey (05-13-2014), JSmith1983 (05-13-2014), miha (05-14-2014), Neckbone (05-13-2014), Renspen (05-16-2014), rolodave (05-13-2014), RoyalCake (05-13-2014), Slawman (12-10-2015), wyobarbershop (05-13-2014)
-
05-13-2014, 08:12 AM #5Senior Member

- Join Date
- Sep 2011
- Location
- stockholm,sweden
- Posts
- 567
Thanked: 100
Great tutorial, any chance you'd do one about unpinning collarless ivory scales?
Last edited by Baxxer; 05-13-2014 at 08:34 AM.
-
05-13-2014, 08:49 AM #6Senior Member

- Join Date
- Aug 2010
- Location
- Tervuren, Belgium
- Posts
- 651
Thanked: 55
And how to tighten such pins without cracking the ivory.... Originally Posted by Baxxer

-
05-13-2014, 03:07 PM #7Senior Member
- Join Date
- Apr 2011
- Location
- Bethlehem, Pa.
- Posts
- 950
Thanked: 555
The process for collarless/washer less pins is exactly the same as you see here.
File the head of the pin. Or use a small grinder to make at least a small flat surface on it.
Then make a centering divot. And then drill.
It will be the same situation as here where the collars popped off and I was just drilling the pin. You stop at the surface or just slightly under it.
Finishing the pins is also the very same process as is done with washers.
Snip off the pin just above the surface . File it flat so it only sticks out about the thickness, maybe just a bit less, of a typical washer and then just peen it.
The anxiety seems to come from the fear of working on scales that are a bit more rare/ valuable and have the feeling that since they are so thin will crack easily. It's actually pretty tough stuff.
All the methods are the same. The difference is our mind set in how we approach what we see as fragile scales. Really, they're just another set of scales to come off or go back on.
But I understand. My first set or two my heart was in my throat and I think I held my breath the entire time while chanting " Please don't break, Please don't break ".
After making , restoring and carving how many sets I've come to see it can really stand up well.Last edited by mycarver; 05-13-2014 at 03:17 PM.
-
The Following 6 Users Say Thank You to mycarver For This Useful Post:
Baxxer (05-13-2014), MichaelS (05-14-2014), randydance062449 (05-14-2014), Renspen (05-16-2014), Slawman (12-10-2015), wyobarbershop (05-13-2014)
-
05-13-2014, 03:23 PM #8At this point in time...


- Join Date
- Jun 2007
- Location
- North Idaho Redoubt
- Posts
- 26,968
- Blog Entries
- 1
Thanked: 13226
Many Thanks My friend, adding this thread to the Workshop Sticky thread
Done: Added to the Pinning and Un-pinning section
PS: I use a Twist Drill and a 1/16 bit to start my drill outs so yes there are a few ways the get them started..
Last edited by gssixgun; 05-13-2014 at 03:34 PM.
-
05-13-2014, 03:48 PM #9Senior Member
- Join Date
- Apr 2011
- Location
- Bethlehem, Pa.
- Posts
- 950
Thanked: 555
My pleasure. I hope there is something in this that might help someone .
I have a few of those as well and as you say, there are many ways to do this.
Be resourceful , use or adapt what you have at hand and enjoy the process. What's needed to build razors can be very minimal and basic. But the rewards are great.
-
05-13-2014, 04:08 PM #10Senior Member
- Join Date
- Apr 2011
- Location
- Bethlehem, Pa.
- Posts
- 950
Thanked: 555
Speaking of pins and washers.
I grabbed this pill holder for a buck to organize my washers in anticipation of my order of 500 of each.
Each bin is marked and I added the SKU to each as well. Makes reordering a breeze. Yeah. As if it's hard.
I get tired of opening those little bags after shuffling through the pile looking for the right one .
Just twist one of these open , dampen your finger and it's easy to get just the 5 washers you need to pin a razor.
Yes , you need 5 to do a typical razor.
Well I do. If I get out 4 like you think you'd need one always gets dropped and simply disappears somewhere. So I anticipate this and use 5.
Clever little trick huh?


 Reply With Quote