Page 1 of 3 123 LastLast
Results 1 to 10 of 28
Like Tree94Likes

Thread: Parkin Cast Steel restoration

  1. #1
    Senior Member xiaotuzi's Avatar
    Join Date
    Jun 2016
    Location
    NH
    Posts
    1,924
    Thanked: 1363

    Default Parkin Cast Steel restoration

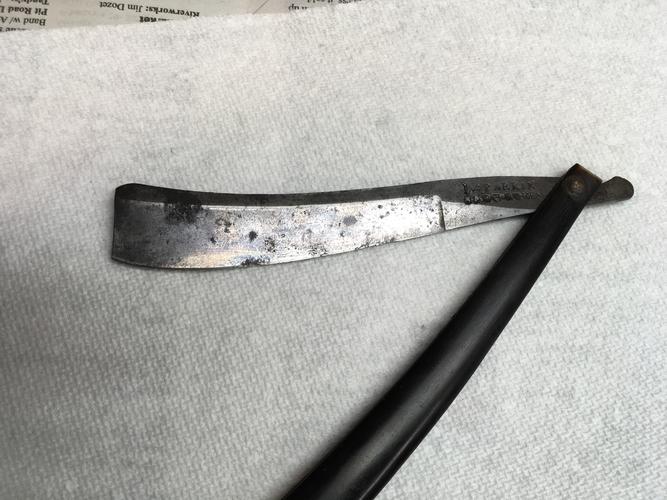
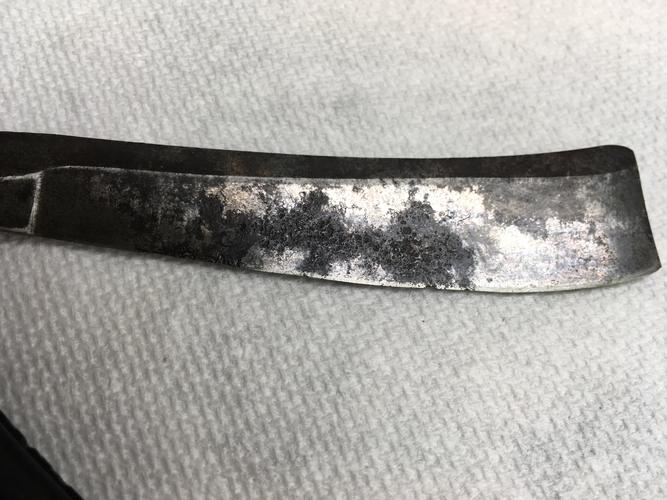
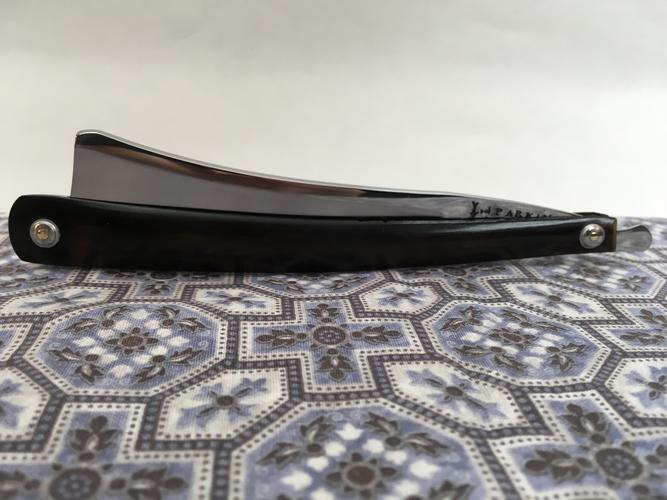
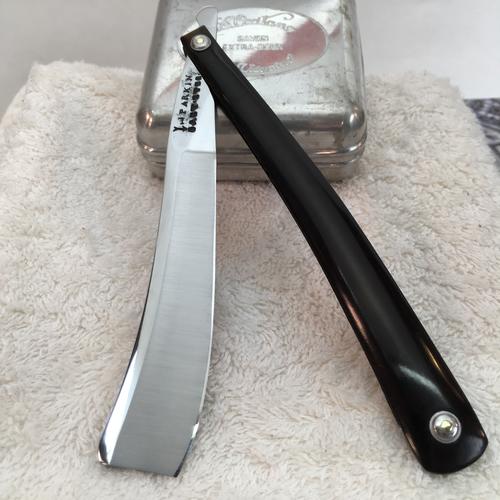
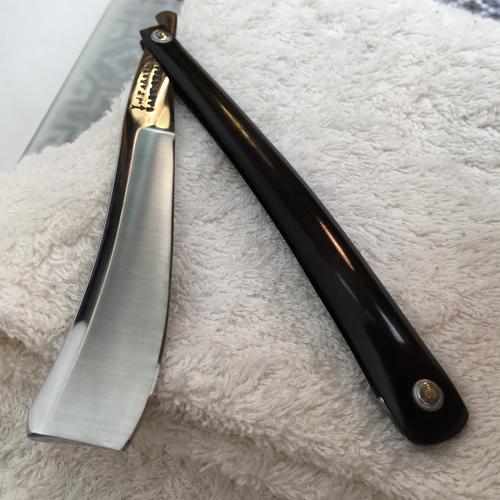
    I've had this razor for a few years waiting for the right time to restore it. An oldie! It was badly pitted, especially on the back side. The scales were in good shape so I was able to keep them. Even though they look black in the pictures, when held to the light they're dark honey. The collars had turned to flakey rust and pretty much crumbled when disassembling. I used replica collars and brass pins to put it back together. I also added very thin washers inside the pivot to limit further wear against the inside surface of the scales. This restoration was done by hand aside from a few minutes at the end I used a dremel and wool wheel with lapping paste to polish the 3000 grit sandpaper haze out of the spine, tang and tail.

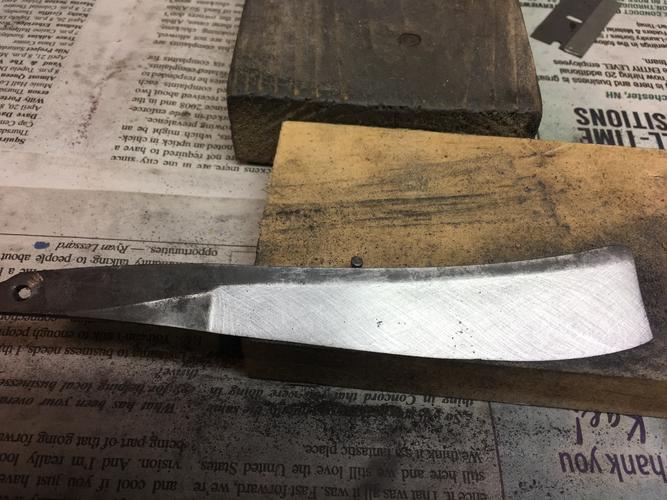
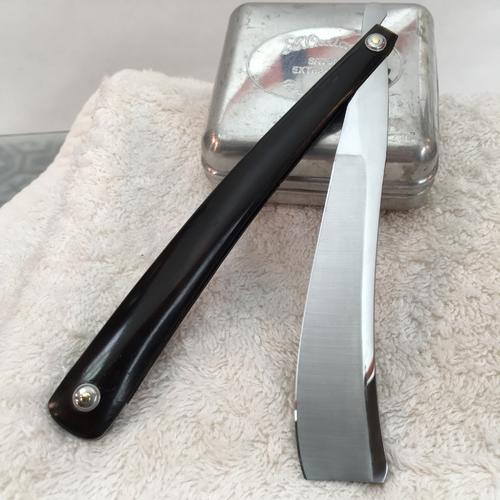
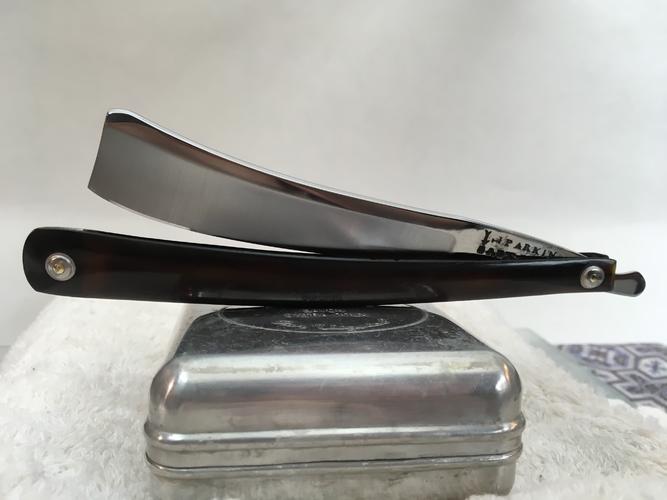
    The geometry of the blade is pretty cool. When looking down on the spine from above you can see the whole thing is shaped like a long, slight wedge from tail to tip. From the side you can see the blade is narrow at the heel and wider at the end. Because the width of the spine increases as the blade width increases, the bevel remains even throughout the entire edge.

    I measured the spine width to blade width ratio at the heel and at the end (in inches).
    Heel: 0.154/0.579 = 0.266
    End: 0.213/0.795 = 0.268
    Almost exact! I thought that was pretty cool.

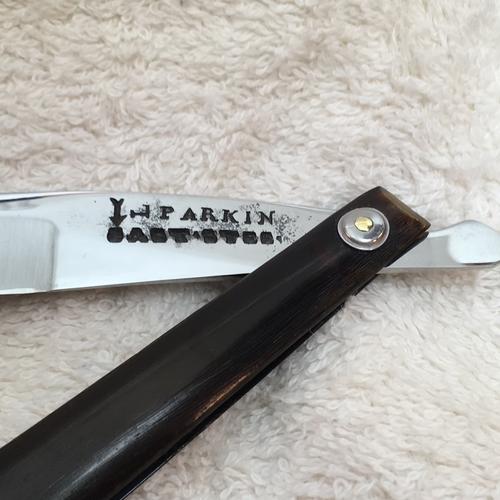
    The only info I have on this razor is that it might be made by Staniforth, Parkin & Co. from Sheffield, probably c. 1790-1810. The tang stamp is a down pointing arrow, a sideways L, PARKIN, and CAST STEEL. Glad to have this one in my collection. Thanks for looking!

    Before:
    Name:  IMG_3375.jpg
Views: 422
Size:  57.2 KBName:  IMG_3378.jpg
Views: 413
Size:  58.5 KB

    During:
    Name:  IMG_3382.jpg
Views: 441
Size:  62.4 KB

    After:
    Name:  IMG_3409.jpg
Views: 398
Size:  49.7 KBName:  IMG_3452.jpg
Views: 425
Size:  39.9 KBName:  IMG_3447.jpg
Views: 416
Size:  38.5 KBName:  IMG_3419.jpg
Views: 423
Size:  37.6 KBName:  IMG_3458.jpg
Views: 416
Size:  31.0 KBName:  IMG_3455.jpg
Views: 417
Size:  40.6 KBName:  IMG_3427.jpg
Views: 414
Size:  35.9 KBName:  IMG_3436.jpg
Views: 413
Size:  40.7 KB
    "Go easy"

  2. The Following 11 Users Say Thank You to xiaotuzi For This Useful Post:

    782sirbrian (08-22-2017), ajkenne (11-19-2017), Geezer (08-21-2017), Hirlau (08-22-2017), karlej (08-22-2017), markbignosekelly (08-22-2017), onimaru55 (08-22-2017), rolodave (08-22-2017), ScoutHikerDad (08-22-2017), Steel (08-22-2017), Voidmonster (08-22-2017)

  3. #2
    Senior Member blabbermouth
    Join Date
    Mar 2012
    Location
    Thunder Bay, Ontario, Canada
    Posts
    17,251
    Thanked: 3222

    Default

    Nicely done. You gotta love that narrow even bevel too.

    Bob
    xiaotuzi likes this.
    Life is a terminal illness in the end

  4. The Following User Says Thank You to BobH For This Useful Post:

    xiaotuzi (08-21-2017)

  5. #3
    Sharp Minded Citizen
    Join Date
    Oct 2013
    Location
    Bucharest
    Posts
    434
    Thanked: 156

    Default

    Outstanding transformation...how did you get the satin finish like that on the sides of the balde? by hand alone?!
    xiaotuzi likes this.

  6. The Following User Says Thank You to ovidiucotiga For This Useful Post:

    xiaotuzi (08-21-2017)

  7. #4
    Senior Member blabbermouth ejmolitor37's Avatar
    Join Date
    Oct 2015
    Location
    Knoxville,IA
    Posts
    2,368
    Thanked: 762

    Default

    That is beautiful, very nice job Garrison. A wonderful example of what is possible with hand tools.
    BobH and xiaotuzi like this.
    Nothing is fool proof, to a sufficiently talented fool...

  8. The Following User Says Thank You to ejmolitor37 For This Useful Post:

    xiaotuzi (08-21-2017)

  9. #5
    Senior Member blabbermouth Leatherstockiings's Avatar
    Join Date
    Apr 2013
    Location
    Rural Missouri
    Posts
    4,981
    Thanked: 972

    Default

    That turned out great.

    How does it shave?
    xiaotuzi likes this.

  10. The Following User Says Thank You to Leatherstockiings For This Useful Post:

    xiaotuzi (08-21-2017)

  11. #6
    Senior Member xiaotuzi's Avatar
    Join Date
    Jun 2016
    Location
    NH
    Posts
    1,924
    Thanked: 1363

    Default

    Quote Originally Posted by Leatherstockiings View Post

    How does it shave?
    We shall see in the morning! Cutting arm hair like a champ so far. I have to say though, it's a little different to hold onto, the tang is really thin and there is no heel. Gotta be careful where the thumb is, not getting too close to where the edge begins. Also, it's a long blade. Going to be fun!
    "Go easy"

  12. #7
    Senior Member xiaotuzi's Avatar
    Join Date
    Jun 2016
    Location
    NH
    Posts
    1,924
    Thanked: 1363

    Default

    Quote Originally Posted by ovidiucotiga View Post
    Outstanding transformation...how did you get the satin finish like that on the sides of the balde? by hand alone?!
    Thanks! Yes, the finish is done by hand. First I get the blade faces close to a mirror finish, hand sanding up to 3000 grit. Then I start applying the satin finish, working spine to edge back down the grits. Sort of like painting. A base coat of 2000 grit, then a coat of 1500, then 1000, then in this case 800. After that, one time with 2000 grit coated with 1 micron diamond lapping paste to soften the finish. This method was inspired by comments in this thread http://straightrazorpalace.com/works...in-finish.html Many thanks to the guys who contributed info there.
    "Go easy"

  13. The Following 7 Users Say Thank You to xiaotuzi For This Useful Post:

    ajkenne (11-19-2017), BobH (08-21-2017), ejmolitor37 (08-21-2017), ovidiucotiga (08-21-2017), ScoutHikerDad (08-22-2017), Srdjan (08-24-2017), Steel (08-22-2017)

  14. #8
    Member
    Join Date
    Jun 2017
    Location
    Toronto Ontario
    Posts
    63
    Thanked: 9

    Default

    this is stunning! this blade shape reminds me a lot of the sweeney todd razors!
    I too love that satin finish, I think if I ever make a razor this will be wha I base it off!
    xiaotuzi likes this.

  15. The Following User Says Thank You to Swifty2point0 For This Useful Post:

    xiaotuzi (08-22-2017)

  16. #9
    Senior Member blabbermouth tintin's Avatar
    Join Date
    Jun 2013
    Location
    archbold ohio
    Posts
    2,364
    Thanked: 545

    Default

    Yes! amazing job. Beautiful razor.
    ejmolitor37 and xiaotuzi like this.

  17. The Following User Says Thank You to tintin For This Useful Post:

    xiaotuzi (08-22-2017)

  18. #10
    Captain ARAD. Voidmonster's Avatar
    Join Date
    May 2011
    Location
    Pacifica, CA
    Posts
    2,474
    Thanked: 2226

    Default

    Very nice!

    Did the wedge have three holes?

    The razor oughta be 1790-1805. Not a lot of those going around in shaving shape, and fewer still that haven't got a case of heel-tooth from pasted strops or overhoning!

    I've found that it's a little weird to shave with them initially, but it pretty quickly becomes normal. I've never felt in danger of cutting my thumb while using one.
    -Zak Jarvis. Writer. Artist. Bon vivant.

  19. The Following User Says Thank You to Voidmonster For This Useful Post:

    xiaotuzi (08-22-2017)

Page 1 of 3 123 LastLast

Posting Permissions

  • You may not post new threads
  • You may not post replies
  • You may not post attachments
  • You may not edit your posts
  •