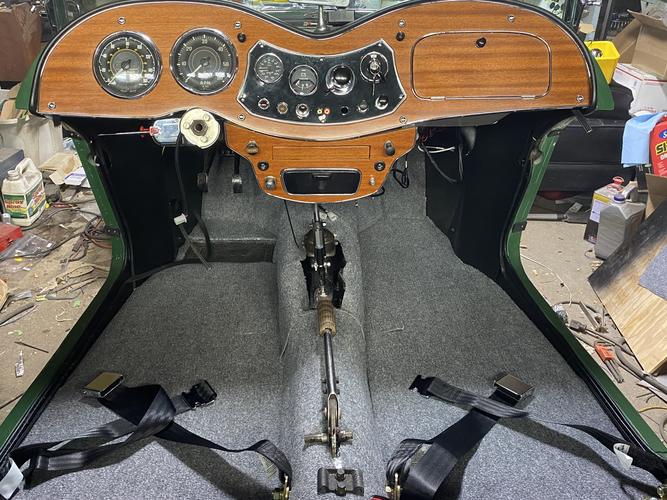
Well it’s a long weekend up here this weekend so I felt like cutting a rug….
Attachment 342048
Gonna hopefully get the door locks working properly, and permanently next.
Cheers.
Printable View
Well it’s a long weekend up here this weekend so I felt like cutting a rug….
Attachment 342048
Gonna hopefully get the door locks working properly, and permanently next.
Cheers.
It's looking good Mike!
You are getting very close amd it is looking fantastic
Thanks guys. I like the lighter color on the floor, phew. Wasn’t sure it’d work but it does.
After the door locks are working it’ll be time to work on the fuel tank and tire carrier. Once those are plumbed and tight, time to go over everything one last time before I consider maybe firing her up.
The final steps will be the fenders and engine cowls. Which really shouldn’t be much challenge, all things considered.
I figure I’m going to move ahead with my shifter as is, see if it’s stiff, to stiff, or just right as she sits. Can always tweak that part of the design later. Need to soldier on and get er done. Do appreciate the suggestions regardless of the final design.
Getting real close.
:tu
Mike, looking good! Was wondering about the final buffing. Is that done once it's all put together? Will you have to take some of it apart to do that?
Final buffing will be just before I put everything together I figure, that way I won’t have to deal with the piping getting hit by the wheels,,
then maybe just a wash and wax once assembled.
The tank, definitely before it’s in the carrier. Will be good practice for the rest of the panels.
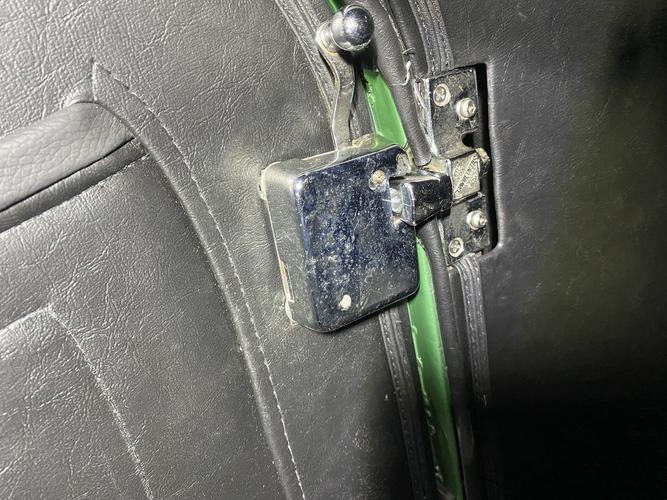
Spent all day and much adjusting to get them done, but the two stage door locking mechanisms now work again, both sides. When acquired only the first stage worked on either door and there was a slide bolt for back up locking.
This is the first detent position, note you can see the hole in the wedge still that comprises the second lock.
Attachment 342093
And this is the fully locked position.
Attachment 342094
Takes a good strong swing to close, not a slam, but a proper close. And the doors are quite tight when closed, almost water tight, nah
Attachment 342095
Attachment 342096
Attachment 342097
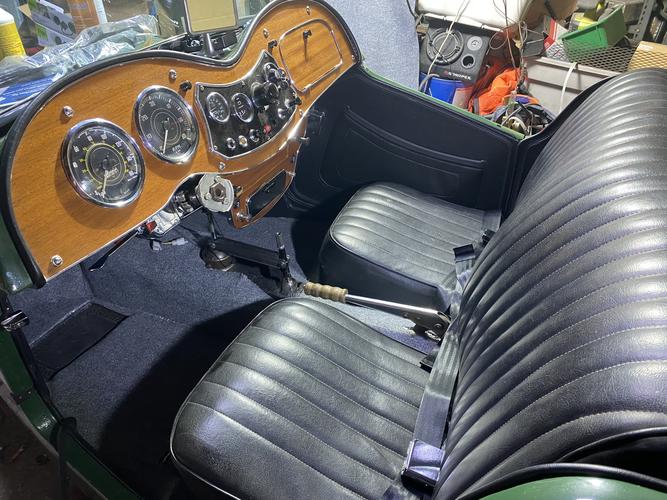
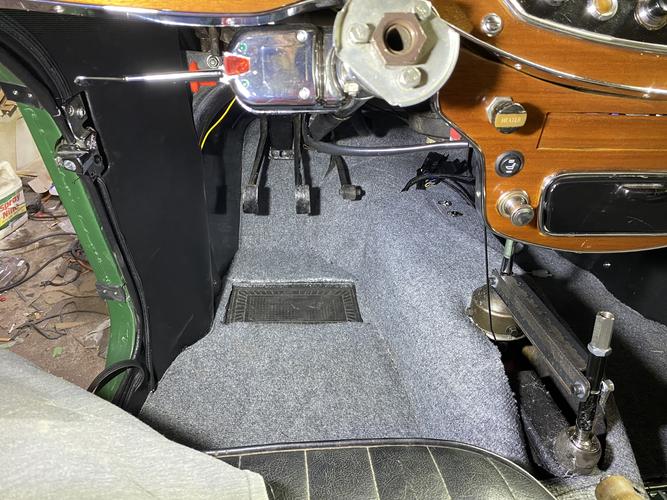
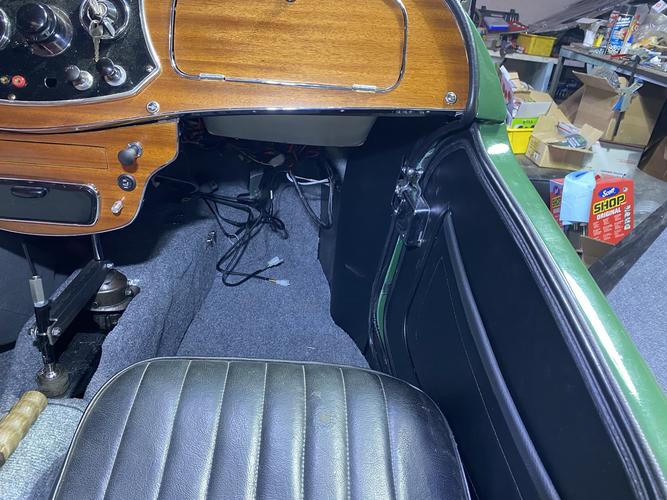
Seat heater, and Bluetooth wiring still to bundle up, but the interior is pretty much done now!!!
Boo yah!
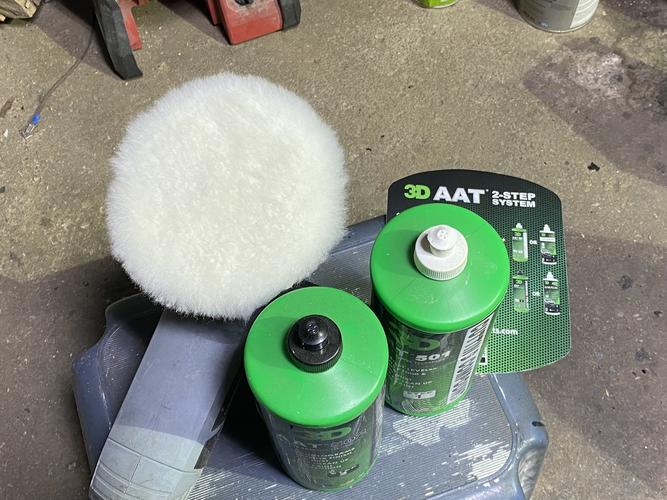
And now I’m getting into the final paint work.
Attachment 342126
Will be using these 3D products after I’ve removed all the irregularities with 1000 grit dry, then 3000 wet.
Attachment 342127
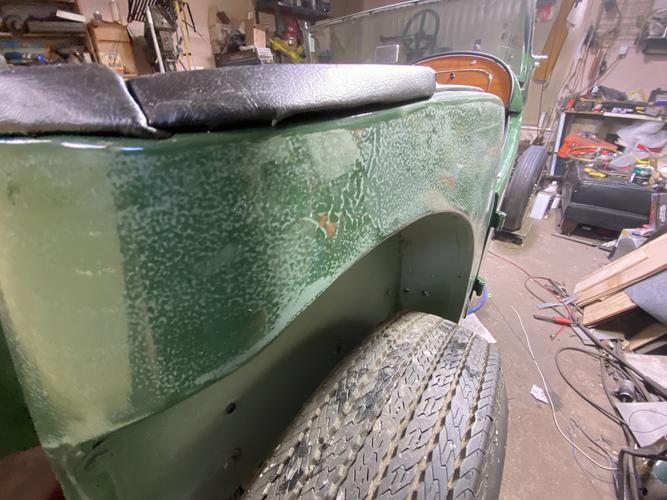
Scary scuffing up new paint but necessary to get the finish I can’t get in a home garage.
Attachment 342128
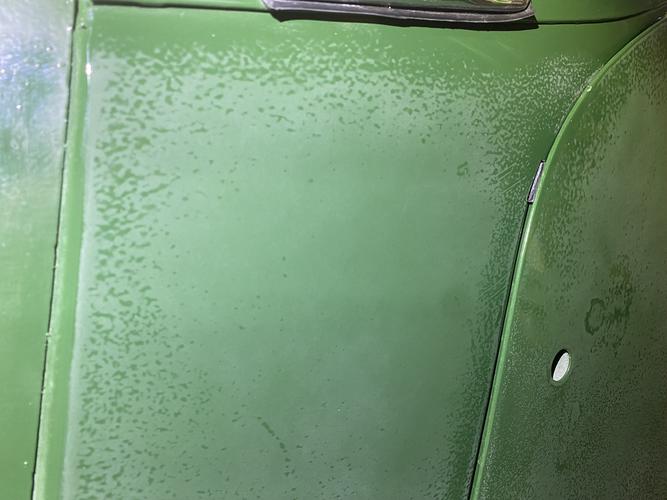
This is about there, with the 1k, and it sure eats the paper getting here. Just need to be careful on the edges as I recall.
Will carry on tomorrow when I get more 1k grit. Luckily it’s a small car, relatively speaking. Won’t be too hard to detail.
As I recall…you have 3-4 good coats of clear on those panels ..eh ? Are you wet sanding…that way the paper lasts longer . Then after a 1K sanding…you need to sand with 1500 or 2000. Don’t forget to put some masking tape on the high edges or adjacent panels when buffing..to prevent burn through. It’s a thankless job…but worth it.
Can't you use 1000 grit Wet n Dry?? The water would wash the residue away---