You making the trip is a good enough reason to have a fall GTG this season after all Shaun!
Wasn’t sure how 21was going to shake out, but it’s looking much more positive every week!
:tu
Printable View
You making the trip is a good enough reason to have a fall GTG this season after all Shaun!
Wasn’t sure how 21was going to shake out, but it’s looking much more positive every week!
:tu
Still working on the doors fit, but almost there.
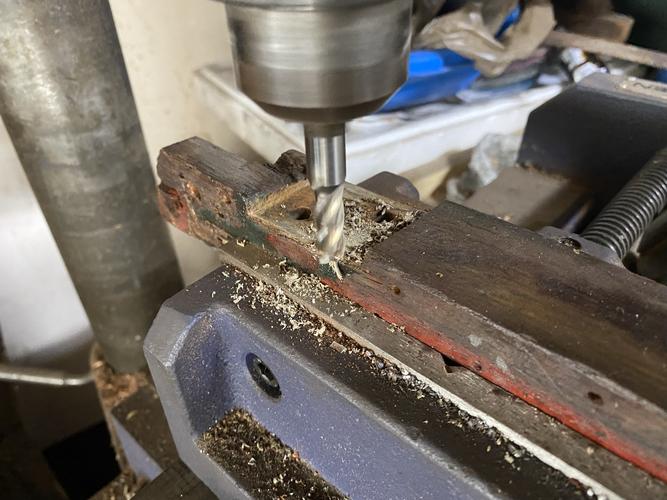
Ended up removing about 3/8 of wood on the rear hinge area before things started to look and fit like I want as you can see when I compare the two sides mid milling.
Attachment 334416
Necessitated slotting out the hinge pads deeper by the same amount so I used my positioning vice and drill press to make sure things were flat-ish.
Attachment 334417
There’s a 18 gage stiffener that runs from the back along the sides as well so thinner wood shouldn’t be a risk.
Attachment 334418
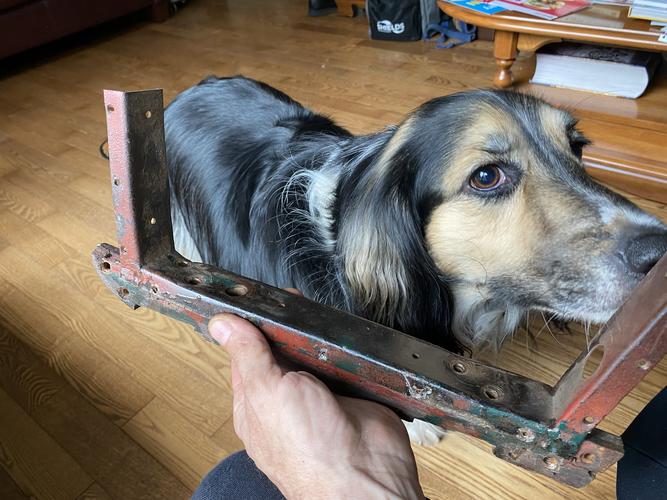
It’s good to have a helper around the shop right?
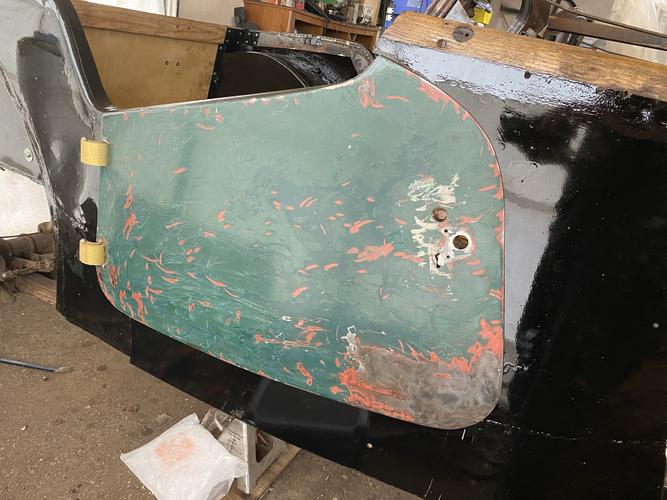
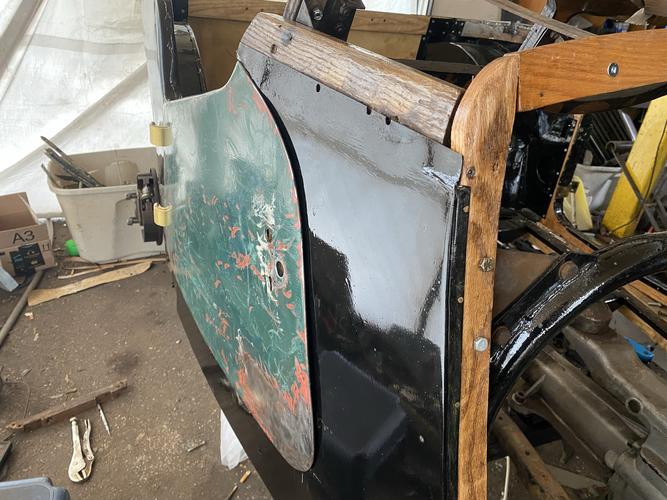
I’ve cut the rear hinge detents in the door skins deeper to allow everything to shift rear wards and am finally satisfied with the door fit and clearances.
Attachment 334420
Attachment 334419
That’s with no clamps or locking hardware yet, just swung shut! Damn near perfect, and certainly better tha it’s been for decades.
I’m going to incorporate an inner adjustment turnbuckle still but can go on to nailing these together after sealing the interiors with por, then epoxying the wood together as I screw it all tight.
Once doors are done, firewall , floor and fenders..
:chapeau
Like your helper Mike. I hope you take his advice as he seems pretty knowledgeable.
Looking pretty tight. You have been a machine on this project.
Looks like a nice fit. Doors and hoods were always a pian for me adjusting.
He has an uncanny nose for finding things out of square.Quote:
Originally Posted by PaulFLUS
Or smelling like food in any way……
:beer1:
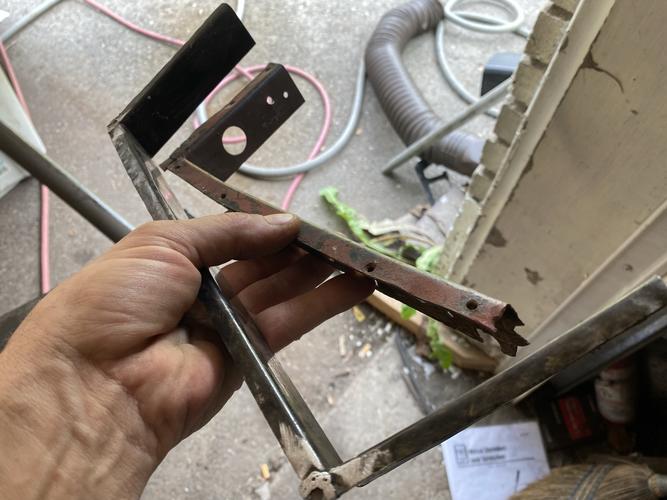
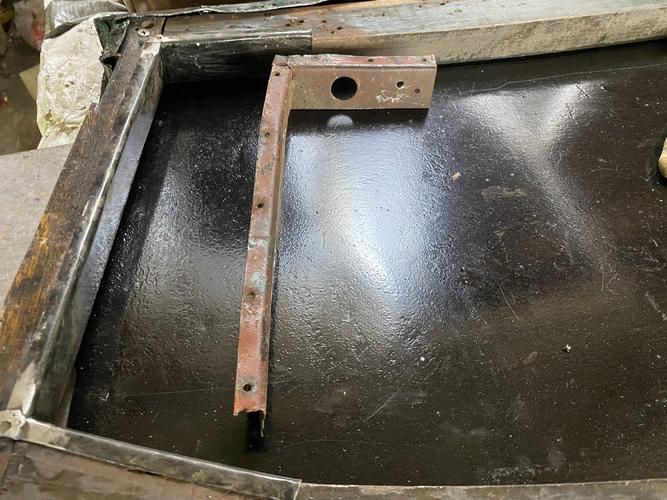
Wrapped up the weekend sealing my wooden door frames after making a replacement hinge strengthening brace for the drivers door. Original developed cracks during the straightening. But still made a good template.
Attachment 334452
Attachment 334453
And while Im using the door skins as a guide to help things set up with the correct curves and angles, I dont want the wood to be epoxied to the steel skins, hence the separator plastic strips around the joints.
G2 is great cause it sets up so slowly (60 minutes working time) I was able to apply it liberally to all mating surfaces, then apply all the screws to proper torque. All well before it set up, and with enough time to reapply glue at the joints after connecting, just to be sure I have strong corners.
Attachment 334454
Attachment 334455
Tomorrow, after the epoxy sets up I can nail the skin trim back into proper nick and the doors will be effectively ready for sanding and painting.
Was a good weeks work to get these trued up again.
:tu
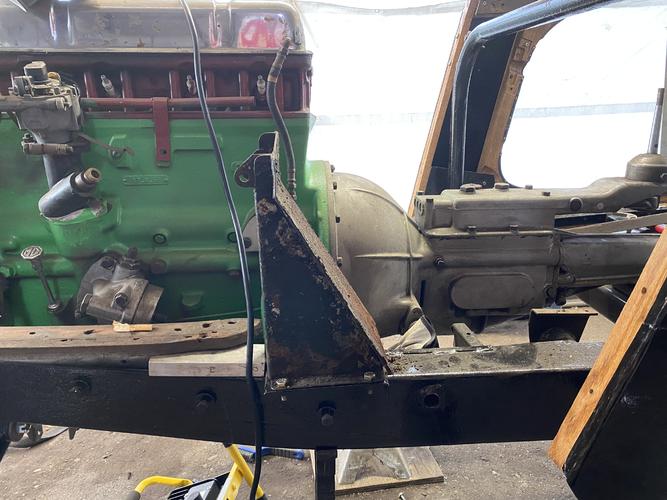
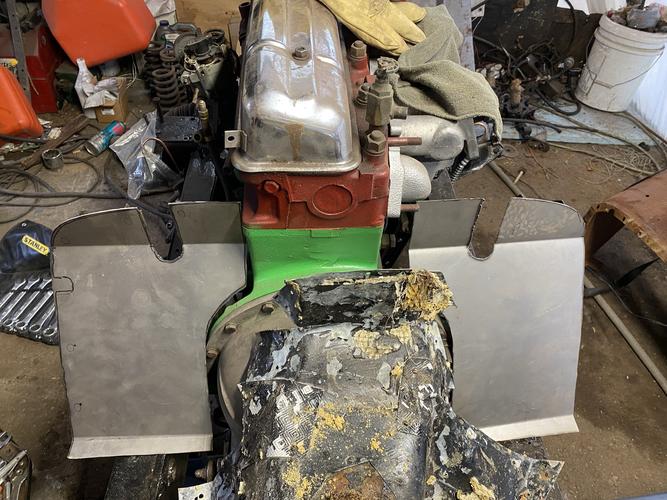
And on to the firewalll. It starts with the toe plate, and clearly I need to build a custom plate to account for the bigger engine and trany.
Attachment 334493
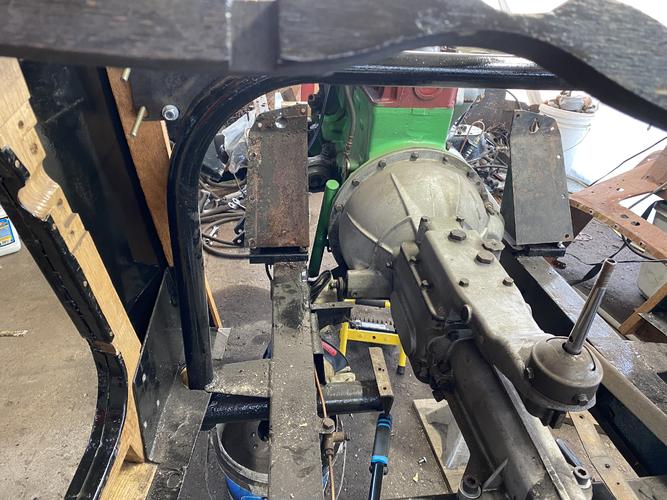
But I can imagine the increased foot room from this angle.
Attachment 334494
I have a whopping 59” to work with now from plate to rear deck. So realistically I’ll have 50” from the seat back face .
That should be plenty of leg room
Was able to save a piece, on the drivers side of the original toe plate, so at least I have something to start from.
Attachment 334508
So I can make a template from that and mirror it to come up with my halves.
Attachment 334509
Cut them out with the plasma cutter and then pair them up for symmetrical shaping.
Attachment 334510
Put the required bends and relief and these are getting close.
Course I realized at this point both sides won’t have a steering column so I could have foregone one of the vertical cut outs. Hell the original one was cut on both sides with a blanking plate on the passenger side as these cars were built for either right or left hand drive depending on market, so I’m keeping it concourse quality baby!
Attachment 334514
Attachment 334512
Will be an interesting final fitment as this gets installed after the firewall is in place on the car, from the inside.
Still need to figure out my bell housing cover but am thinking of getting a large stainless mixing bowl, and modifying that to cover the mid and I can braise the sides to these plates turning it into one unit,,,,
Maybe, still thinking about that part..
Cheers..
Oh man...You are overcoming my similar blockage. Would like to see the process on these and the tunnel?