-
I'm going to be the eccentric one here. I don't mark anything.
First I grind the spine clean on both sides.
then I grind primary hollows. They don't need to be free from scale and may still contain forging marks.
Then I simply run a 36 grit belt at high speed, hold the blank by the point, with the edge up, and press the tang against the belt, making sure the edge is angled to the belt with the taper I want on the tang.
Then I do the other side, leaving enough thickness in the tail. I do each side a couple of times, eyeballing over the edge from point to tail.
When I am nearly there I simply clamp 2 pieces of wood to the tang and verify that the angle of each side with respect to the edge is correct. And then I clean up with 80 and 120 grit belts.
I don't scribe, measure, or calculate.
-
I try to end my taper at the spine tang junction just forward of the heel, an 1/8 to a 1/4. I also like to hone my heel up the radius at the heel to help scoop out the hollows next to my Adams apple. Running the tang long or in other words the spine contact area short, makes it easier to hone more of the heel without doing a bunch of gymnastics on the jones to do so. I also like to leave the tail thickness over thickness and then walk that in later to help with balance towards the end of the finish grinding, taking into account my scale design as that will further push the balance into the tang. I prefer neutral at the thumb or a little tip heavy.
Bruno gave me some good advice: make razors, make a lot. What that did for me, at least my interpretation has been, gain experience and work out the issues in design in each iteration, youll get better at grinding and figure out how not to make easy mistakes, as well as how to fix or design around mistakes.
The other thing with razors, the heat treat. Doesnt matter how cool or how ergonomic the tool looks or is, if it cant take and hold a comfortable edge there is no reason to worry about design and ergonomics.
I have a couple of razors just out of heat treat, Ill take some pictures after I clean up the decarb layer. Mind you ergonomics and geometry is towards my liking and wrist angle, yours may vary.
Pretty much every Sheffield I have runs the tang spine junction ahead of the heel. There is probably a reason.
-
Sine plate on my surface grind attachment for my 2x72.
-
4 Attachment(s)
Well just typed out a whole thing then an error occurred and the all the text and pics were gone.
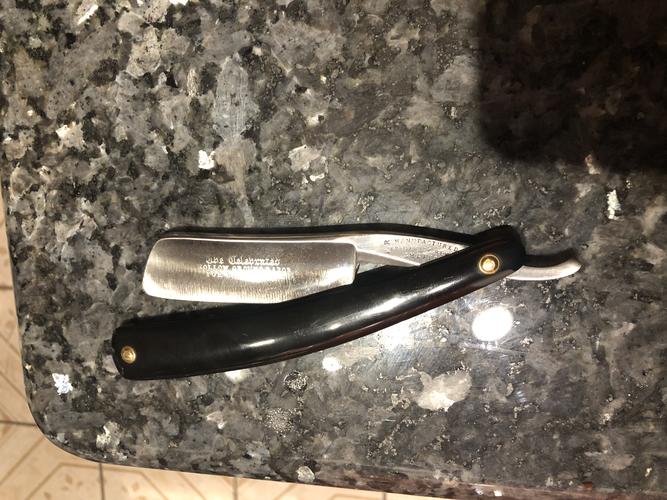
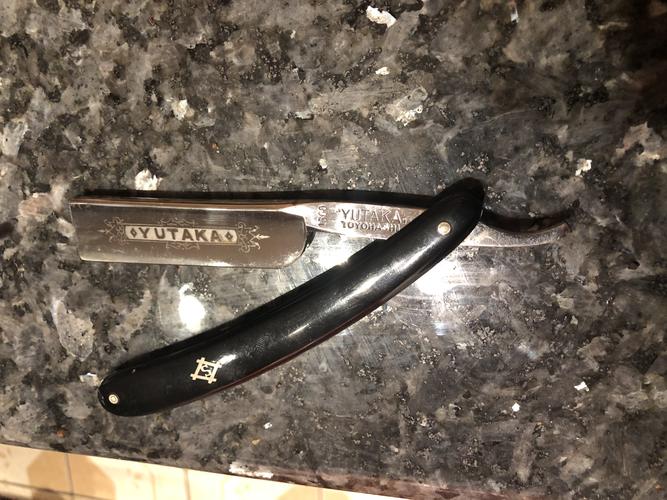
Long story short, I grabbed two random razors off the mantle:
Attachment 327532
Attachment 327533
Like I said earlier most the razors Ive come across have this feature.
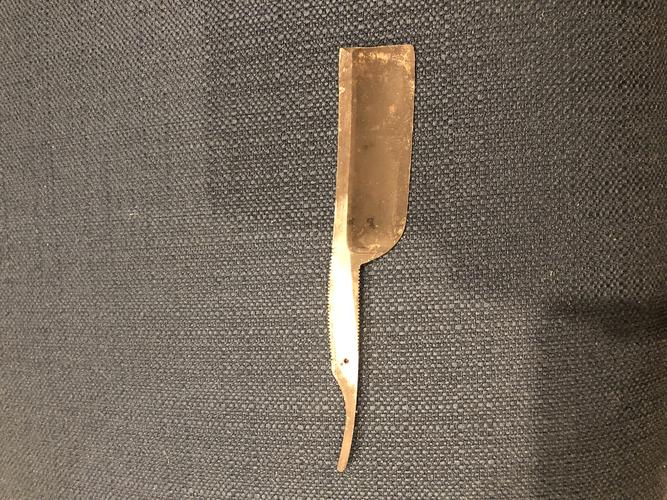
Here is one of mine out of heat treat, I cleaned up a flat so you can see where I left it. The area is exaggerated as my spine is .03 oversized. The tail will get some more thinning and the junction only clean up. As I walk all the surfaces in on the grinder and final tweaks will be made hand sanding. Blade is currently 8/8, will be 7/8 when Im done. Stock was 1/4x1. My junction, finished, will be about .1 forward of the heel where it will hit the hone.
Attachment 327536
Attachment 327537
My apologies for the photo orientation, still havent figured out how to make pics from my phone orient properly.
As you hone the razor that junction naturally move back towards the tang. I wouldnt make a razor without positioning the spine contact area at least in line with the heel.
-
Great responses. Thanks to all. My 6” wheel should show up tomorrow.
I think I may do one on the 12” as a near wedge just for kicks and practice.
-
The more wedge shaped the blade the more important it is to get the edge as thin as possible while grinding so you get a nice small bevel. I have actually started grinding to where I get a very thin burr at the edge when using my cork belt with emery (belt moving away from the edge). A nice thin edge makes setting the bevel faster too.