Planning a new little forge.
I may start building it next weekend. I love Spazola's forge design especially the table out front and the way the burner comes up from the bottom. I always wondered why no one ever placed it there. The pipe in the air at the top thing just didn't look right to me for various reasons like heat goes up and more line and well, it just looks top heavy. I don't have any big pipe but I do have some mail box shaped steel that is about a 1/16 thick. So what I am wondering now is soft fire brick or blanket ? For some reason I am stuck on the idea of using fire brick. Maybe because I can get it for nothing :). I am thinking of coating it with bubble alumina refractory coating over a coat of satanite refractory mortar. Even if I go with the blanket I think I will do this. This will protect my forge walls from flux if I decide to ever do any welding with it right? Who knows I may want to hand wack some Damascus together someday or get creative beyond making a straight razor.
So back to the question of brick versus blanket. If I can use the brick as efficiently as blanket would it be better to go with a thick plate for the housing ? I do have some 3/8" or 1/4" laying around.
Any thoughts on this would be greatly appreciated.
5 Attachment(s)
Okay I am going to get this thing built now !
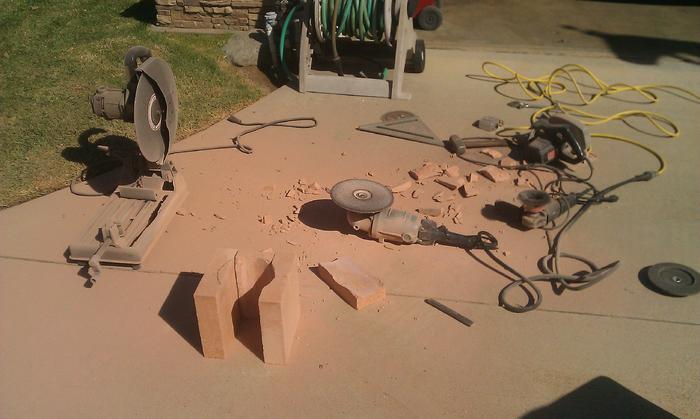
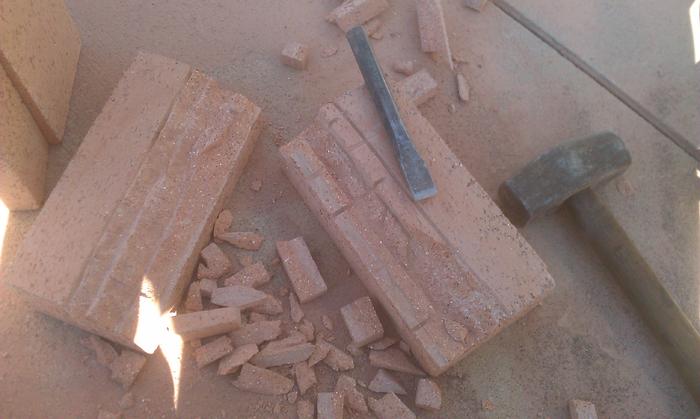
Well I started working on the forge today. It has been awhile but I am hell bent on getting a forge up and running within the next few weeks. I shaped some fire brick today and even though it is not perfect(which I always shoot for) I think I can live with it.
I was almost done when I remembered to take pics. You can see all the things I tried and I will describe what worked. You can also see the mess it makes.
Attachment 143139
I used a pencil to draw the round shape I wanted on one end and the some lines to make score marks on and for depth of cut guides. I used an old circ saw with a 6 1/2 masonry blade. I used 1 whole blade and wished I had bought 2. This is where the quality of the perfect inside diameter first started to deteriorate. On my 7" grinder is a 9" masonry blade. Once again I should have popped for a 7" wheel because that is the inside dimension I wanted. But this was all just a grab it and start thing today so, it is what it is. I am still under 7" but I design as I go so I think the refractory clay I line it with will hide my imperfect dia. You guys won't tell on me will ya ?
Attachment 143140
Here is the finished score lines and cuts.
Attachment 143141
And then I did some chiseling
Attachment 143142
Now I couldn't get any real good pictures of me grinding out the radius because that old B&D 7" really twists a wrist when you pull the trigger. Not to mention the dust factor. I just started grinding away until I got the shape I was happy with. For the final shaping I put 2 bricks together and ground the mating edges at the same time. Drop 1 brick and pick up the next all the way around until all the seams matched. It went a lot faster than I thought it was going to and on the bench it doesn't look so bad.
Attachment 143143
This is the hard firebrick and I am going to line the inside with a special clay made to withstand flux. I am going to lay everything out tomorrow and see what metal I have and maybe get started on some fabricating.
I had this wild idea of incorporating a heat treat oven on top of the forge but I decided against that for now. I thought maybe I could get more out of it if I heat treated one thing while a shaped another. Too much to handle at once for a beginner but maybe later I will add that option. I just hate to waste all that heat :<0) .
5 Attachment(s)
Encapsulating the brick .
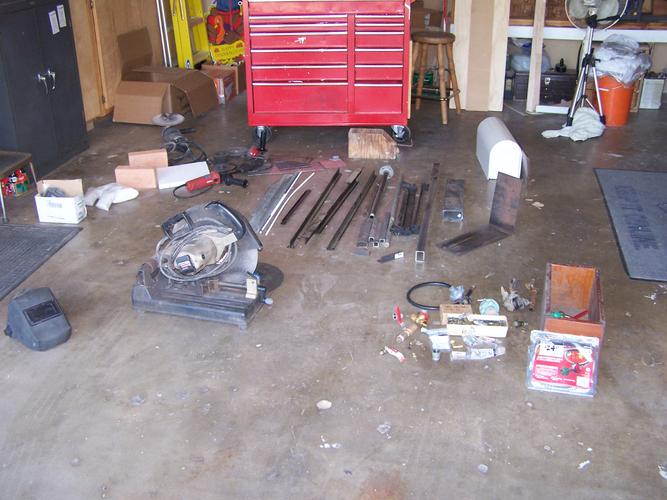
Well today was pretty productive once I got going.
I spread everything out on the floor and realized I was missing all the base and housing metal. A quick run to storage and I scrounged up some stuff.
Attachment 143223
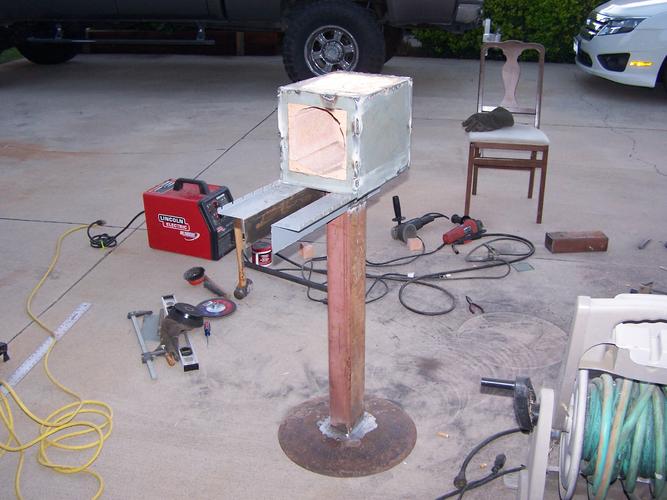
I found the plow shear and a piece of 3X4 red iron so I made a stand. Some funky thing I had saved made a good base plate. All I had to do was half it and weld it on. Measurements came out a perfect match for the brick width.
I knew I would need that thing for something when I first saw it :<0)
Attachment 143225
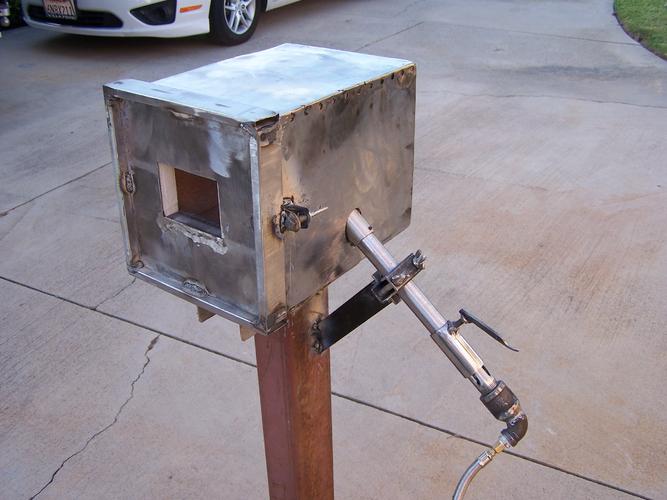
The next step was encapsulating the brick. I grabbed some steel shelves and cut the pieces out with a jigsaw. Slow but the parts came out straight and square. I wanted those bricks in there tight. After I had 2 parts made I started clamping and tacking until I got it all together. It's not welded down to the base yet but that will be where I start tomorrow. I may have to take it apart to drill the hole for the burner. I haven't forgotten the tangent and I really want to come up from the bottom as much as possible.
Attachment 143226
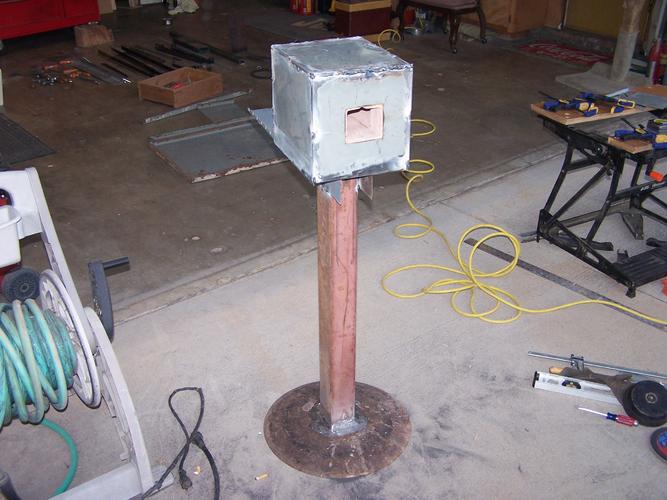
Here it is all tacked up .
I have to make a front door at least and cut a hole for the burner. I have enough stuff to put 2 burners in it but after looking at how Charlie's worked, I don't think I am going to need the second 1. This will be about a 6 " inside diameter when the clay is added and 8 1/2 inches deep. I am hoping to line it tomorrow and then work on my anvil stand while it dries. If things go good I may have fire in 3 days or so.
Front with tray
Attachment 143239
Backside
Attachment 143240
To be continued.................. Thanks for the help and tips. It's nice knowing what 's up ahead and what to watch out for.
2 Attachment(s)
Houston, this is Beagle 1, we have ignition !
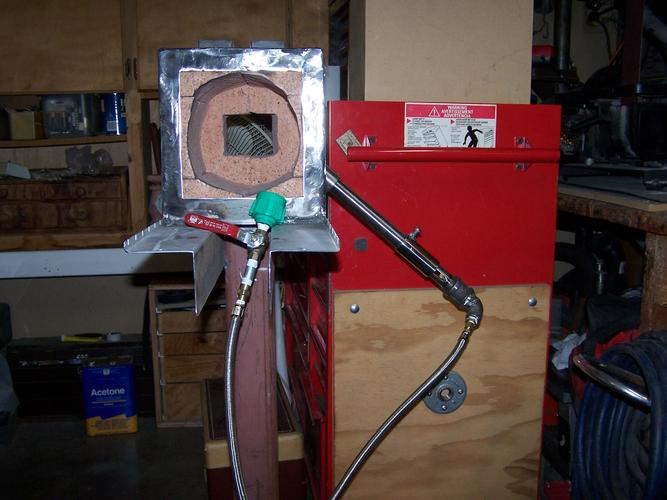
It's been a long week and I feel like I am way behind with this project. I have excuses but lets get to the flame.
I finally came up with a torch design I like. Comes apart easy enough if I want to make changes like the tip length or hole dia. , what ever. I am going to add a fine gas control valve but I have to do some design/fabricating work on that still.
I went with a ss braided hose right off the tank into the 1/2 x 3/4 reducing elbow. The hose had a swivel fitting on one end and not liking the idea of a leak I just made a flat rubber gasket to seal up the joint inside. It was a smoker hose so that end just went out into the flame. It may have been okay but I didn't want to risk it. I put a reducer on the 3/4 " end of the elbow and ground the nut off it so it would fit inside the coupling. Then I welded the 90 to the coupling. Essentially I have 2 dia. of pipe coming out the coupling now. 1 for the 3/4" pipe and 1 inside that for the nozzle itself. After 2 many reducers a nipple and a coupling I got to an 1/8 plug that I drilled a #58 hole in. Close as I could get to .035 welding tip.
Attachment 143702
Here is the burner hanging out of the forge the way it will sit. I need to make a hanger bracket, a nifty handle for the air adjustment and the fine tune gas valve form an old cutting torch. The tip may not be far enough up into the air gaps ? When I first fired it up I had flame down in the mixing chamber (3/4 pipe). After some learning it didn't any more but I am wondering about what it will do once inside the forge. I know I will find out :<0)
Attachment 143708
Hold your ears or turn the volume down some. I did not edit the video . This is the last of 3 short vids the first 2 have a lot of blow outs due to the large gas valve and my learning where to start the air adjustment at.
http://www.youtube.com/watch?v=117tT...ature=youtu.be
I have to add some Bubble Alumina Refractory Coating inside the forge plus what I mentioned above and I should be ready to get it hot. That and making an anvil stand is the only thing needed for me to start banging on metal.
I forgot .... I have to make a couple of doors and finish the front tray . Can you tell I'm anxious ? :<0)
