Too late, you’re in the water… swim.
Printable View
Too late, you’re in the water… swim.
OK, here's an update of where I'm at with setting the bevel. Getting closer, but still have a ways to go...
Process:
I did many sets of 20 circles, each way, after first lapping the stone. I'd check every 2-3 sets to see how the edge was doing. First with some pressure, and then later, with light pressure, and then no pressure at all. I did some heel forward strokes next.
Checking:
I inked the blade and did one stroke on each side. On the right side, as looking at the blade, there was about a 0.3cm region at the very heel that had ink. On the left side, there was about 1.5cm region from the toe, with ink.
I did more heel forward strokes and put my finger on the toe, for strokes coming toward me (where there was no ink). Did lighter and lighter pressure, and added more water as I lightened pressure in later strokes. Probably did around a 100 (each direction, alternating, obviously).
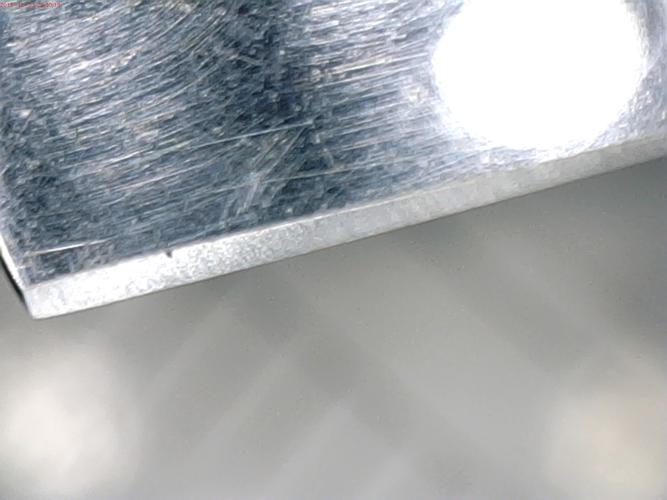
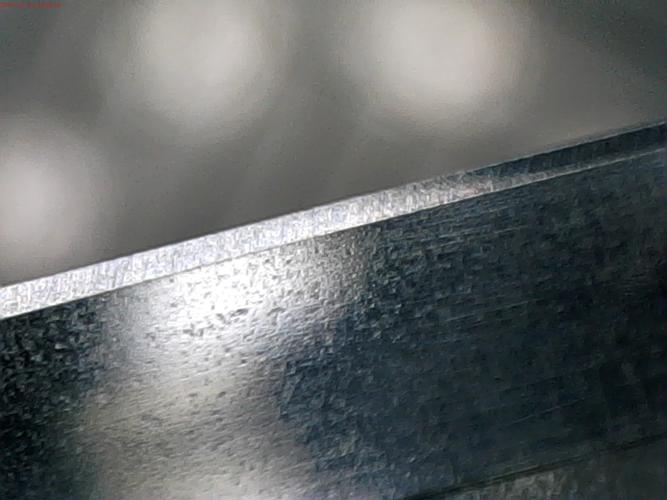
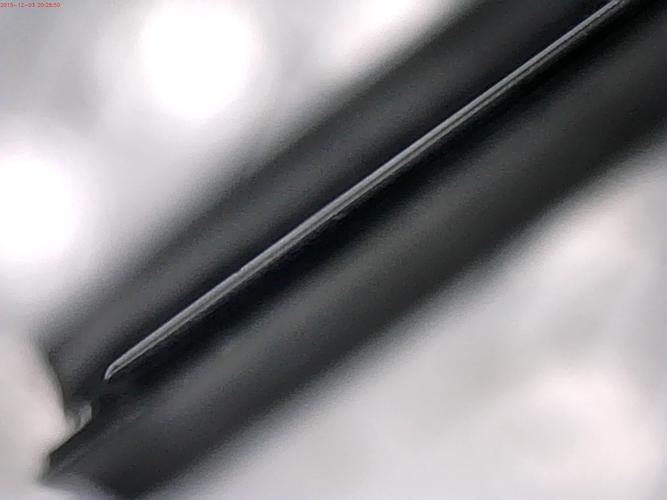
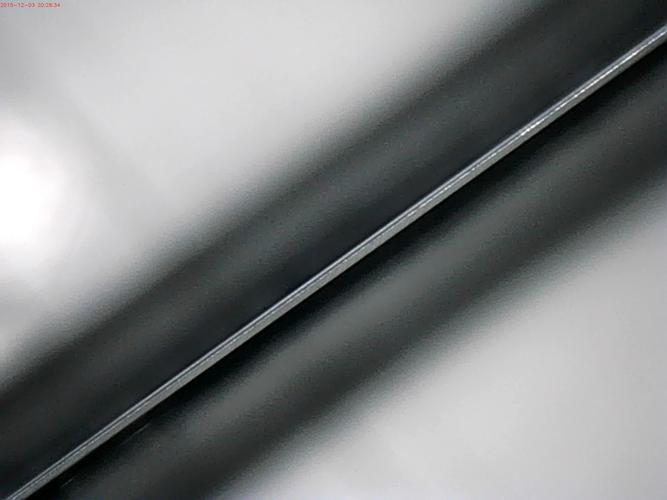
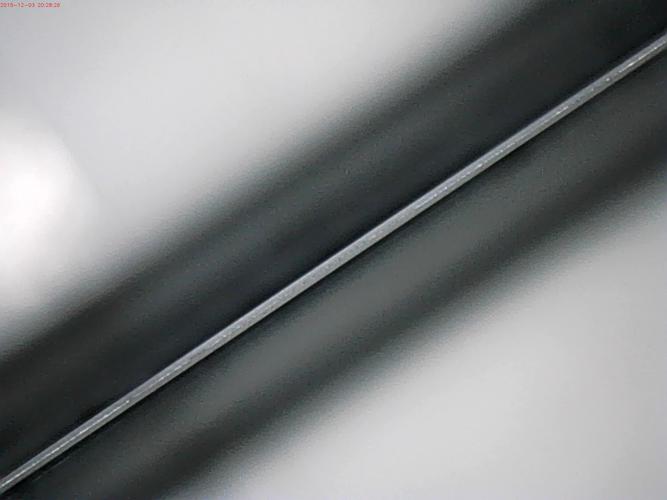
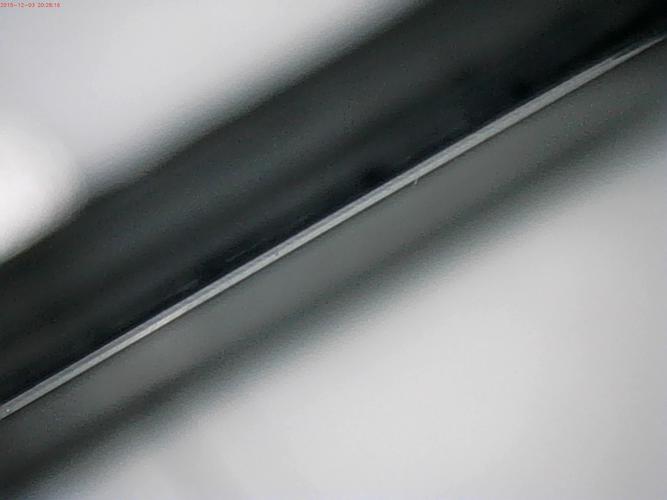
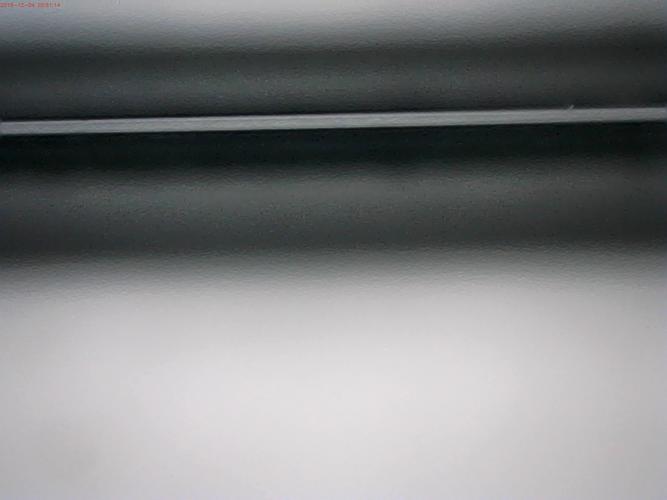
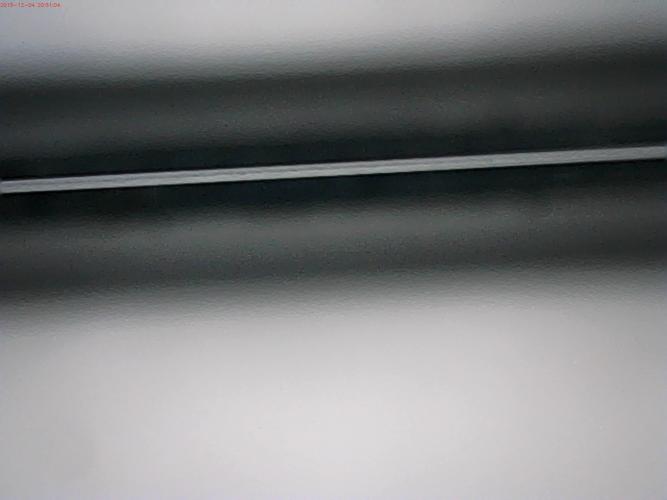
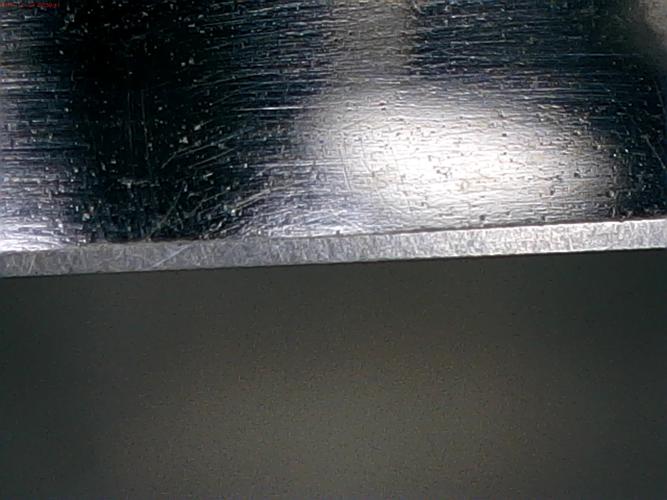
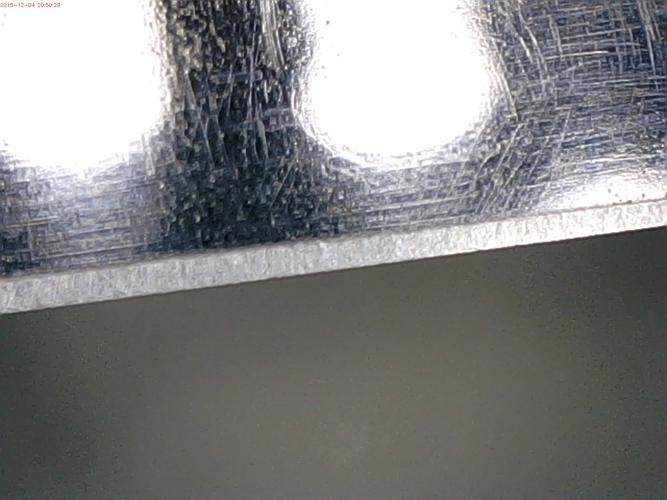
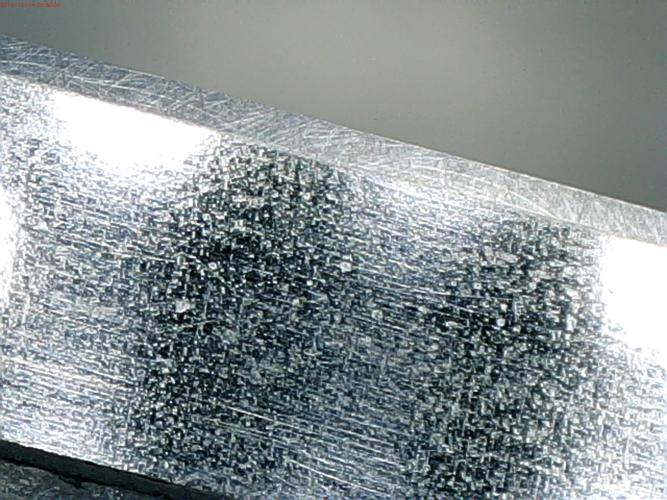
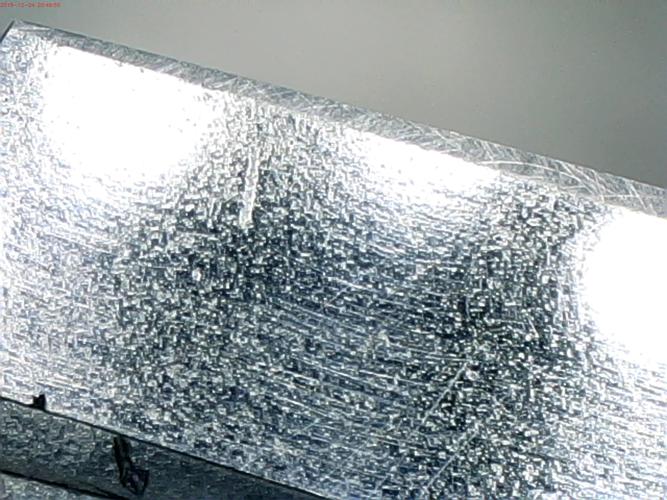
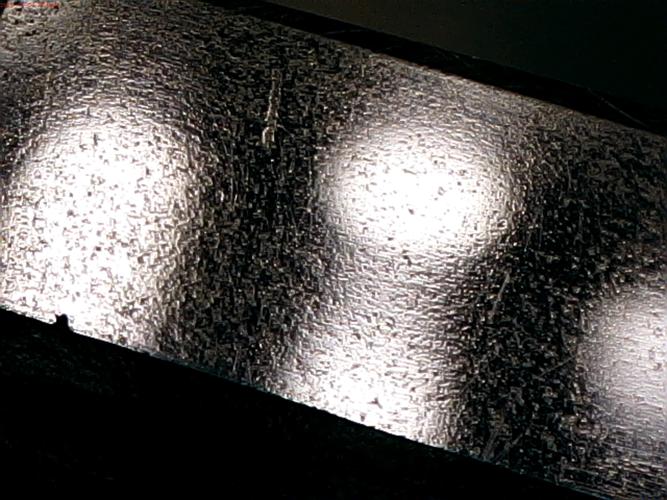
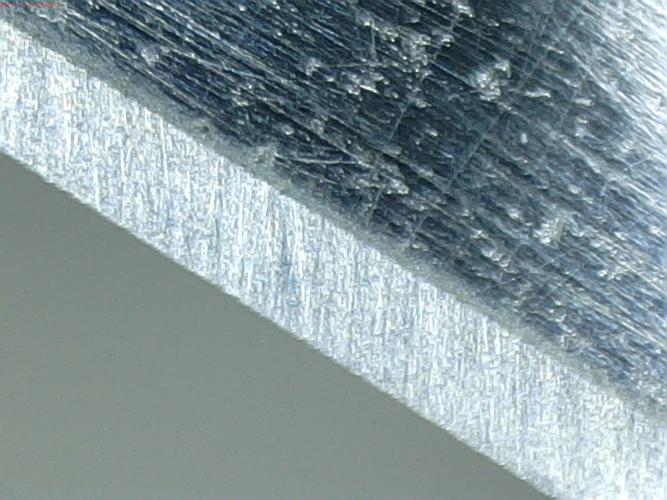
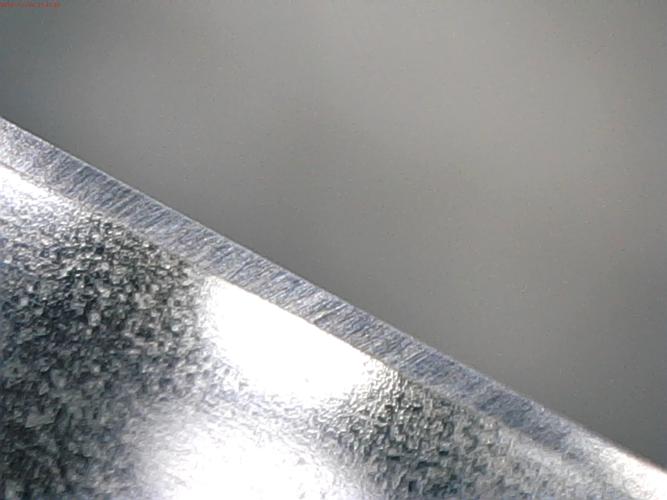
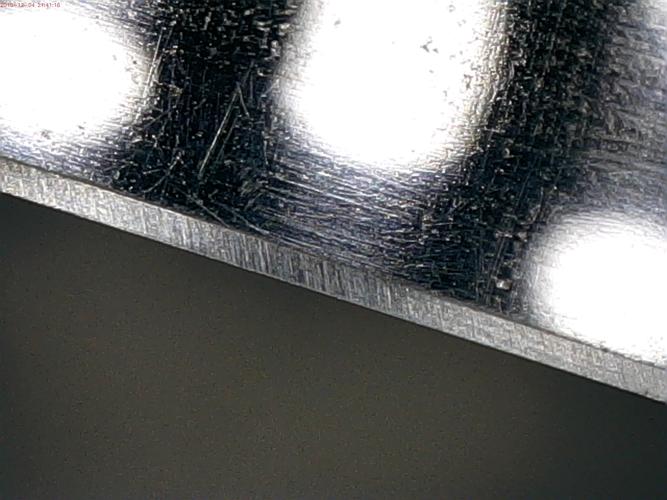
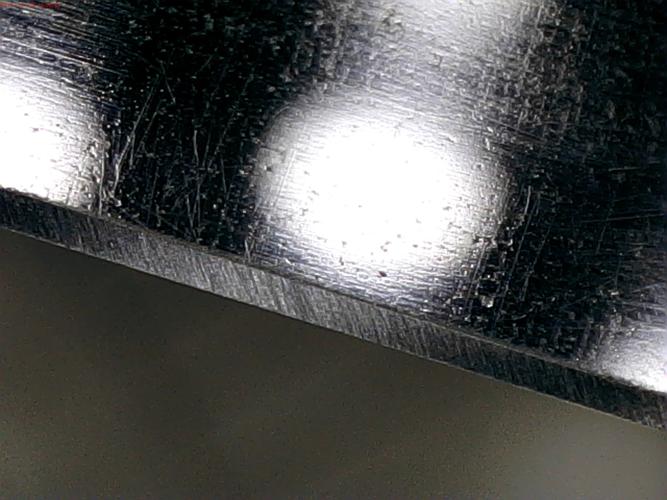
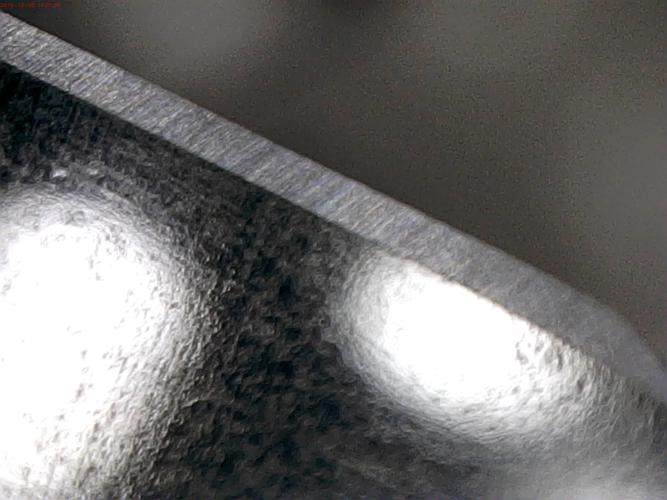
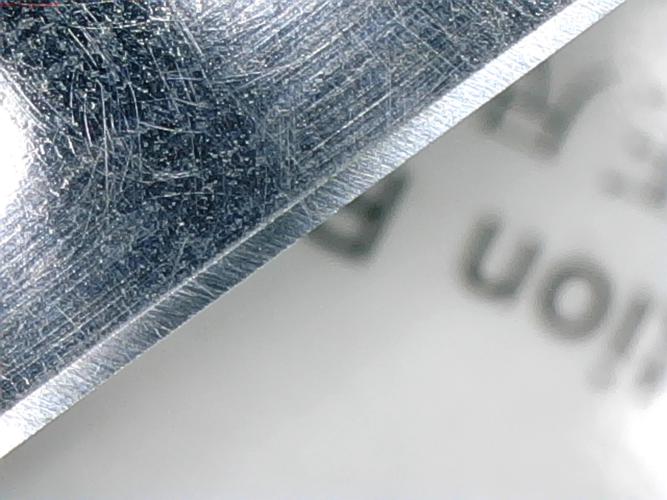
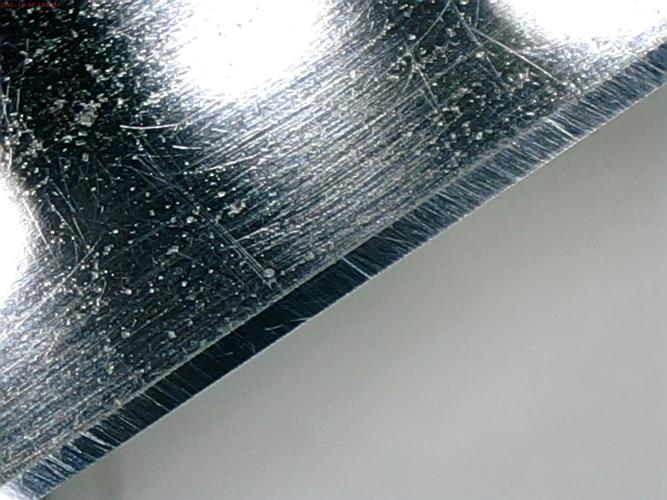
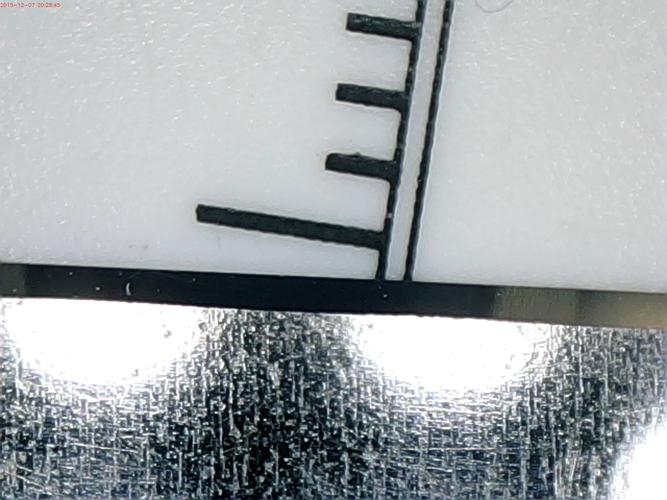
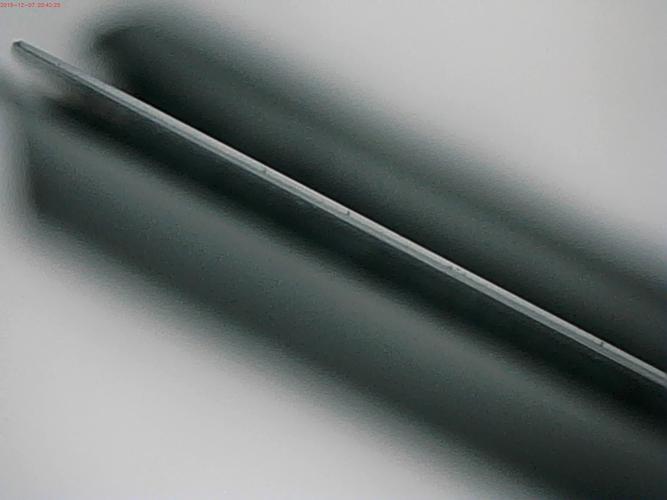
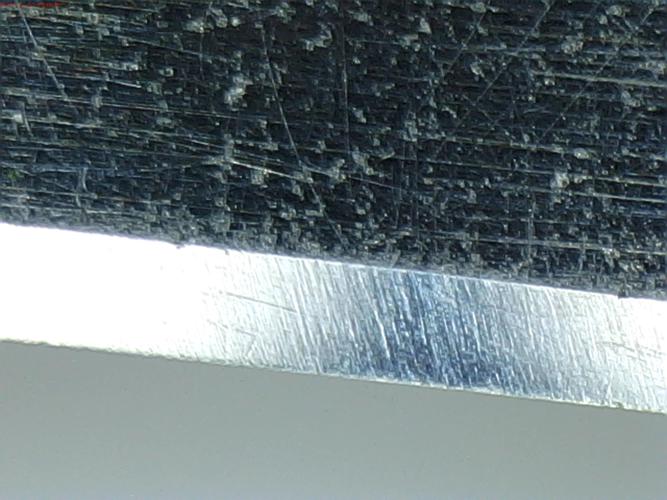
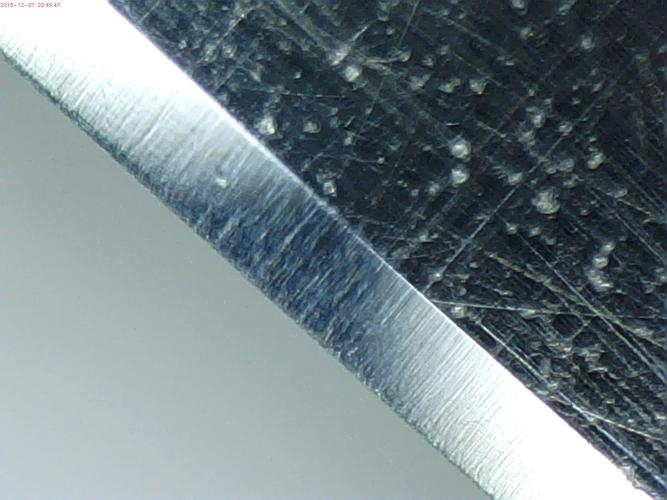
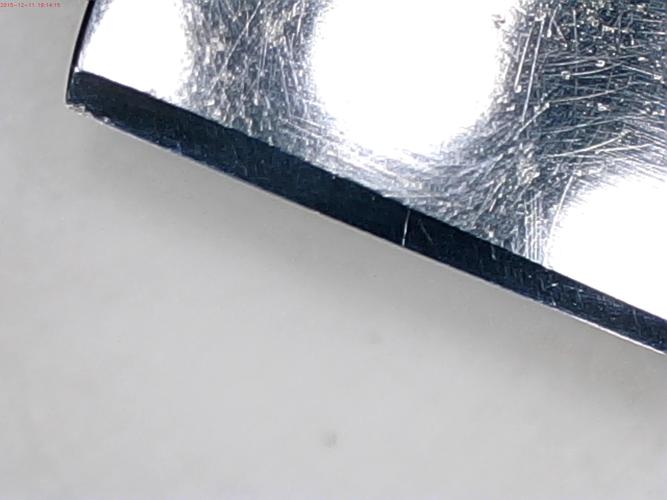
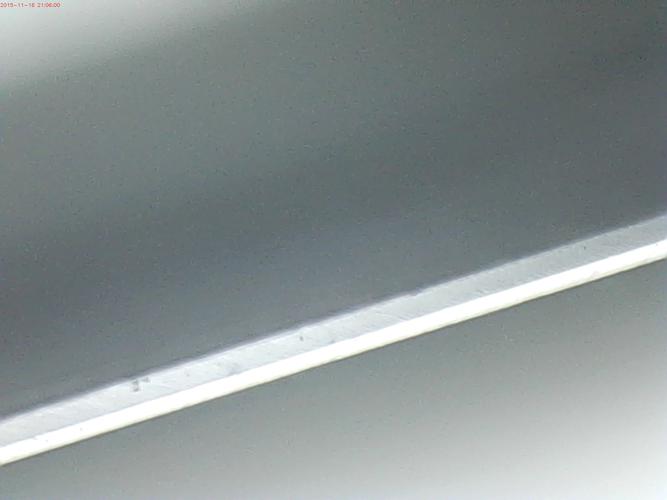
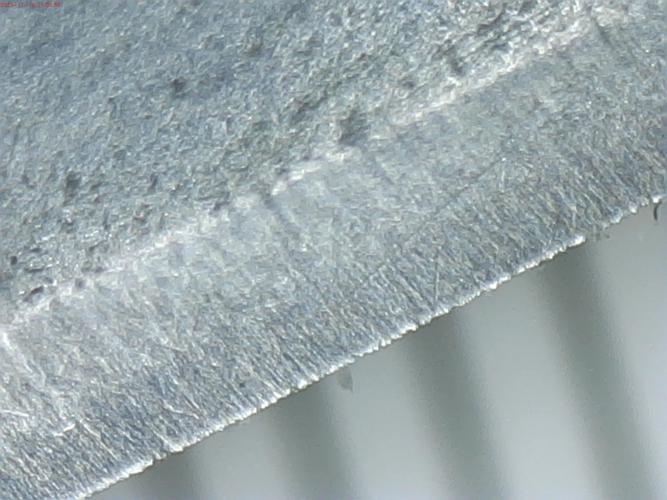
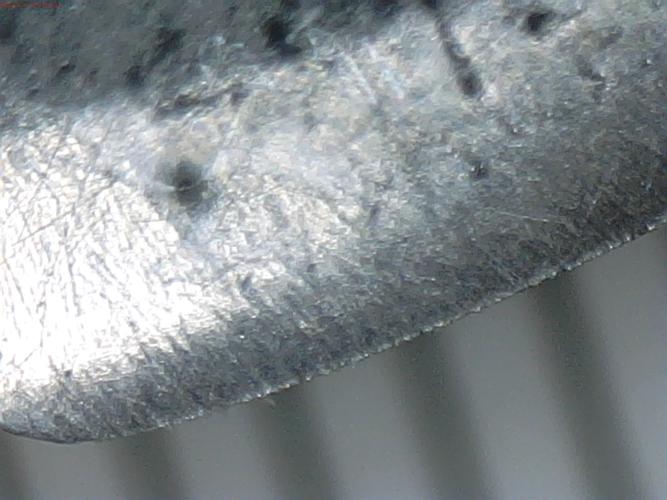
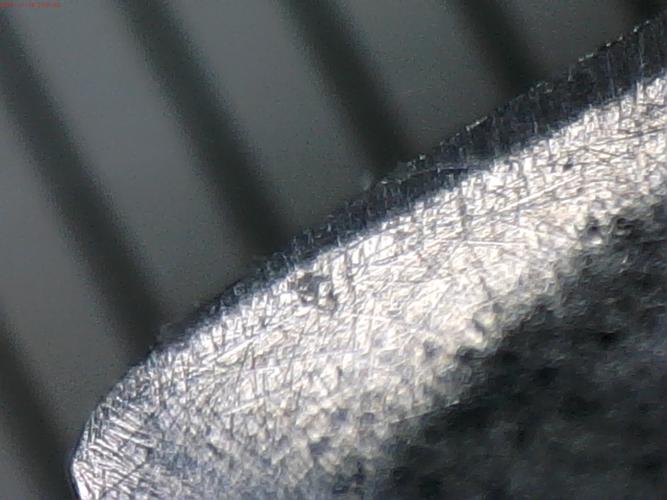
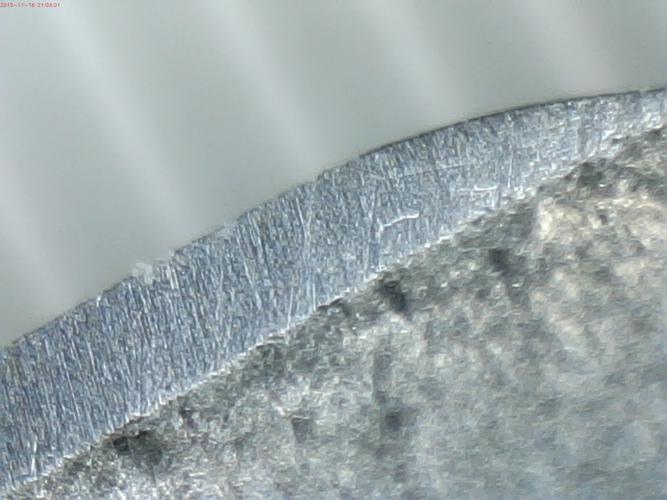
Here are pictures of the toe (the side where it gets narrower and then widens back out), the bevel (some shadows, I don't see a double bevel anywhere), the edge from toe to heel.
Attachment 220715Attachment 220716Attachment 220717Attachment 220718Attachment 220719Attachment 220720
Bevel width:
From the edge, on the left there is a gradual increase in width from toe to heel. On the right side, it is pretty much straight, except around 2.5cm from the toe, where it is a bit narrower. In general, it is about 1mm wide.
Bevel:
It looks very good at the heel, and I can feel the edge being sharp on my thumb. About a third of the way though, there are some shiny spots and then in the middle and toward the toe, there are regions that are shiny. It it clearly not that sharp on a TPT in that area.
Honing observations:
Could be me (or lack of experience), but is seems like it moves smoother when honing on the right side, going away from my body. It seems to pull a bit, when I go towards me. Maybe it's just me, or my technique.
Arm Hair:
It cuts hairs near the skin, at the heel region, but not in the middle or toe (confirming the TPT results).
Suggestions on how to bring together the bevel on the middle and toe regions?
Do I go back to circles?
Do I apply pressure in certain regions?
Thanks!
Yup, you are getting close, keep doing circles and make sure your tape is good. If the tape gets squishy you can get a double bevel. Even if you do not a big deal it will flatten out.
Stay on the circles until the bevels meet completely, they are looking good and flat and you are close to setting the bevels.
Once they meet fully, no shiny spots, then do heel forward X laps to smooth out and flatten the bevels and get all the stria going in one direction, no diagonal stria. Once that is accomplished then you can move up in grit.
From a full breadknife it can take a lot of laps to cut new bevels, some pressure and or slurry can help. The bevels will smooth out, feel smooth on the stone, as they flatten, that is one of the indications that the bevels are flat, smoothness, if it feel rough it is usually because the bevels are not yet flat, completely.
Keep at it you are almost there, once the bevel is fully set, it is just polishing and will go much quicker.
You can add a little pressure on the heel and toe, doing circles, X laps will straighten the bevel out.
Ok I was getting nowhere fast with my first hone, but then I started another razor in better shape to start with to try out there. WOW things went better. I got the bevel set without any problems and everything was moving along fine but then it kinda stopped. I dont seem to be making any improvement between my 5k and my 8k Naniwa. I am not sure if I need to work more on the 5k or 8k or maybe go back to the 1k and start again? BTW my progression is 1k/3k/5k/8k/12.
As for the original straight I was working on I can now tell from the 2nd that I was not nearly close enough to setting the bevel and will have to work more on the 1k.
Learning, learning, learning its a never ending process :)
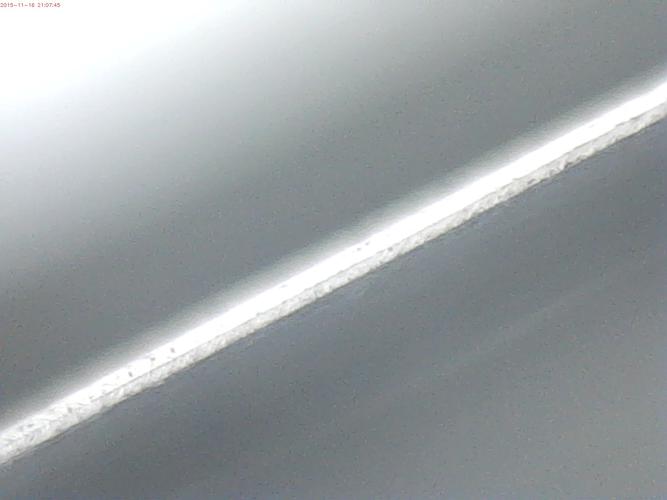
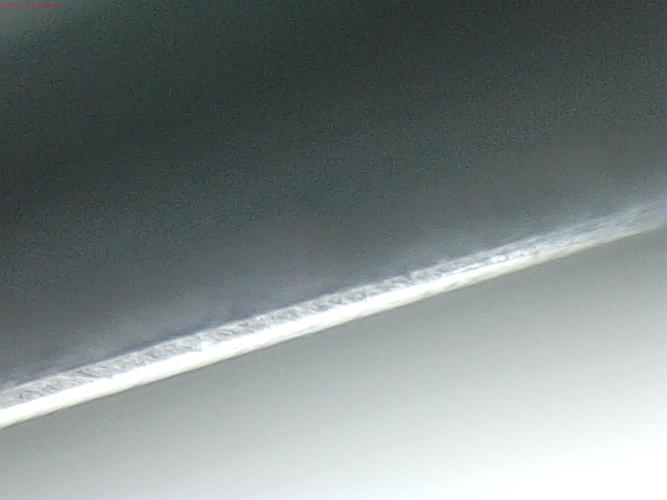
Super progress tonight, IMHO! Here are shots of the edge, and the sides of the bevel and lower magnification:
Attachment 220807Attachment 220808Attachment 220809Attachment 220810Attachment 220811Attachment 220812Attachment 220813Attachment 220814Attachment 220815Attachment 220816
I'm able to shave arm hair the whole length, except at the very toe. The bevel on the left side (from the edge side) is small, compared to the rest (it looks fine on the right side). I don't see any shiny spots on the edge, but I'm having a hard time seeing a well formed bevel, again right at the very end by the toe. Maybe the last 6mm or so.
I'll do some X strokes tonight to try to straighten out the stria.
Any suggestions about the very tip of the toe? Should I apply pressure on the one side?
Regards,
PCM
When you are honing with circles, it is not uncommon, especially when learning, for the pressure to alternate on the bevel and for it to be a bit uneven. That will straighten out with one directional X strokes, but the spines thickness, straightness and hone wear will dictate, the width and evenness of the bevel. On a vintage razor and especially an abused one the bevels are rarely even but will probably not affect the ability to shave or hold an edge.
Now, just do heel forward X strokes to remove all the horizontal stria, it should not take too many laps to get an even stria on the bevel, then move to your next stone and remove the 1k stria.
Good progress, you are almost there. This is the hardest part for most new honers to achieve, you just have to put in the time and watch the edge. If there is any doubt, joint it and re-set it, it’s downhill from here…
I did a pile of X strokes, with lighter and lighter pressure, and more water as I went along. I checked the each side, and as far as I can tell, all the stria are going the same way (maybe a few at a slightly different direction, but nothing parallel or near it). Low and a few high magnification shots...
Attachment 220817Attachment 220818Attachment 220819Attachment 220820
Check the photos after the X stroke and let me know what you think. When I go up to the 4K/8K/12K do I stick with 2 layers of tape?Quote:
Originally Posted by Euclid440
Thanks for all the useful advice! You've been a lifesaver!
You can, or you can drop down to one layer and do some more laps on the 1k to re set the angle.
I would just stick to 2 layers as I recall the spine was a bit worn and you have a nice size bevel now. Do some more laps on the 1k to smooth out the stria as much as possible. The more you do now will save you time and frustration in the higher grit stones or having to come back to the 1K. Get it as even as possible.
If you move up and still see deep stria, just go back to the 1k and smoot it out. A lot of times you will see deep stria on the higher grits once the bevel starts to polish out.
Great advice. I'll stick with 2 layers, hone a bit more with the 1K trying to get rid of the deep stria, and then go to the 4K.Quote:
Originally Posted by Euclid440
This is coming along nicely, IMHO.
Ok. Did more with 1K X strokes and two layers of tape - very light touch - one hand. Looks really nice to me:
Attachment 220875Attachment 220876Attachment 220877Attachment 220878Attachment 220879Attachment 220880Attachment 220881
Looks good move up and remove the 1k stria. Start with new tape.
Very nice progress! I lived in the Lebanon, NH and WRJ area up until 3 years ago, I would have been happy to work with you in person. However, you have been getting excellent mentoring here from Euclid440 and seem to be learning quickly - keep up the good work!
I did a bunch of X strokes on the 4K:
Attachment 220941Attachment 220942Attachment 220943
Then, did some more on 4K and then 8K:
Attachment 220944Attachment 220945Attachment 220946Attachment 220947
And, finally did a pyramid of 15/15, 10/10, 5/5, 3/3, 1/3, 1/5 (just for grins):
Attachment 220948Attachment 220949Attachment 220950Attachment 220951
I can't tell the grit corresponding to the depth of the stria in these shot. Should I drop back to the 1K some, do more on the 4K, or just give it a test shave and see? I also have 12K SS that I can use.
No don’t drop back to 1k now. The edge looks a little rough and you have some deep stria, perhaps from the pyramid.
As you move up the progression the goal, after the bevel is set, is to polish the bevel and straighten the edge. Going backwards just adds deep stria and we are trying to polish out all the deep stria.
At this point I am more concerned with the edge in last photo at the toe.
I would reset the bevel on the 4k, (it should only take 20-40 laps) get a nice even stria pattern going with a heel forward X stroke, you should end up with angular stria about 45 degrees. Look straight down on the edge and make sure your bevels are meeting completely. If not do more laps.
When you move up to 8K do you final 10 laps at 90 degree to the edge. any angular stria will be 4k stria and you will just have to do more 8k laps until all the angular (4K) stria is gone.
You can finish on the 12k but make sure all the other stria is gone and the bevels are still meeting. Keep alternating the final laps so you can tell if you are removing the previous stria. The 8k should do the bulk of the polishing and the edge will become noticeably straighter after the 8K.
Did 4K X strokes at a 45 degree angle, till it seemed to get better, and then 8K at a 45, and finally 20 strokes with it at a 90 degree angle.
Here's what it looks like at the lower resolution:
Attachment 221093Attachment 221094Attachment 221095Attachment 221096Attachment 221097Attachment 221098Attachment 221099Attachment 221100
There are few deeper stria, but not very many. Here is the edge:
Attachment 221102Attachment 221103Attachment 221104Attachment 221105
Here are some at maximum resolution, the bevel is about 1mm wide:
Attachment 221106Attachment 221107Attachment 221108
Looks good, move up to the 12k. Use lite pressure doing X laps. The toe on the right side I believe, (photo 5) looks like it could use more attention, more laps or a finger of pressure when honing that side. Just put your index finger of one hand on the toe to add just a bit of pressure, weight of the finger. Use the 12K.
A 12k Super Stone is very versatile and can cut quickly, use lite pressure and do sets of 20, we are looking for a high polished bevel and a straight chip free edge.
Slide a QTip along the edge to check for microchips, the slightest chip will snag the cotton. The 12 K will remove microchip.
If after 40 laps you are good, strop on leather and test shave.
I'll try the 12k as you suggest Euclid440. For the Q-tip, are you saying to run it along the side of the edge on each side?
BTW, I was anxious to try it out, so this morning, I had stropped it with the webbed stop that has CR-Ox, then with linen, and finally with leather, and did a test shave. It was a very close shave, no pulling (with my normal 2 day growth - a tougher test would be to wait an extra day, but I usually shave every other day), and very little irritation. I use my time tested method of assessing irritation via the application on alum block. If I have irritation, it stings.
In full disclosure, embarrassingly, I did get one cut, on the cheek never the less. Something I haven't done in months (I've been straight razor shaving for almost a year, and have only done this about 3 times). Not a little nick, mind you, but a good 1/2-5/8" cut. I don't think it was the blade, but instead, technique. I think I had too high of an angle, and was using my non-dominant hand on a second pass that was XTG/ATG in that area. Had a odd orientation, and was try to adjust. 5 am in the morning...oh well. Gotta have some battle scars. :)
Very pleased, even at this level of honing, though. It does need to have work done on the toe, and I'll do the 12K with pressure on the one side.
I'm a happy camper! Thanks so much on the guidance!
Good work. Yes an easy, nondestructive way to test an edge for micro-chips is to lightly run a Q-tip along the edge from heel to toe. Any chip will snag the cotton.
A 12k super stone will hone out any microchips with a few laps.
If the toe need a bit more work some X strokes, where you add just a bit of torque into and towards the toe will add just an extra bit of pressure on the toe.
Good work, see it was easy piece of cake, anybody can do it…
Did 40 X strokes, with light pressure on the toe, when honing toward me (the left side on stone, as seen when looking at the edge, and where there was a smaller bevel). I checked with the q-tip and didn't notice any pulling. Here are high rez shots of the toe on each side, and along points of the edge. I can see some deeper stria, in a few places (included them in the shot), but for the most part it is very smooth.
Attachment 221328Attachment 221329Attachment 221330Attachment 221331Attachment 221332Attachment 221333Attachment 221334Attachment 221335
Thoughts/suggestions?
Suggestions for future honing to mitigate the deeper stria?
If ready for testing, should I stop with Cr-Ox that I have on webbed strop and then go to linen and leather? # of passes on Cr-OX?
Thanks so much for the help on this!
More time on the 12k will get all that out and the toe could use a bit more work. Ink the toe and see if you need more pressure, if so just the weight of one finger on the opposite side will get it on the 12k. The toe looks like 4k stria.
So if you want a perfect bevel, you have to max out each stone, removing the previous stria. New guys are always in a rush to move up and just a few extra laps will make a big difference. Or you can just spend more time on a finisher, the 8k Norton is a good stone for cleaning up a bevel and getting any stria that was missed.
Or get some .50um and .125um CBN and polish the bevel, it will also give you a smooth shaving edge and a great touch up pasted strop.
That looks like a nice edge, I would strop on leather and test shave it. If you want more smoothness, do 10-20 laps on Chrome Oxide, make sure it is razor quality Chrome Oxide.
I did about 200 X strokes with pressure on the toe, for the side that has the narrow bevel. Overall, it does seem a little better, but there are still some stria visible, more toward the toe and heel. The center is very shiny and no deeper stria:Quote:
Originally Posted by Euclid440
Attachment 221385Attachment 221386Attachment 221387Attachment 221388Attachment 221389Attachment 221390Attachment 221391Attachment 221392Attachment 221393Attachment 221394Attachment 221395
Thanks for the advice. Seems like I should speed longer at each level, to remove the stria faster. Will remember that for when I re-hone the Spike razor.
For this one, I have Cr-Ox that I got from Glen here on the forum (it was for a bench strop, but I put it on the webbed strop I have). I'll strop on that. Should I go to linen and then leather, or just leather? I can then test shave and see how it works. It was nice from the previous attempt, so it'll be good to see how it improved. I'll try not to cut myself again either! :nono:
Will let you know how it goes...
In this case you don’t need linen, just leather. SRD Chrome Oxide is great paste, if you paste a new strop just draw 3in X’s on it about ¼ to ½ in wide, that is plenty of paste.
The toe looks like you are not honing all the way to the edge on the one side. You either need a little more pressure on the toe or a little torque on an X stroke. Ink will tell you when you are making progress reaching the edge.
You can also do X strokes with pressure on the toe, just make sure you balance your strokes by doing some on the other side and long strokes to blend the edge and not create a flat spot on the toe.
The edge looks real good and should shave well.
Linen is best for cleaning and re aligning the edge, (like stropping between stones when honing), leather is for final polish.
I did forget to try inking the edge, on this last honing. I'll give that a shot, just to see the coverage. May need to try a modified stroke, as you are mentioning.
I stropped and shaved this morning and it was great! Very close, no irritation, and not slashes to my face. :)
I'm very please at how this $20 blade was resurrected into a shavable razor.
Thanks so much for all the help Euclid440!
Great read!
You guys explained ALOT of questions that many of us have with regard to bevel set, stria, etc...
Thanks for taking the time to share!
Best,
-K
Yea, great photos of every step by PCM, make the thread. Stopping to take photos with a scope is such a hassle and a lot of work.
I'll have to sit down and take a good look at this thread later. Thanks for all the work you guys have put into this, pcm especially for the photographs. Looks like there's a lot to learn here!
You're welcome. I'm learning a lot, and getting great help from Euclid440 and others. I'm glad this is helping others out as well. BTW, I'm working on another razor, and have posted here... http://straightrazorpalace.com/honin...ochipping.htmlQuote:
Originally Posted by Marshal
I've also started a follow on to this thread, due to some issues I'm having (might just be my technique)... http://straightrazorpalace.com/honin...have-live.html
Having read this thread makes me think razor honers are veritable magicians. Stuff seems overwhelming.
Quote:
Originally Posted by MrZ
It certainly can seem that way, but the concept is very simple.
If you have a decent bevel, or a good edge without chipping or other defects, honing a razor is relatively very easy. Even more so if you use synthetics.
Having chips and other difficulties will definitely give problems and that's where the difficulty lies.
There are different aspects of honing, or categories. There is the touch up, where you simply refine an already made bevel and tune the edge up a little. There is a full hone, where a bevel is reset, but one had already existed. This is done sometimes because of minor issue like the edge has been mildly damage from a light faucet kiss or a rolled edge, or a friend checking out you razor and killing the edge on their thumb nail.
There is also chip removal, where again a bevel exists but the edge needs to be honed back a bit to remove larger chips.
Restoration honing is the big one. You are essentially creating the entire bevel from scratch where no reminants of a bevel exists. This one may also include damage anlong the edge that is visible, or invisible damage where the steel has suffered sub surface damage and chips show up sort of all of the sudden.
This is all to say without any geometry issue being thrown in just for fun. The principles of honing are simple. As long as you are honing a solid blade and working in the first two categories all should be easy to deal with.
Magicians? Nah. Just patient and diligent. Practice makes perfect, and once you have a feel for the pressure/torque involved it can be fairly easy to get a good shaving edge on a blade. Having a site like this that has an excellent catalogue of how-to threads and many a knowledgeable member to learn from makes it that much easier to get results.Quote:
Originally Posted by MrZ
It's been well worth the cost of hones and time I've put into learning their ins and outs. At least from my perspective. YMMV.
Quote:
Originally Posted by MrZ
Honing is one of those things that looks deceptively simple and it is once you have gained enough experience through practice. It is getting to that point that can get frustrating. It is not something that you can do by rote either, there is a lot of art to it. Once you learn a few things it can be good fun to do.
Bob
Bob is correct. Honing can be fun.
One problem on the learning curve is few razors are alike. Learning how to address the vagaries of blade manufacturers and previous often inexpert honings makes the curve seem insurmountable and terribly difficult. Practice is the best way to get to that perfect edge.
Attending meets and spending time with experienced honers is the best way to learn.
Nothing to do with magic and everything to do with technique! You don't need a whole bunch of hones either. That may come later as a personal choice. Only need one stone to set the bevel. If you can't get the bevel set, the other stones are useless to you. Again I wish you all the best!Quote:
Originally Posted by Marshal
what do you use to take these pictures? It shows a lot of good detail. I would be interested in providing this kind of detail when I ask a question and feel I need to show a picture of my razorQuote:
Originally Posted by pcm
Id guess its a digital microscope. I have a USB microscope i plug into the co.puter once in a while. Pics are not real great but close enough to show what your talking about. You can find them on amazon
USB microscope I got from Amazon a few years ago. Maybe $60 or so. Brand was DBPOWER, some cheap Chinese microscope with stand.Quote:
Originally Posted by mitmitzoom
Attachment 295131
Rezdog pointed me toward this thread.
Seeing the edge pics of the bevel in this thread was useful, especially in regard to how as the bevel improved the shiny spots went away.
Since the pics in this thread came from a microscope, I was wondering if I would be able to check the edge in the same way with a loupe? I had a decent lighted loupe that I seem to have misplaced. I just picked up a handheld microscope but I can't seem to get the hang of it, so I'm thinking of trying another loupe.
And, I'll in turn point you to this thread, sonny. https://straightrazorpalace.com/honi...pe-honing.htmlQuote:
Originally Posted by sonnythehooligan
Pay attention to the discussion points on optical quality versus claimed magnification (e.g., cheap-o eBay $5 30x LED loupes). I recently picked up a BeloMo 10x loupe to replace my cheap-o LED one, the optical quality of which was seriously bothering my old eyes.
The nerd in me would love a USB microscope to play with...but certainly not for the business of honing my razors. A good loupe is all you need.