
Results 1 to 7 of 7
 12Likes

Thread: 3rd knife progress
 LinkBack URL
 About LinkBacks
-
05-20-2016, 03:28 AM #1Senior Member


- Join Date
- May 2012
- Location
- Nuriootpa, Australia
- Posts
- 130
Thanked: 27 3rd knife progress
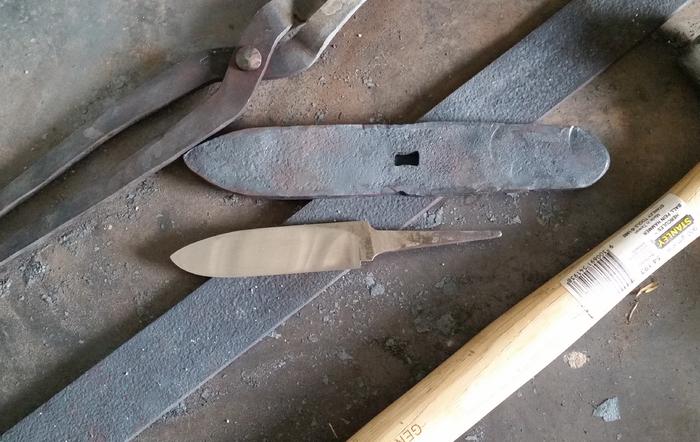
Here is some progress pics of my third knife. Almost finished.....maybe...I think..

The knife is made out of an old file, I think it was an Australian Wiltshire bastard file.
It has a euro oak handle with a brass spacer and heat blacked carbon steel guard.
The first picture that I thought to take of it with some leaf spring steel for future abuse
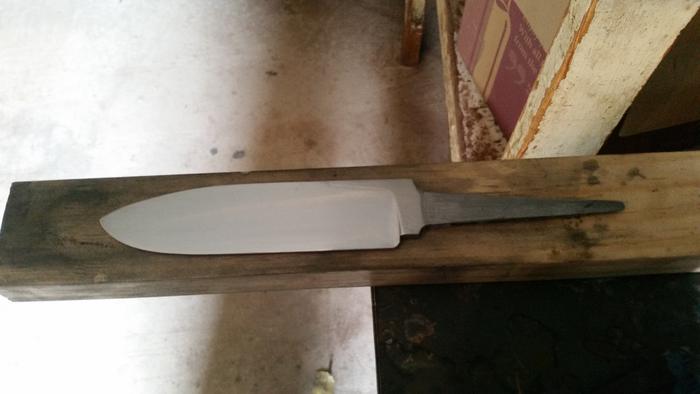
Ready for heat treat.
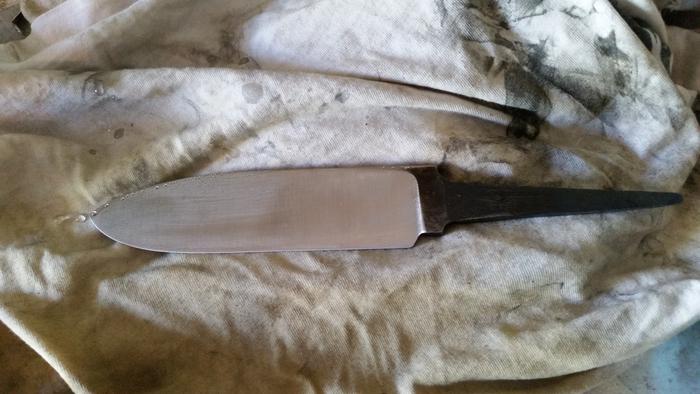
Post heat treat and final grinding.
Dry fit before heat blacking the guard which is carbon steel from the same file.
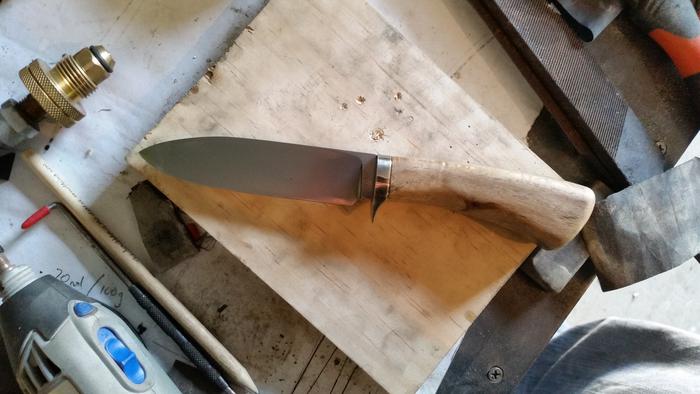
..and finally the final dry fit.
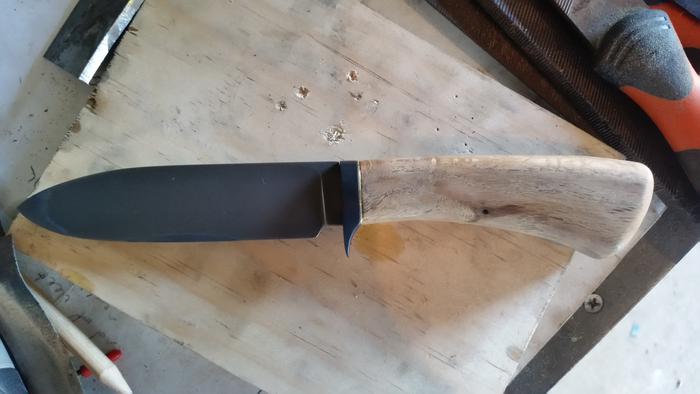
My only concern apart from getting those joins between the brass and oak tighter is the heat treatment on the blade. Its going to be a knife for outside and taking abuse so I wanted to etch the steel to give it some small amount of rust protection and thats the only means I have at hand. However, after the etch I noticed what could be a temper line at the tip and half way down the blade which makes me think that the heat treat wasn't as successful as I first thought after heat treatment and running a file along the edge.
Anyone with more experience than I feel like chiming in and seeing what they think on my assessment?
I'm gonna hold off gluing it all together until I work out whether I have to re-harden it, in which case I'll have to work out how to make up some clay as it's verging on too thin but might still be possible without it.
-
05-20-2016, 03:54 AM #2< Banned User >

- Join Date
- Jul 2015
- Location
- Central Oregon
- Posts
- 789
Thanked: 98
Looks like it will be a great user blade. Far as re-temper I wouldn't if I were you as the edge looked fairly thin, when I harden a blade I leave at least 3/32 on a flat grind like that on file steel which is usually 1095 an Air hardening carbon steel, Great stuff for blades.
Sure is fun to beat on Hot steel, Keep at it, you have some Talent there to develop.
Funny. I have some leaf spring stubbies just like the one you pictured, the 5160 makes Great Hard use choppers etc. Cheers Mate.Naallen12 likes this.
-
05-22-2016, 03:07 AM #3Senior Member

- Join Date
- Dec 2013
- Location
- Texas
- Posts
- 1,568
Thanked: 269
Looks good, nice work on the grind and finish!
Naallen12 likes this.
-
05-22-2016, 07:33 AM #4Senior Member


- Join Date
- Jun 2013
- Location
- Gladstone QLD AUSTRALIA
- Posts
- 3,245
Thanked: 804
Gday mate what was your heat treatment and tempering process used ?
It is definately showing different quenching heats but could be OK still
Most file can be treated similar to W2 steel
Depending on temps reached if say the tip was much hotter say above 850c then you staggered when dipping into the quenchant the rest of the blade could still have been in the 810c area and ok even with the temper line
Was water or oil used to quench at a temp of about 60c
Also as the with the tempering if held in the 220c area the blade could still be in the 56-60 Rockweel hardness
But these are all ifs until your HT process s confirmed
Also how thick is the steel behind the bevel end edge if thick enough you may be able to re quench it just a risk of warping bit better to regrind than have a soft edgeLast edited by Substance; 05-22-2016 at 07:36 AM.
Naallen12 likes this.Saved,
to shave another day.
-
05-22-2016, 09:06 AM #5Senior Member
- Join Date
- May 2012
- Location
- Nuriootpa, Australia
- Posts
- 130
Thanked: 27
From my research, I think it's a safe bet to say that the steel is as you said and W2. for the heat treat I dont have any digital thermometers or anything so I just had to darken my shed as much as possible. I tried to use low heat and gas rich fire in my little home made gas forge by adjusting the air and gas around till I got what I wanted. Got the steel up to an even colour and held it there for a few minutes carefully and then checked to see that it was non-magnetic. Once it was I returned it to the heat to regain the same colour I had previously and then quenched it in some veggie oil. Originally Posted by Substance

For the quech, I just used a low cost veggie oil from the supermarket that I preheated by quenching another piece of metal in before quenching the knife.
While the knife was still warm after the quench I tempered it in the oven at I think was either 200 or 220C for about an hour.
It's about 1/32 behind the edge now so unless I used clay, I dont know if I could re-do the hardening without having anything hankie happening.
-
05-22-2016, 10:36 AM #6Senior Member
- Join Date
- Jun 2013
- Location
- Gladstone QLD AUSTRALIA
- Posts
- 3,245
Thanked: 804
Going by the non magnetic then quenching into warn oil should be ok
The temper line could just be the thin tip was hotter
Bit thin to retemper safely might just have to suck and see
Give it some use and put it in the leasing learnt bucket heySaved,
to shave another day.
-
05-31-2016, 02:12 AM #7Senior Member
- Join Date
- May 2012
- Location
- Nuriootpa, Australia
- Posts
- 130
Thanked: 27
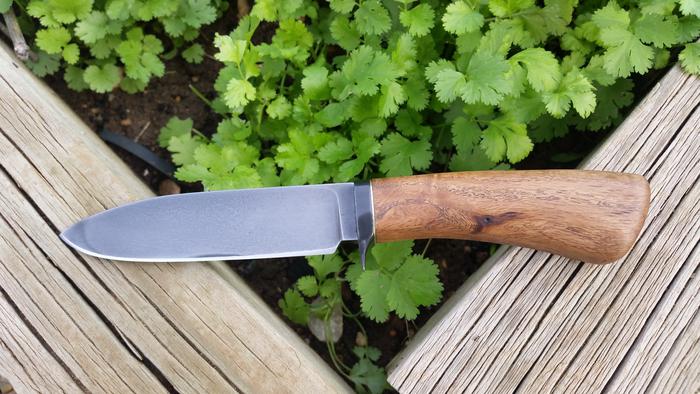
And its finished! made a few small adjustments. its not perfect but hey when is anything! Very happy with how this turned out, especially for my first attempt at this style and difficulty with the handle. It is now sharp enough to shave with and after a little use/abuse in the backyard, seems to hold the edge ok.

-
The Following User Says Thank You to Naallen12 For This Useful Post:
earcutter (05-31-2016)


 Reply With Quote