
Results 1 to 10 of 26
 34Likes
Thread: How to Get that Mirrored Finish
 LinkBack URL
 About LinkBacks
Hybrid View
-
10-11-2014, 04:17 PM #1Junior Member

- Join Date
- Oct 2014
- Location
- Jax Beach
- Posts
- 15
Thanked: 0 How to Get that Mirrored Finish
Hi all, I have a question about what steps are involved to accomplish:
- 100% Mirrored Finish
- Remove Minor Pitting
- Remove Minor Tarnish
I was hoping you could advise me on the right types of grit and sandpaper, any necessary compounds and what process to use. Here's the blade I am trying to work on so you can get an idea:
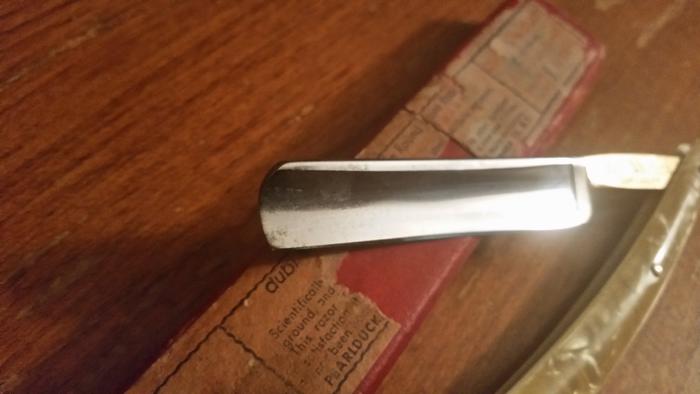
You can see some tarnish on the point and very light pitting on the spite. Just a note, the blade is not frowning, it's just a weird illusion from the picture.
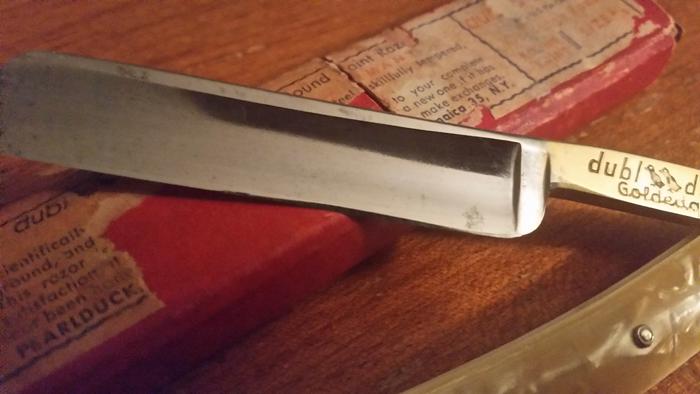
Here you can see some more tarnish near the heel and the pitting on the spine I was talking about.
I hope you guys can help!
-
10-11-2014, 04:21 PM #2Senior Member

- Join Date
- Aug 2008
- Location
- Montreal, Quebec
- Posts
- 1,630
Thanked: 260
Not frowning, really? there looks like there is quite a lot of hone wear in the middle of the spine, as well as a chip on the edge. I would straighten up that edge and remove any chips before doing any polishing.
-
10-11-2014, 04:38 PM #3Senior Member

- Join Date
- Sep 2011
- Location
- stockholm,sweden
- Posts
- 567
Thanked: 100
Agreed. Originally Posted by Badgister

It seems a bit strange to me that this illusion would appear in both of the pictures.sharptonn likes this.
-
10-11-2014, 05:29 PM #4Senior Member


- Join Date
- Feb 2013
- Location
- Haida Gwaii, British Columbia, Canada
- Posts
- 14,455
Thanked: 4830
To begin with I actually bought a small lot of the worst razors ever, on purpose. I knew there was a learning curve and though that four dead razors should be able to teach me a lot. They have, I also continue to do experiments on them. The learning curve is also a lot longer than four razors, but I had to start somewhere. Looking at your razor I can't help but think the guys above have it right. Straighten the edge and set the bevel. It will show you a lot of what you have to deal with. The next step sounds a little counter productive. Dull the edge. It is for safety purposes. There is several really good threads on how to. Both in the library section and again in the workshop forum. It is a lot of information. I'm a slow typer and it would take me days to quote everything in there.
It's not what you know, it's who you take fishing!
-
The Following User Says Thank You to RezDog For This Useful Post:
veritas24 (10-11-2014)
-
10-11-2014, 05:33 PM #5Junior Member
- Join Date
- Oct 2014
- Location
- Jax Beach
- Posts
- 15
Thanked: 0
Thanks for the great advice! I'll definitely check that out as I haven't ever heard about dulling the edge. Originally Posted by RezDog
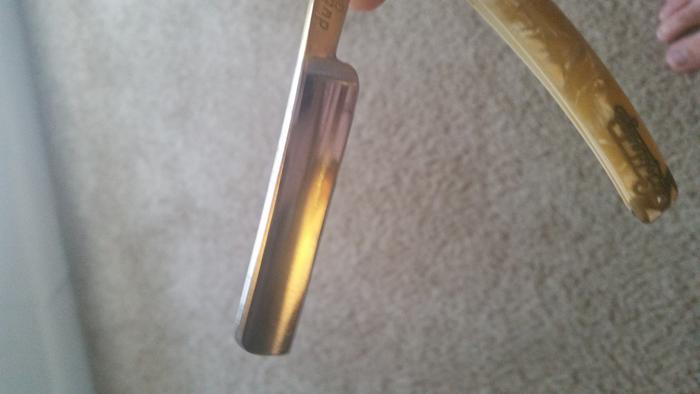
I don't think there's a chip on the blade and here's another picture for reference. Badgister, do you still think it's frowning from this picture?
-
10-11-2014, 05:38 PM #6Senior Member

- Join Date
- Aug 2009
- Location
- New Hampshire
- Posts
- 3,955
Thanked: 581
That's a good razor to practice on...cus it's got a lot going wrong with it...and if you mess it up ..nothing lost. You will learn grasshopper...what is a good razor and what is bad...we have all been there !!!
Martin103 likes this.
-
10-11-2014, 05:41 PM #7Junior Member
- Join Date
- Oct 2014
- Location
- Jax Beach
- Posts
- 15
Thanked: 0
Thanks man! Can you describe some of the problems you see with it? It's hard to know what to fix when you can barely spot the problems. Originally Posted by nessmuck
-
10-11-2014, 05:42 PM #8Moderator


- Join Date
- Jul 2013
- Location
- Forest Grove, Oregon
- Posts
- 5,163
Thanked: 1229
You can check to see if there is a frown yourself. Any flat surface will do, like a barber's hone or any hone. P{lace the razor's edge perpendicular to the surface, hold it up to, or place a strong light behind it. If you can see light coming through the middle section of the blade, then you have a FROWNER. If there is light coming through at the ends of the blade, then you you have a SMILER - a good thing.
RezDog likes this."The sharpening stones from time to time provide officers with gasoline."


 Reply With Quote