
Results 1 to 10 of 10
 50Likes

Thread: Homemade Fabric Strop: Some Lessons Learned
 LinkBack URL
 About LinkBacks
-
02-03-2019, 01:02 AM #1Senior Member

- Join Date
- Dec 2016
- Posts
- 283
Thanked: 61 Homemade Fabric Strop: Some Lessons Learned
Ive recently been experimenting with pastes and while I know I could have gone the balsa or felt route, I got it in my head to make some relatively cheap fabric strops that, if they worked out, might be more of a long-term solution. In total I spent about $20 (Canadian monies) on all the components for enough to make three separate strops, though this of course doesnt include the cost of the pastes themselves.
A big part of the project was just to experiment with different fabrics and modes of assembly. I definitely learned a lot doing this. Obviously you could use whatever materials you have handy and leather is an obvious option, but for this I kept it entirely to various webbings, including the tabs. No doubt a lot of folks out there will know all this already but I wanted to just share a few of my observations and lessons should anyone else want to give this a go some time.
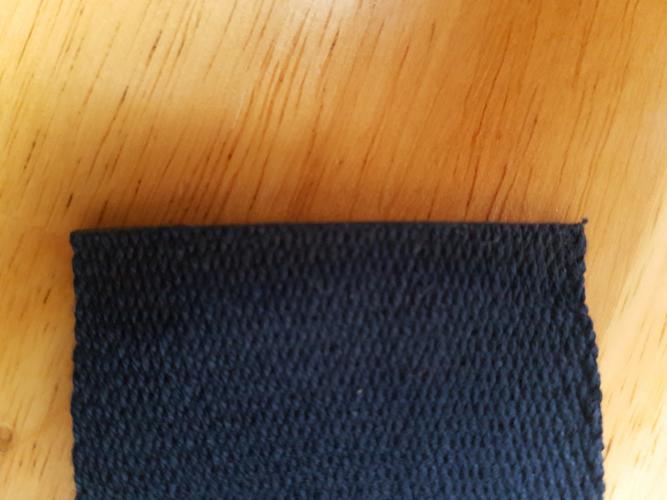
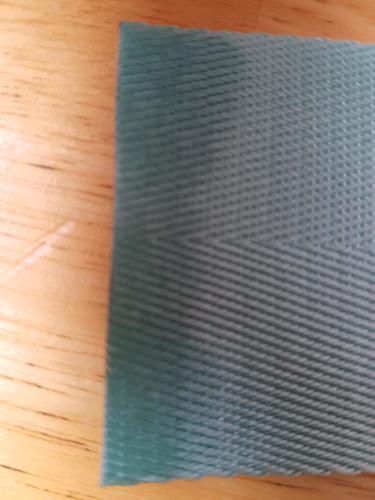
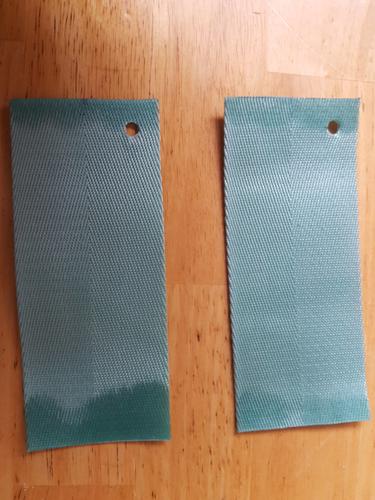
I bought three different fabrics, each 50mm (2) wide and 1 metre (~3) long: one pure cotton webbing (blue), 1 polyester-cotton blend, and 1 nylon; the choice of colour was simply based on what was available to me at the time. Of these, the pure cotton is easily the softest, while the nylon had a distinctly zippy feel to it (think seat belt); the polyester-cotton blend was somewhere in-between. Id be willing to use any of them as a medium for pastes but Id be a bit hesitant to use the nylon webbing just on its own (though I know people do).
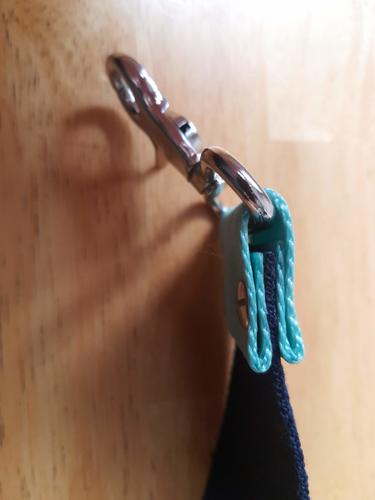
For this project, I used 50cm (~20) of the blue cotton webbing for the stropping material and the green nylon for the tabs. Because the fabric is both woven and cut, I didnt want the ends exposed and so folded the nylon material in on itself so that the cut ends were hidden; I used approximately 12cm (~4.75) of material.
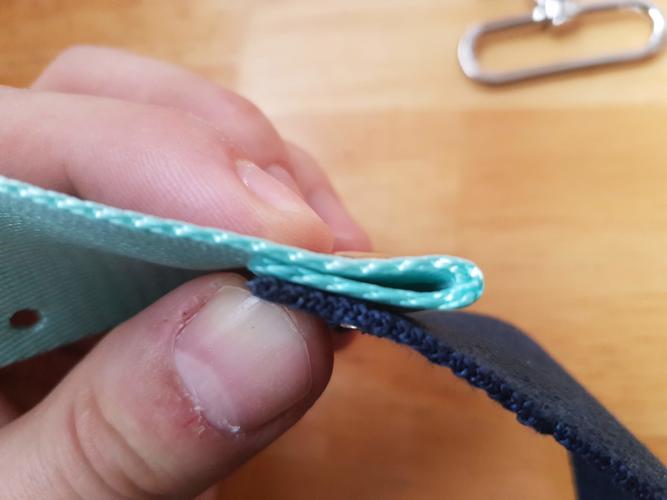
The fabric unravelling is obviously a concern here, more so for the cotton than the nylon. At first I tried to shore things up by applying some superglue to the ends to hold things together, but I later found that even better was to [lesson 1] apply CA glue to the fabric first, let it dry, and only then cut it; this gives a very clean edge that will not unravel.
It does discolour the fabric slightly, but since the ends are tucked under and hidden anyway this wasnt a concern. Importantly, the fabrics respond very differently to CA: nylon takes a bit longer to cure whereas the cotton cured instantaneously and produced an intense exothermic reaction so much so that some smoke was produced and it almost ignited: [lesson 2] be careful when applying CA glue to cotton!
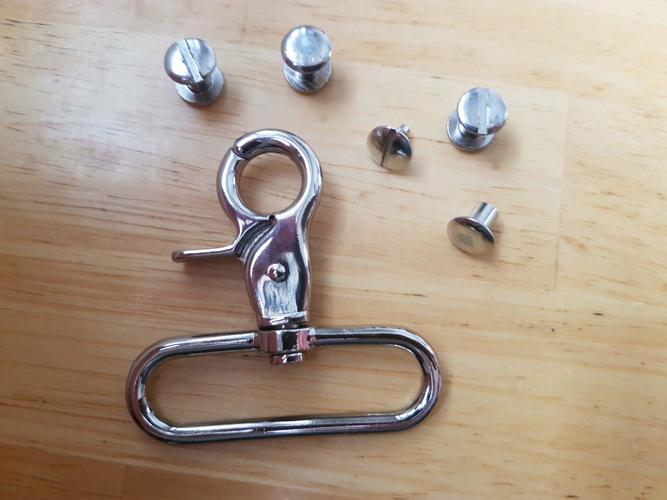
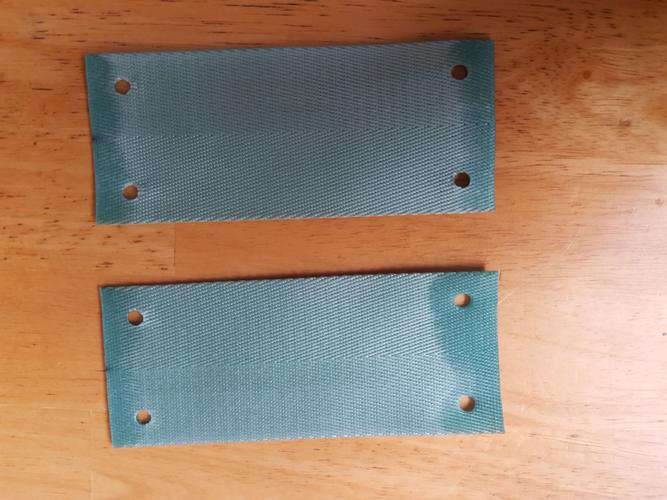
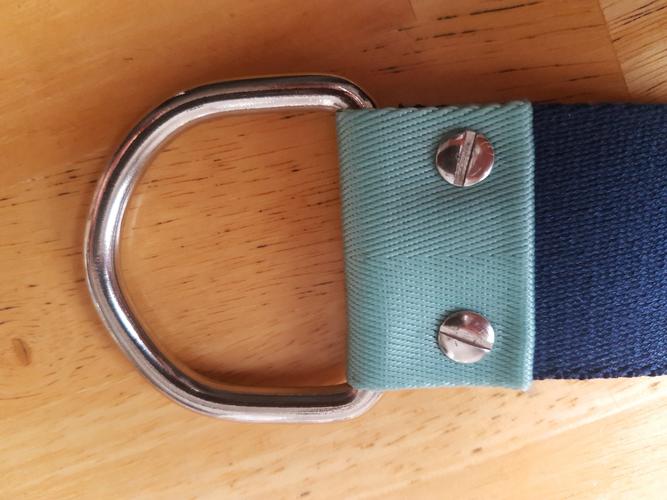
If you dont have any chicago screws handy or arent overly worried about disassembling the components one could easily glue and sew everything together, but I prefer them, both aesthetically and because their modular nature is very practical and something Id want in a high quality strop. Also, I had chicago screws handy that I salvaged from some discarded restaurant menus.
I used a rotating hole punch to make the holes; something that will be obvious to some people I needed to discover for myself: [lesson 3] place a scrap piece of material under the fabric youre punching as it makes for much cleaner holes.
I found that getting all the punched holes aligned was actually one of my bigger issues. It didnt really matter too much where the holes were placed (I inset the centre of the outside hole 1cm from the side edge and 1.5cm from the end, but that was fairly arbitrary), but because of all the folding it did matter that they lined up and for this eye-balling things was entirely insufficient and even using a tape or ruler to make out a location came with a margin of error. [Lesson 4] matching relative hole positions is both important and difficult. I found the best way was to [lesson 5] punch a hole in one corner of one of the tabs first and then use it as a template
Since I had both tabs cut to length already, I kept flipping the one around to ensure the holes in all corners were in the same relative position, then with that one done I used it to complete the other.
Not exactly an engineers dream approach, but it was simple to do and worked really well.
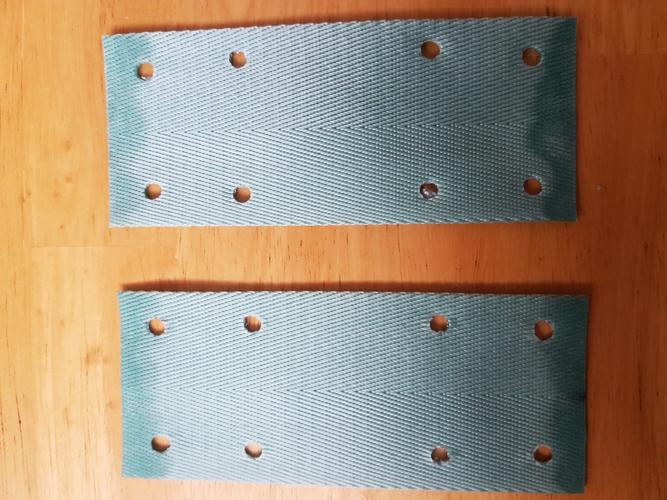
As with the ends of the fabric material, I was a bit concerned unravelling around the punched holes being an issue. In my first attempts I actually applied some CA glue around the punch holes too. Unexpectedly, this greatly increased the width of the fabric as there was no longer any give. When there was no CA around the punched holes I could use chicago screws that were 7mm long, but once they were glued I had to go up to 12mm to get things to fit. In summary, [lesson 6] strengthening the punch holes with glue will add noticeable thickness to the strop tabs. One could use grommets here too, but they add a bit of works and will likewise make it thicker. All in all for this level of stress at least, [lesson 7] the fabric unravelling at the holes is not a huge concern.
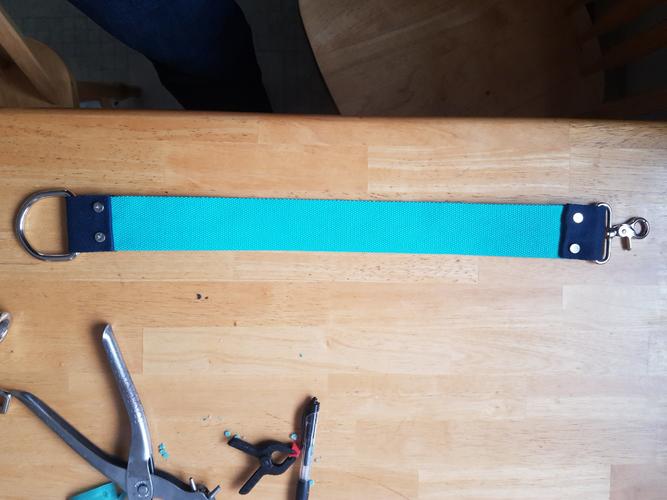
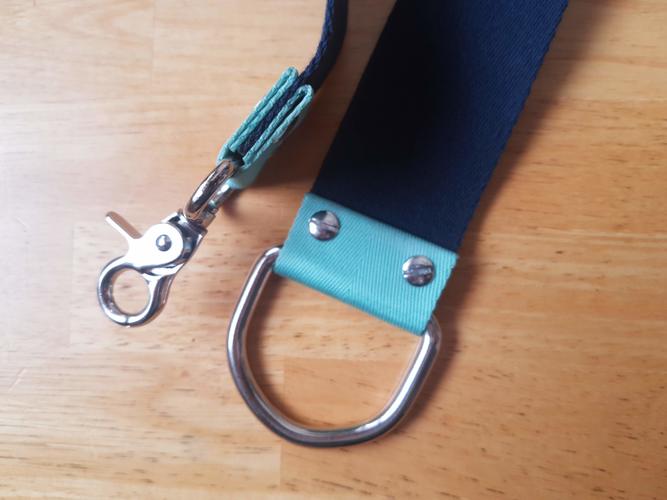
The final result:
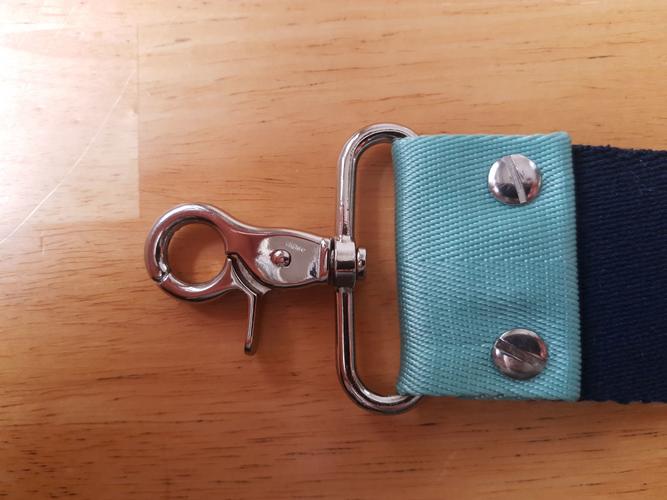

Overall I'm very happy with how things turned out. For comparisons sake, here is another I made in more or less the same manner, this one, though, with the polyester-cotton blend as the stropping material:
I hope this helps someone out there. I'm still learning a lot through this, so any suggestions or critiques are more than welcome!
Paul
-
The Following 8 Users Say Thank You to ppetresen For This Useful Post:
BobH (02-03-2019), Geezer (02-03-2019), jfk742 (02-03-2019), JOB15 (02-04-2019), markbignosekelly (02-03-2019), RayClem (02-03-2019), RezDog (02-03-2019), ScoutHikerDad (02-03-2019)
-
02-03-2019, 01:12 AM #2Skeptical Member


- Join Date
- Nov 2016
- Location
- Colorado Springs
- Posts
- 10,554
Thanked: 2195
Very nice. Now I want a blue strop. See what you started.
It's just Sharpening, right?
Jerry...
-
02-03-2019, 01:25 AM #3~ Life is but a Dream ~

- Join Date
- Dec 2014
- Location
- Oakham, Ma.
- Posts
- 3,844
Thanked: 1218
Really nicely done and documented.
Blue strop....Hmmmm
Pete <:-}"Life is short, Break the Rules. Forgive quickly, Kiss Slowly,
Love truly, Laugh uncontrollably, And never regret ANYTHING
That makes you smile." - Mark Twain
-
02-03-2019, 03:36 AM #4Senior Member


- Join Date
- May 2010
- Location
- Upstate South Carolina
- Posts
- 3,308
Thanked: 987
Which shade of blue will give the finest finish?

-
02-03-2019, 03:58 AM #5Senior Member


- Join Date
- May 2005
- Location
- Nottingham, Maryland
- Posts
- 2,559
Thanked: 382
Really well done! I like the look of these. Keep us posted on the performance as you use them.
The Heirloom Razor Strop Company / The Well Shaved Gentleman
https://heirloomrazorstrop.com/
-
02-03-2019, 08:45 AM #6Senior Member

- Join Date
- Dec 2012
- Location
- Egham, a little town just outside London.
- Posts
- 3,857
- Blog Entries
- 2
Thanked: 1083
Great write up, making your own strop is very rewarding.
-
02-03-2019, 02:26 PM #7Senior Member
- Join Date
- Nov 2016
- Location
- Chicago Suburbs
- Posts
- 1,104
Thanked: 292
It seems like the most difficult part of making the strop was using the cloth to make the buckles for attaching the D-rings. If you make additional strops, you might consider making the buckles out of leather. It might increase your cost slightly, but it would decrease your workload. A 3 1/2" x 9" piece of trim leather sould be sufficient to make two buckles and should cost less than $10 Canadian.
I have a Tony Milller linen strop that has flax linen fabric, but leather buckles. It is quite nice. That one is fabric only, no leather component.
-
02-03-2019, 03:20 PM #8Senior Member

- Join Date
- Oct 2010
- Location
- 50 miles west of randydance
- Posts
- 9,692
Thanked: 1354
Nice looking work and write up.
For the Nylon I have just melted the cuts with a lighter to keep them from unraveling.
You could also glue the pieces together with like a rubber cement before punching the holes and then they will all be lined up easier.
-
02-03-2019, 07:42 PM #9Senior Member
- Join Date
- Dec 2016
- Posts
- 283
Thanked: 61
Thank you everyone for your very kind words! It's funny, I only used the blue cotton because that's what was available, but I really like how it looks. I don't know how much of an issue it'll be, but the darker base could make it more difficult to tell the various pastes apart by colour alone, which really just means taking care to keep things labelled.
Using leather would definitely be an option for something like this and in many ways a lot easier than using the fabric. I had also thought about getting some faux snake leather for the tabs, which can be found in some really fun colours and patterns. If this was planning to go makes scores of strops that is probably what I'd do, but a big part of this was to keep costs down and use what was around as much as possible.
I don't know why I didn't think of gluing the folded tab ends together before punching the holes; Tim, it's a great suggestion and one I wish I'd thought of myself. This morning I gave it a try and made some new tabs using this approach. Previously, when I glued the ends to keep things from unraveling I used thin CA so it would deeply penetrate, but to glue the folds together I used a medium thickness (Gorilla brand) super glue, both to keep the glue closer to the surface and to give me a bit more time to get things arranged. With the folds glued I pressed them in the vice to give it a nice crease and keep things flat. It was definitely much easier and looked a bit cleaner too, so [lesson 8] if you're using fabric tabs, glue the folded ends first and then punch the holes (and so ignore lesson 5 ).
).
-
02-03-2019, 10:26 PM #10Senior Member
- Join Date
- May 2005
- Location
- Nottingham, Maryland
- Posts
- 2,559
Thanked: 382
Now that really dresses it up. Even neater looking caps now.
The Heirloom Razor Strop Company / The Well Shaved Gentleman
https://heirloomrazorstrop.com/


 Reply With Quote