
Results 1 to 10 of 16
 3Likes
Thread: Building home made balsa hones
 LinkBack URL
 About LinkBacks
-
04-09-2012, 10:44 PM #1Senior Member


- Join Date
- Feb 2012
- Location
- Coquitlam, British Columbia Canada
- Posts
- 121
Thanked: 16 Building home made balsa hones
Hi Gents,
I've aquired a piece of balsa material 1/2x3x36" and am looking for advice from anyone more experienced than myself so I can learn from your experiences and perspectives. When I cut it into lengths it seems logical to mount it to a harder substrate to prevent any future deviations from a flat, true profile and then I believe the honing surface should be lapped. I have various sandpapers and a piece of truing glass for the lapping process and will pencil out a grid the same as I would do for my water stones on my DMT 325.
Not really sure what size I'd like. I could leave them 3" wide or cut it in half and have 1 1/2" lengths. I wouldn't go any smaller than 6" in length and 9" would be max as it divides evenly into 36 but the combinations seem endless
Is 600 grit high enough to finish lapping the honing surface of the balsa?
Thanks,
ALast edited by AndrewK; 04-10-2012 at 05:31 AM.
-
04-10-2012, 12:37 AM #2Senior Member

- Join Date
- Sep 2009
- Posts
- 913
Thanked: 83
You'll find most favorable what you like to use. Do you prefer smaller hones and x strokes or wide hones? beauty of that stuff is you can make it any size you want. make a 1"x40" if you really wanted to.
-
04-12-2012, 01:22 PM #3Senior Member
- Join Date
- Feb 2012
- Location
- Coquitlam, British Columbia Canada
- Posts
- 121
Thanked: 16
Alright well although cutting it in half and having one 1-1/2" X 72" hone was awfully tempting Rick, I ended up bucking it into 4-9" lengths and have 11" backers with little 1" feet. The backer I used is some fancy wood that was kickin' around but has this awful paint on it. Hopefully that junk sands off okay as I think the wood will look quite pleasant unfinished. Going to get to fastening this all together today I hope and will see if 600 grit is high enough to lap the honing surface once the dust settles. I'll get some balsa hone pr0n pics up when I'm done. Out of 4 hones, one is going to be #1/4 Amplex diamond paste (0-0.5 micron range) and one is going to be 0.1 micron Cubic Boron Nitride spray and is going to be my coveted 160,000 grit hone. I'm going to have to figure out what to do with the other two. Maybe I'll just have to wait until some finer abrasives come out to load 'em up with!


Last edited by AndrewK; 04-12-2012 at 01:28 PM.
-
04-12-2012, 03:38 PM #450 year str. shaver

- Join Date
- Aug 2008
- Location
- Pothole County, PA
- Posts
- 2,258
- Blog Entries
- 2
Thanked: 522
Cut it into 4 pieces 9 in. long and glue each piece to a ceramic floor tile 3 in. wide. You now have 4 balsa hones. Put whatever pastes that suits you on them. Strop away...........
Jerry
-
The Following User Says Thank You to mrsell63 For This Useful Post:
AndrewK (04-12-2012)
-
04-19-2012, 04:09 AM #5Senior Member
- Join Date
- Feb 2012
- Location
- Coquitlam, British Columbia Canada
- Posts
- 121
Thanked: 16 Progress report
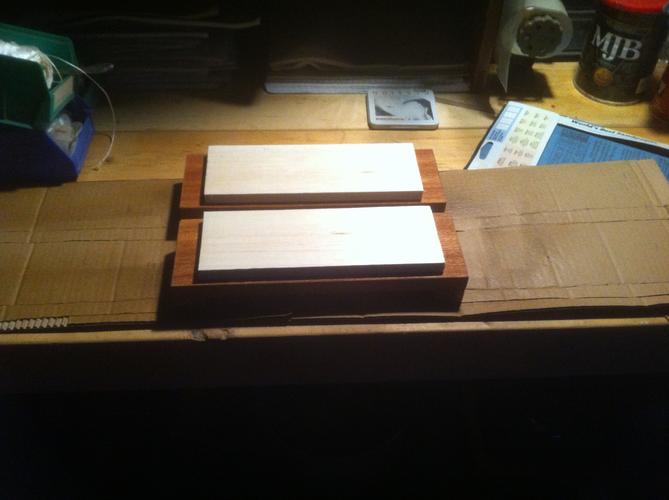
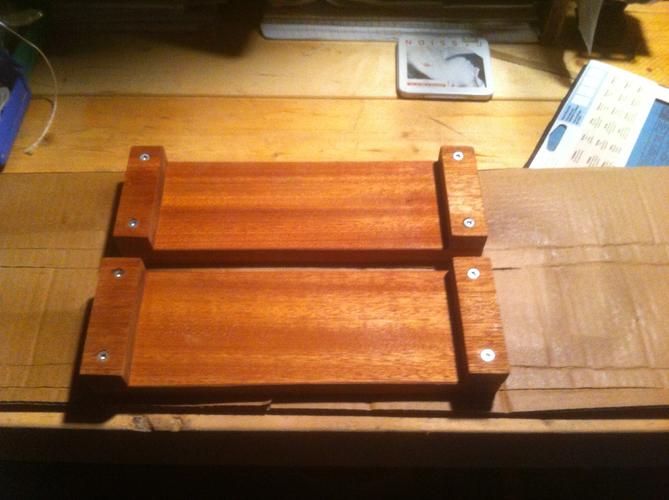
Getting closer. Here is two of them. I need to pick up some glue though on the weekend to stick the honing surface to the stands. The wood is Philippine mahogany.

 Cove5440 likes this.
-
04-28-2012, 08:25 AM #6Senior Member
- Join Date
- Feb 2012
- Location
- Coquitlam, British Columbia Canada
- Posts
- 121
Thanked: 16 2 down, 2 to go
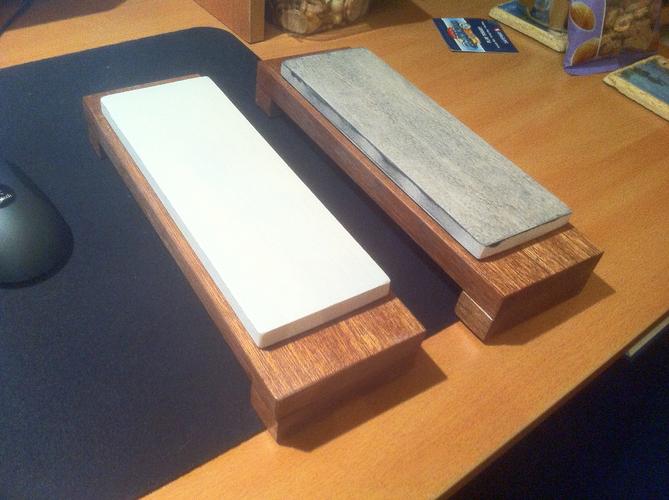
My 2 new babies
 The stropping surface was flattened on 240 and polished on 600 which worked out perfectly. 30k on left and 160k on right.
Last edited by AndrewK; 04-28-2012 at 08:28 AM.
-
04-28-2012, 12:56 PM #7Senior Member

- Join Date
- Jan 2011
- Location
- Roseville,Kali
- Posts
- 10,432
Thanked: 2027
Very nice,should serve you well.
-
The Following User Says Thank You to pixelfixed For This Useful Post:
AndrewK (04-29-2012)
-
04-28-2012, 01:28 PM #8Senior Member

- Join Date
- Jul 2009
- Location
- Brampton, Ontario
- Posts
- 635
Thanked: 121
Those look great!
-
The Following User Says Thank You to Cove5440 For This Useful Post:
AndrewK (04-29-2012)
-
04-28-2012, 05:15 PM #9Senior Member


- Join Date
- Feb 2010
- Location
- California
- Posts
- 4,833
Thanked: 1841
Very well done! I really enjoy my balsa hones.
-
The Following User Says Thank You to lz6 For This Useful Post:
AndrewK (04-29-2012)
-
04-29-2012, 04:39 PM #10Senior Member


- Join Date
- Jan 2010
- Location
- Amsterdam Holland
- Posts
- 2,124
Thanked: 246
Hmmm... this is a great idea so simpel and great at one time! think i make some of those for my own.
By the way...think i steal you stand idea.
thanks for showing this.
-
The Following User Says Thank You to kalerolf For This Useful Post:
AndrewK (04-30-2012)


 Reply With Quote