
Results 1 to 10 of 15
 5Likes
 LinkBack URL
 About LinkBacks
Hybrid View
-
07-07-2015, 01:53 PM #1Senior Member


- Join Date
- Feb 2015
- Location
- Duluth, GA - Atlanta OTP North
- Posts
- 2,546
- Blog Entries
- 1
Thanked: 315 Few Questions Before I Start Making My Strop
I found the strop making guide here on SRP, so I'm good to go in that area.
My Dad visited an Amish community in TN and picked up a few things. He stopped at the saddle shop and bought me piece of leather. I can get a nice size smooth piece out without any bumps or deep wrinkles, it just needs a little cleaning.
It is pretty stiff, but that may be because it is 1/8" thick.
Is there somewhere I can buy a good linen strop by itself?
Is cupping/convexing a problem at 3" wide with 1/8" thick leather? Any reason I should cut it narrower?
Any recommendations for speeding up the 'break in' process?
Should it be treated with anything prior to using?
Any way to improvise a leather burnishing or edging tool??
Thanks
-
07-07-2015, 03:17 PM #2Senior Member

- Join Date
- Apr 2012
- Location
- Diamond Bar, CA
- Posts
- 6,553
Thanked: 3215
Tandy Leather has all you will need. Just be aware, when making a one off strop, it is way cheaper to buy a ready-made strop, especially if you are new to stropping, because you will tear it up.
How you attach the leather strop will help to prevent cupping. Do use Chicago screws, so you can replace the leather. You should be ok.
Nylon fine weave seatbelt type strapping will work well in place of linen and is almost cut proof, great for learning to strop.
I have not found a good source for linen, I use vintage strops, linen can easily be cleaned and often purchased very inexpensively, if the leather side is trashed.
-
07-07-2015, 04:02 PM #3Senior Member
- Join Date
- Feb 2015
- Location
- Duluth, GA - Atlanta OTP North
- Posts
- 2,546
- Blog Entries
- 1
Thanked: 315
Thanks
Yeah, I was looking at Chicago Screws, D rings, and possibly conchos for strop hardware.
I don't want to put much money in this. The leather didn't cost me anything, but it seems like good quality leather.
The linen or nylon material was going to be the most expensive part. Even if it isn't a great razor strop, I'm sure it would be a good knife strop.
I wish I had bought a vintage strop I found at a antique shop once. They probably had over 10 leather strops and many of them had linen sections as well. I was low on funds though and didn't know if it was worth the >$30 at the time to buy a strop just for the linen. I didn't know they were normally so stiff either, so I didn't want to get something I couldn't use. Now that I've done some more research I know that linen is normally pretty rigid.
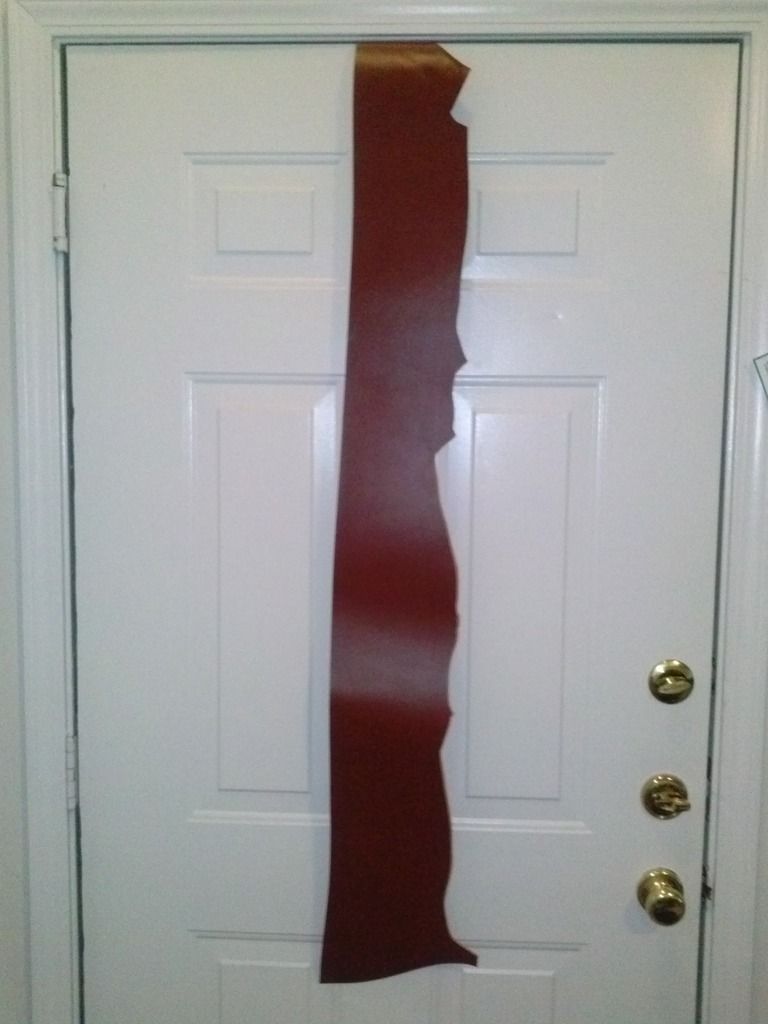
Here is a quick snap of the leather I'll be working with. I could always make a machete strop.
-
07-07-2015, 04:26 PM #4Senior Member
- Join Date
- Apr 2012
- Location
- Diamond Bar, CA
- Posts
- 6,553
Thanked: 3215
Looks nice, you only need about 18 inches for a razor strop, so you could probably get 2 strops from that piece. Cut with a straight edge and sharp utility knife, stropped on Chrome Oxide or Diamonds.
Most linen strops are pasted, but will wash up fine with a soaking in Oxygen cleaner and or Woolite. I use dollar store knock off, Woolite and Ox cleaner, just soak in clean water and rinse well. I don’t re past them and they work well for me.
Your cost add up quickly buying specialty tools, but they do make the job easier, edger, strip cutters, bevelers, ect, past the $50 a decent starter strop will cost.
You can but vintage strops cheap, if you look around and as I said one of the strops are damaged, use leather from one and linen from another. And some have some very cool hardware that cleans up nicely and were made from good Horse Butt leather, expensive to buy new now.
For knives a wide paddle works best for me.
-
07-07-2015, 04:28 PM #5
This outfit used to have linen. Not sure if they still do.
Big Easy ToolsIf you don't care where you are, you are not lost.
-
07-08-2015, 12:34 AM #6Senior Member
- Join Date
- Apr 2012
- Location
- Diamond Bar, CA
- Posts
- 6,553
Thanked: 3215
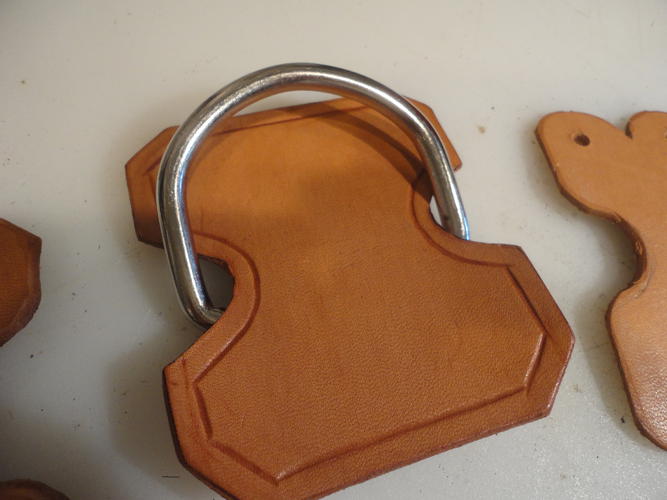
Joshua
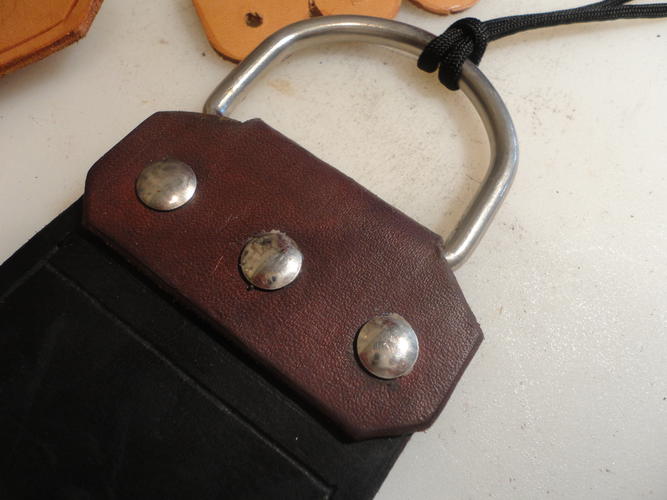
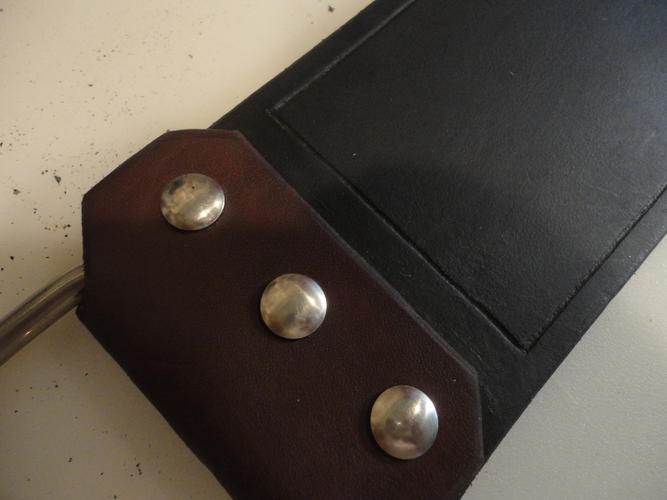
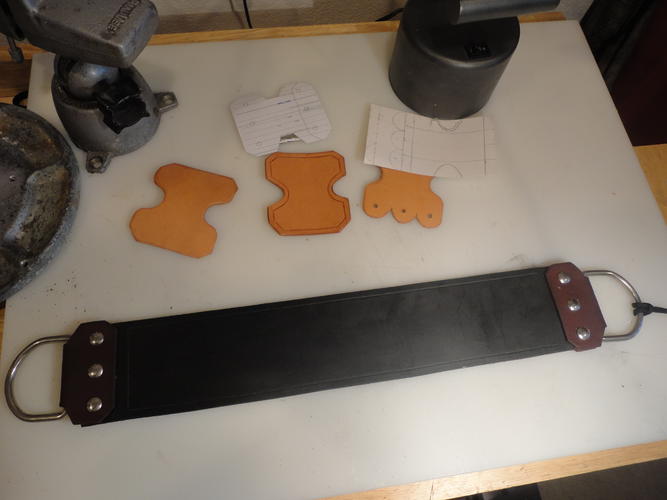
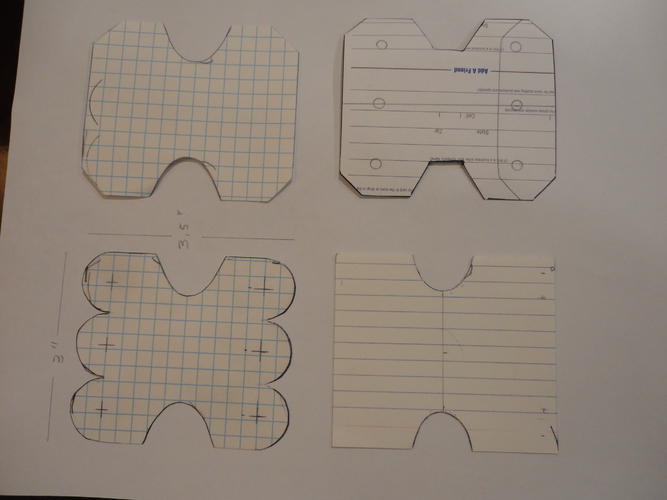
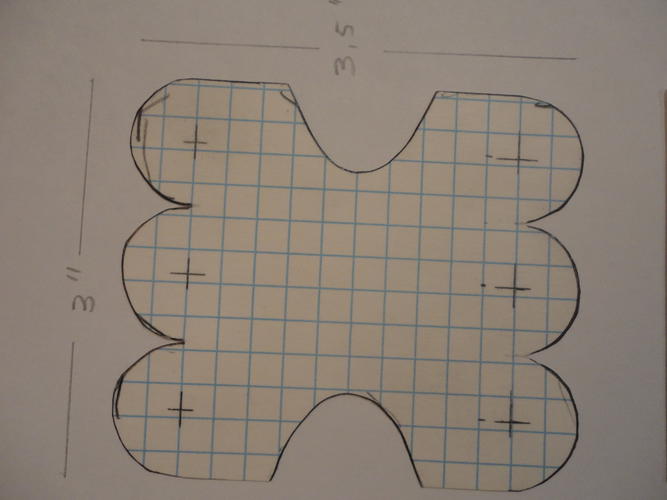
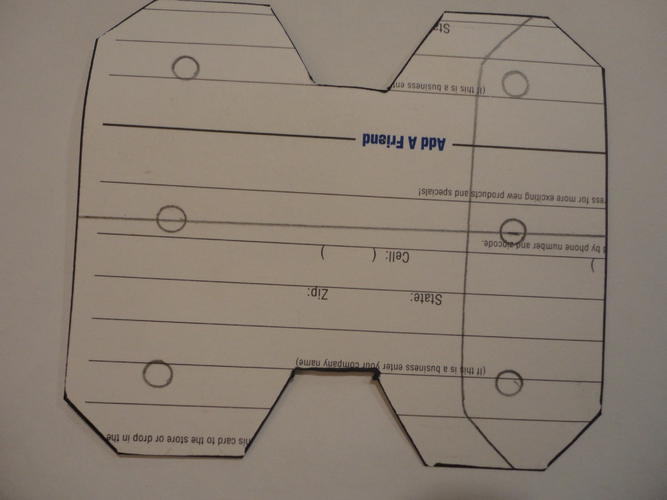
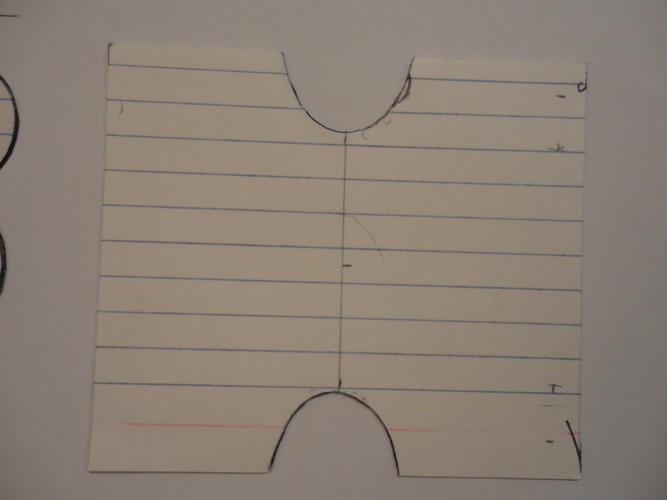
Here is a template you can use to make end caps that will work with a 2 in D ring and 3 in strop with Chicago Screws. All the caps are 3 wide X 3.5 long.
After you cut you cap to shape, wet the cap on both sides and wait until the water soaks in and the leather is soft. Then fold the cap over the D ring. If you dont wet it, you run the risk of cracking the leather at the fold if it is too dry.
Then let the cap dry while folded overnight. You dont have to let it dry with the D ring in place. Punch your holes in one side of the cap. Then, punch the middle hole on the other side. Install the middle Chicago screw for alignment and punch the other 2 holes. Put on the strop and mark and punch your holes in the strop/s, so all the holes line up.
Here are also a couple of variations on the same cap. I prefer to round the middle cut out like the leather ones as opposed to the square cut template, there is less tension on the fold on the cap at the D ring.
The template will give you the dimension and you can modify to your design to suit you. The cap does not need to be thick, you can use the same material as the strop or fabric, canvas would work.


 eddy79 likes this.


 Reply With Quote


