
Results 1 to 10 of 35
 110Likes
Thread: A Strop Project
 LinkBack URL
 About LinkBacks
Hybrid View
-
09-16-2015, 07:17 AM #1Senior Member


- Join Date
- Dec 2010
- Location
- South Florida
- Posts
- 13,530
Thanked: 3530 A Strop Project
Hey Guys,
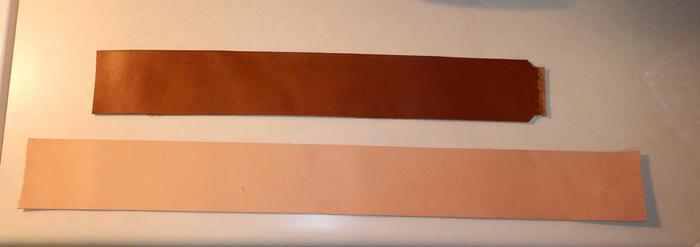
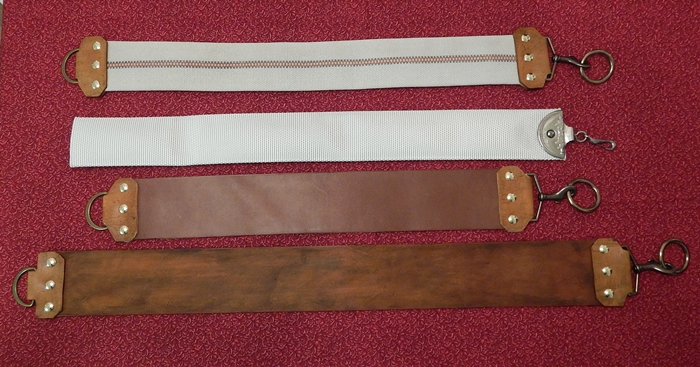
A little over a week ago, Richard(Geezer) sent me some extra material he had laying around. They were two strips of leather, one finished & one raw, some strips of old fire hoses and two strips of cotton webbing. He said do something with them or toss them out. So I decides to play strop maker for the first time.
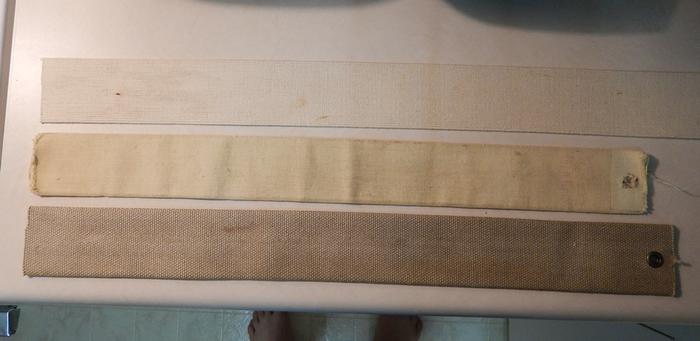
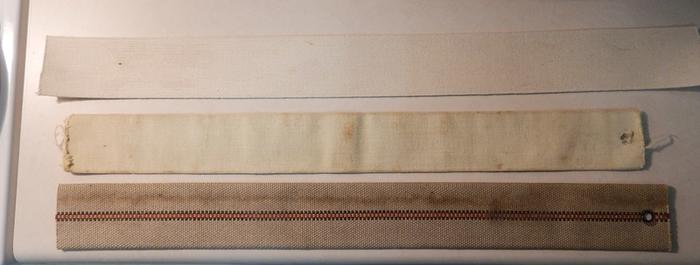
The fore hoses & webbing needed cleaning. Two of the fire hoses were single layer cotton(maybe linen) and the bright white one is a hard nylon webbing with a rubber second layer inside. All the fire hoses are 2 1/2 inch.

I soaked the hoses in BIZ for three days,,,,,then scrubbed with Colgate toothpaste,,,, let dry outside for three more days.
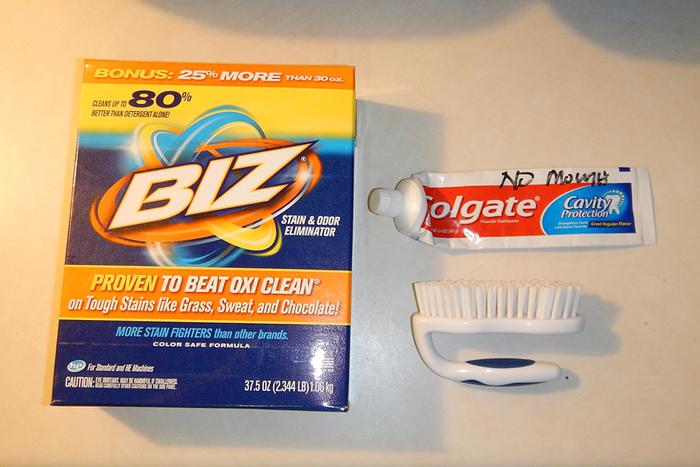
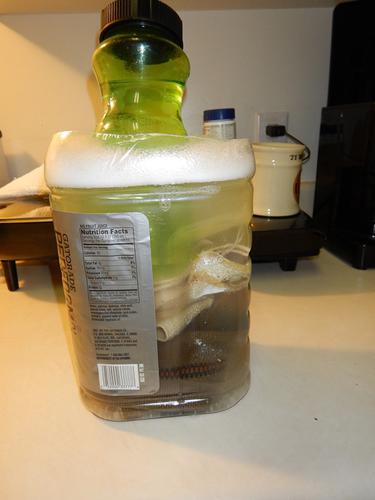
The BIZ pulled 90% of the stains out of the hoses.
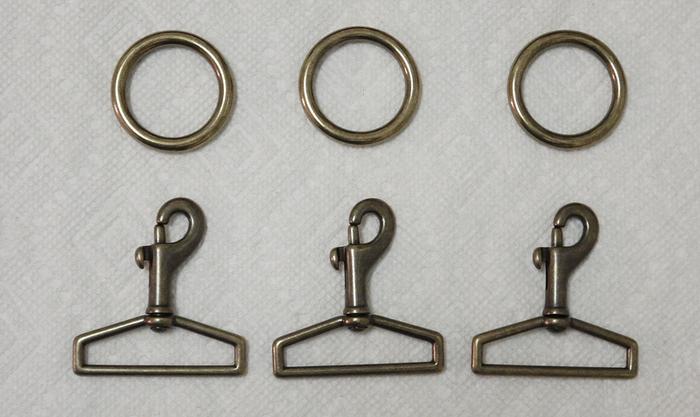
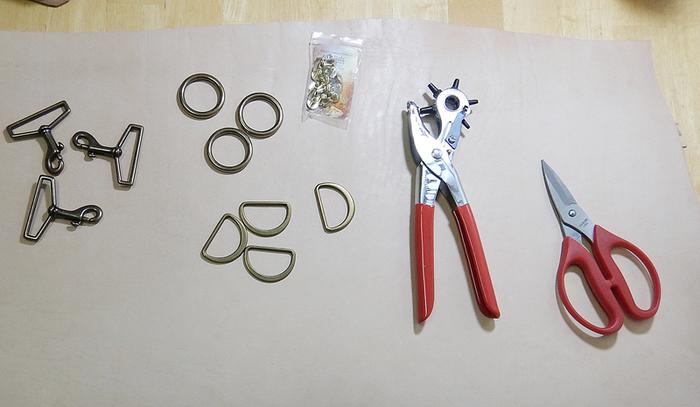
I ordered vintage brass hooks , O-Rings and D-Loops on Ebay last week. I screwed up and forgot to Ebay the screws & had to use shiny brass screws from Tandy. I will order vintage brass screws next month & replace the shiny ones. We went to Tandy today & got supplies,,,, vintage tan stain, sealed, a big piece of raw leather, screws, punch, scissors and a crash course on leather work.
,,,,,,,,,, to be continued next post,,,,,
-
The Following 5 Users Say Thank You to Hirlau For This Useful Post:
bongo (09-24-2015), Leatherstockiings (09-16-2015), markbignosekelly (09-16-2015), Phrank (09-05-2016), xiaotuzi (07-30-2016)
-
09-16-2015, 07:21 AM #2Senior Member
- Join Date
- Dec 2010
- Location
- South Florida
- Posts
- 13,530
Thanked: 3530
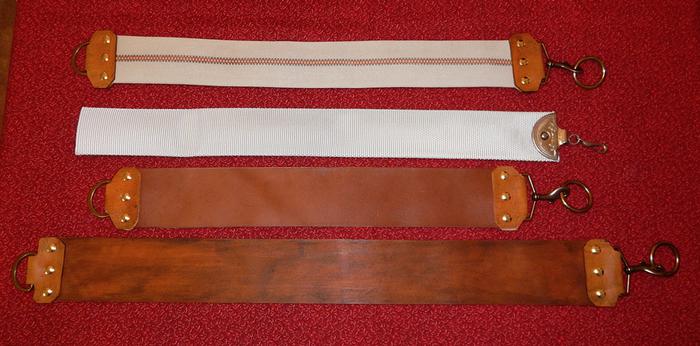
I worked on these today,,,,, it was fun,,, made a lot of mistakes as you will see,,,,,,Please comment on how I can make changes next time.
Thank you for looking,
Hirlau
-
The Following 3 Users Say Thank You to Hirlau For This Useful Post:
Euclid440 (09-18-2015), Leatherstockiings (09-16-2015), xiaotuzi (07-30-2016)
-
09-16-2015, 07:22 AM #3Senior Member
- Join Date
- Dec 2010
- Location
- South Florida
- Posts
- 13,530
Thanked: 3530
Thank You Richard ,,,,,,,

-
The Following User Says Thank You to Hirlau For This Useful Post:
Geezer (09-22-2015)
-
09-16-2015, 07:27 AM #4Senior Member
- Join Date
- Dec 2010
- Location
- South Florida
- Posts
- 13,530
Thanked: 3530
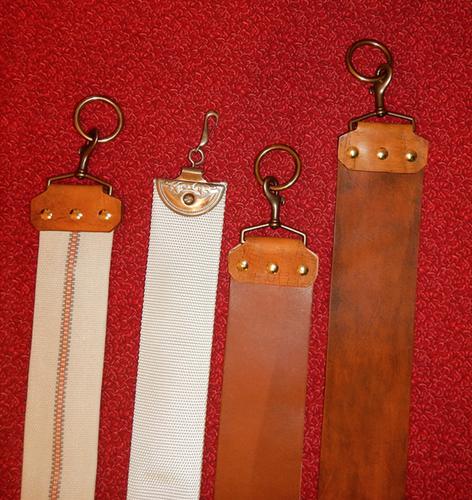
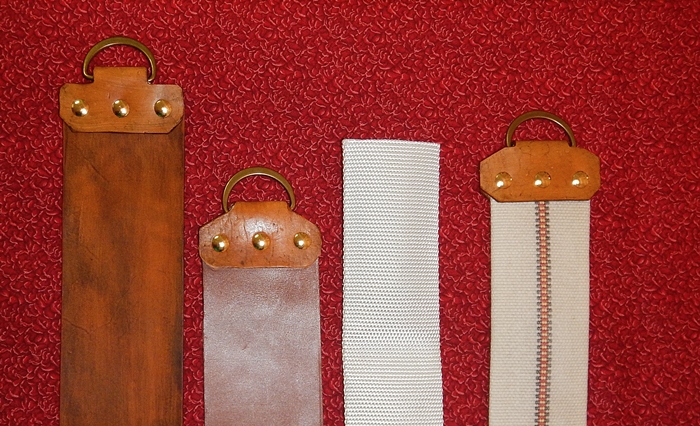
Some of my mistakes are;
The D-Rings were smaller than I thought, though I can get my fingers in them to extend the strop.
My staining of the raw leather strop & the leather clasps that hold the hardware on the strops is poor,,,, I forgot to wear gloves,,, I have vintage brown fingers now,,,
The shiny brass screws don't match.
I can't cut a straight line,,, wasted a lot of leather.
-
09-16-2015, 07:52 AM #5< Banned User >
- Join Date
- Jul 2015
- Location
- Central Oregon
- Posts
- 789
Thanked: 98
Every one of those look Good and usable Hirlau, Nice work.
-
The Following User Says Thank You to FAL For This Useful Post:
Hirlau (09-16-2015)
-
09-16-2015, 08:48 AM #6Senior Member


- Join Date
- Apr 2015
- Location
- Johannesburg
- Posts
- 2,498
Thanked: 410
Great effort for your 1st attempt.
Tony
-
The Following User Says Thank You to Thug For This Useful Post:
Hirlau (09-16-2015)
-
09-16-2015, 08:55 AM #7Senior Member
- Join Date
- Mar 2015
- Location
- Southern California
- Posts
- 114
Thanked: 20
Awesome job! Thank you for sharing with us!
Geezer likes this.
-
The Following User Says Thank You to TheFiveO For This Useful Post:
Hirlau (09-16-2015)
-
09-16-2015, 05:54 PM #8
Hirlau, we haven't spoken much, but I have great respect & appreciation for your posts.
My local leather shop (Portland Leather) scores an edge w/ a ballpoint along a metal straightedge before reaching for a blade. Next, takes a blade along the same straight edge & tries to keep it in the bottom of the trough created by the ballpoint. Next, uses a straight edge cutting tool (about $20) which is simply a blade w/ a width-limiting guide, cutting inside the slice left by the knife. I wasn't worth a dang at cutting straight either. If the variation in the cut is minimal, an edging tool will make it undetectable. For finish-burnishing the edge, the traditional method is literally to wipe spit on the raw edge, and burnish w/ a wooden handled tool - even a wooden kitchen spoon. (Thank You HidestoArt)
HidestoArt is probably the most experienced leather worker I'll ever have the pleasure to speak with. And, he's a wonderful guy. Connecting with him is sure to be informative, and a great pleasure.
All Best to you & yours, Hirlau
-
The Following User Says Thank You to pinklather For This Useful Post:
Hirlau (09-16-2015)
-
09-16-2015, 06:33 PM #9Senior Member
- Join Date
- Dec 2010
- Location
- South Florida
- Posts
- 13,530
Thanked: 3530
Thank you for the kind words,,,, Originally Posted by pinklather

I'm going to spend time tonight looking for the tools you mentioned & read up on the techniques,,, this helps me a lot,,, the cutting was the hardest part for me.Geezer likes this.


 Reply With Quote