10 Attachment(s)
One-piece scale making - a little illustrated how-to
As per request, I have made a few pictures while making one-piece scales (I'll use plural out of habit).
I have left out the basics of scale making, which can be found here: http://straightrazorpalace.com/works...wers-here.html. The adjusted power tools I used are more elaborately described here: http://straightrazorpalace.com/works...ling-poor.html.
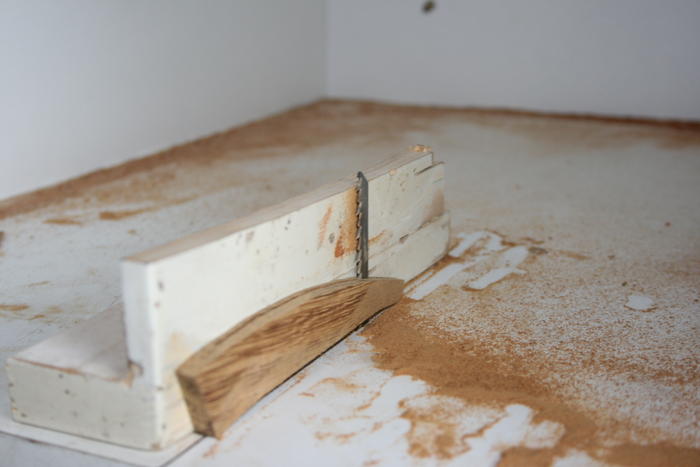
I started out with the rough shape of the scales on an uneven piece of wood of 6-8 mm in thickness. To saw the center cut, I tried a cope saw and a Dremel in the past with sloppy, non-straight results. For these scales, I used a guide next to an upside-down mounted jig-saw (picture taken after sawing) as a cheap alternative to a band saw. The distance between guide and saw is 2-3 mm and you may want to mark until where you need to saw (I forgot to, but got it almost right).
Attachment 140534
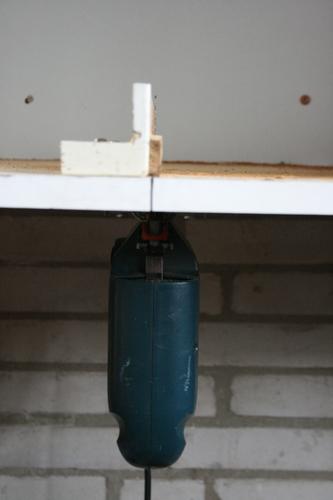
The jig-saw in full:
Attachment 140535
Two notes: if you decide to copy this idea, do so at your own risk. And the saw and guide are not exactly parallel, but that will be fixed later on.
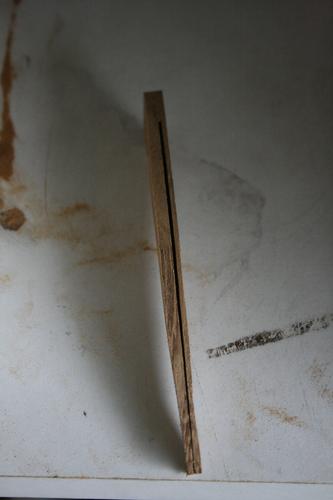
The sawn result is uneven, as you can see below. What is important, though, is that it is straight!
Attachment 140536
At this point, I could have flipped the scales and sawn on the other side as well. However, as this piece of wood was of uneven thickness, I decided to make do with just one cut. I will include a comparison to illustrate the difference.
Now for fixing the unevenness and shaping the scales, I used an improvised band of sandpaper around a buffingwheel.
Attachment 140538
Attachment 140537
I have made bands of 80, 120, 180, 240, 400 and 800 grit. 90% of the work was done on the 80 grit, then I smoothed out the surface on the other grits. At that point, the wood becomes very smooth and shiny.
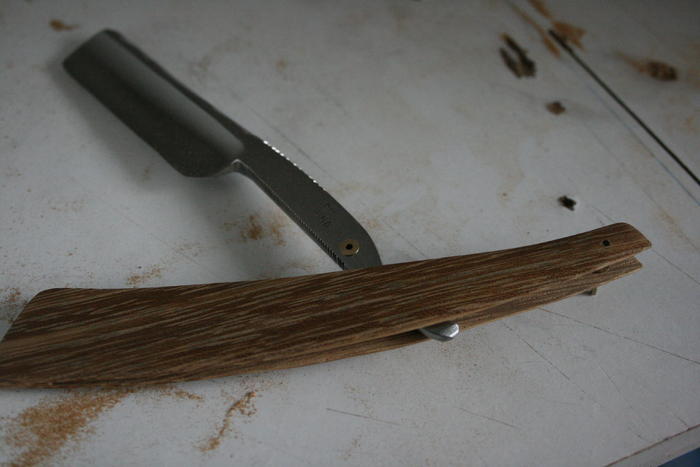
Glen taught me the importance of flexible scales, it ensures that the razor will rotate relative to the scales with even resistance all the way. I made some thick scales in the past, causing the razor to rotate barely when it was almost closed but freely when it was 180° rotated. When I can pinch the scales quite easily when the blade is in place, I find they are thin enough.
Attachment 140541
At the first fitting, I noticed that the cut I made was just a few mm short. Hence, I got back to the jig-saw, this time without the guide, and slide the scales over the saw before turning it on and making the cut just a little deeper. Then I fitted again and decided to make the cut a little wider at the "wedge"-end, again with the jig-saw.
Attachment 140539
To smoothen out the inside of the scales and further widen the gap, I used folded-over sandpaper of 80 and 180 grit.
Attachment 140540
When the scales were finished, I moved to pinning. I like using washers on the inside, they too help keeping the rotation resistance even. I used brash washers that I gave a few hits with the hammer to flatten them a little.
Getting the washers in place can be tricky. I put the first washer between the scales and used a thin piece of scrap wood (not in the pic) to move it over the hole and then held it in place while I put the pin through the washer.
Attachment 140542
The next washer I laid on the razor in hopes of getting it right the first time, but that didn't work out as planned. Again, that small piece of wood served to put it in place and hold it down while I slid the pin through.
Attachment 140543
Next was regular pinning. I have a few more pictures coming up!
