
Results 1 to 8 of 8
 16Likes
 LinkBack URL
 About LinkBacks
-
09-14-2013, 09:47 PM #1Scheerlijk


- Join Date
- Feb 2013
- Location
- The Hague, the Netherlands
- Posts
- 1,184
Thanked: 164 One-piece scale making - a little illustrated how-to
As per request, I have made a few pictures while making one-piece scales (I'll use plural out of habit).
I have left out the basics of scale making, which can be found here: http://straightrazorpalace.com/works...wers-here.html. The adjusted power tools I used are more elaborately described here: http://straightrazorpalace.com/works...ling-poor.html.
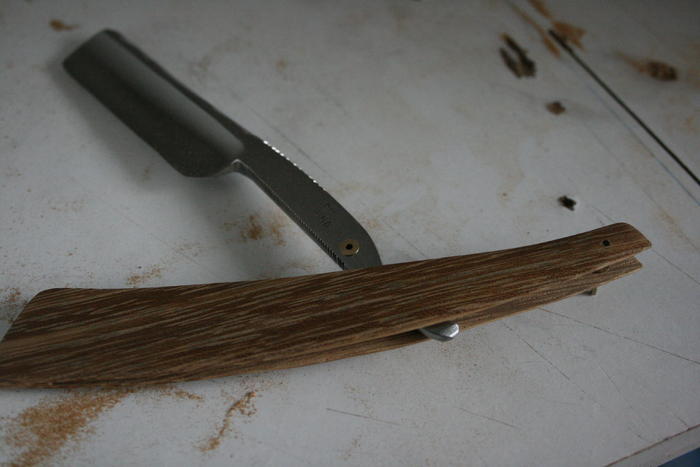
I started out with the rough shape of the scales on an uneven piece of wood of 6-8 mm in thickness. To saw the center cut, I tried a cope saw and a Dremel in the past with sloppy, non-straight results. For these scales, I used a guide next to an upside-down mounted jig-saw (picture taken after sawing) as a cheap alternative to a band saw. The distance between guide and saw is 2-3 mm and you may want to mark until where you need to saw (I forgot to, but got it almost right).

The jig-saw in full:
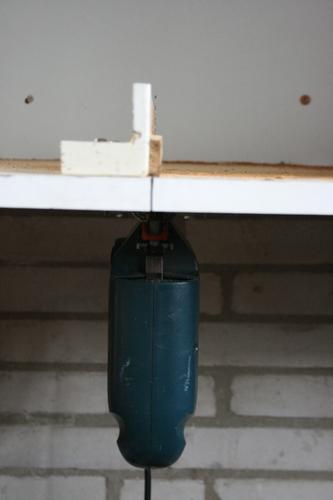
Two notes: if you decide to copy this idea, do so at your own risk. And the saw and guide are not exactly parallel, but that will be fixed later on.
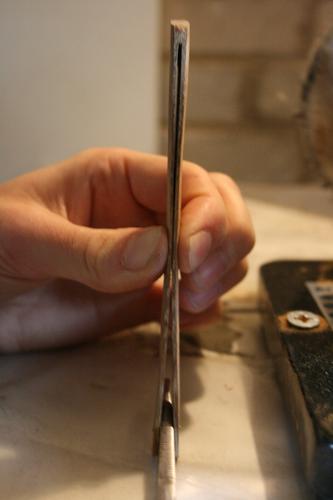
The sawn result is uneven, as you can see below. What is important, though, is that it is straight!
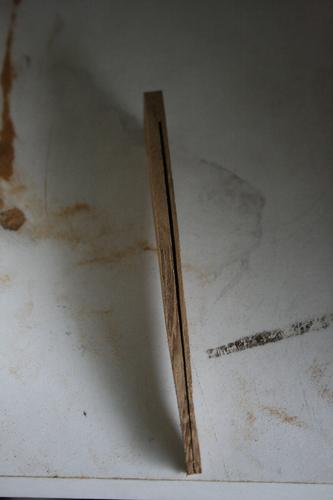
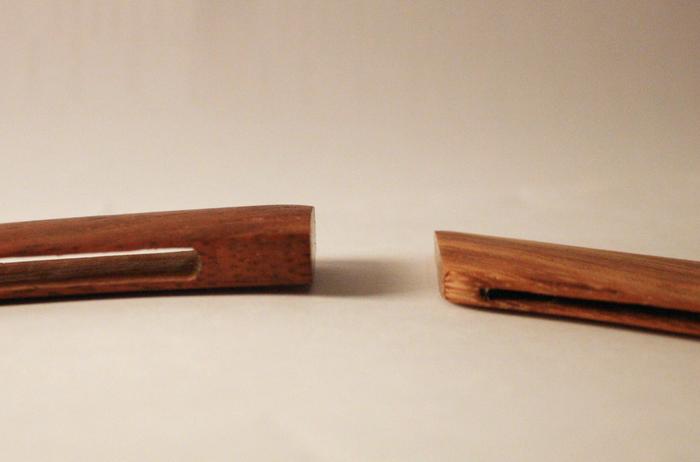
At this point, I could have flipped the scales and sawn on the other side as well. However, as this piece of wood was of uneven thickness, I decided to make do with just one cut. I will include a comparison to illustrate the difference.
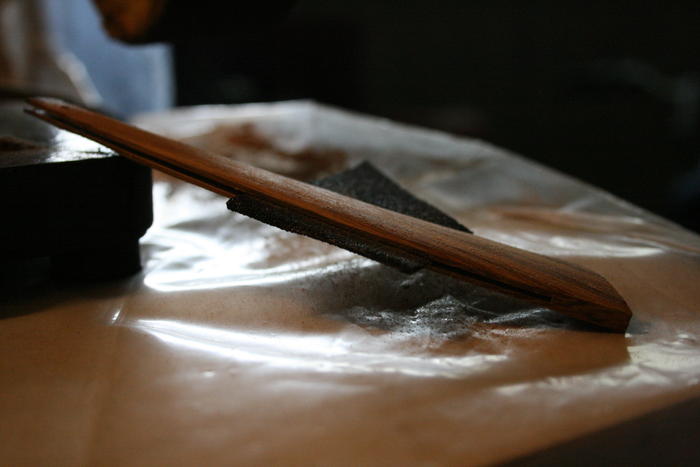
Now for fixing the unevenness and shaping the scales, I used an improvised band of sandpaper around a buffingwheel.
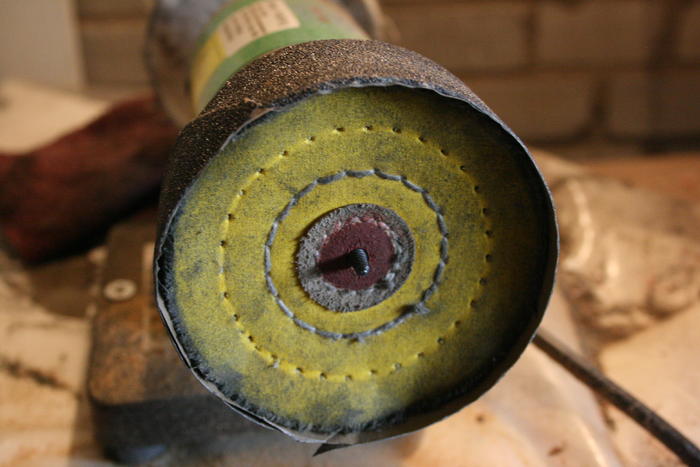
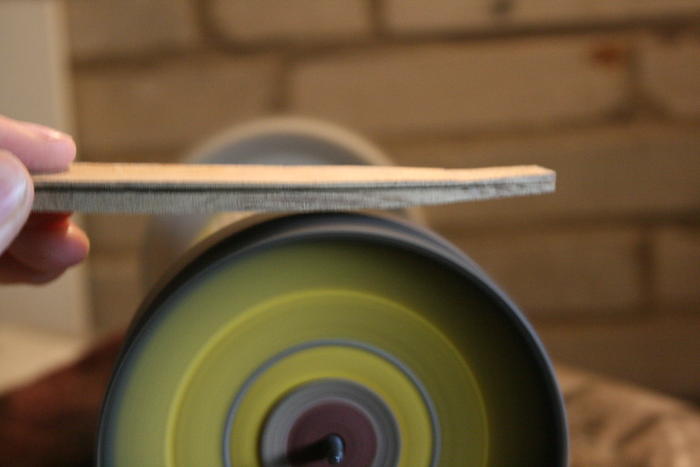
I have made bands of 80, 120, 180, 240, 400 and 800 grit. 90% of the work was done on the 80 grit, then I smoothed out the surface on the other grits. At that point, the wood becomes very smooth and shiny.
Glen taught me the importance of flexible scales, it ensures that the razor will rotate relative to the scales with even resistance all the way. I made some thick scales in the past, causing the razor to rotate barely when it was almost closed but freely when it was 180° rotated. When I can pinch the scales quite easily when the blade is in place, I find they are thin enough.
At the first fitting, I noticed that the cut I made was just a few mm short. Hence, I got back to the jig-saw, this time without the guide, and slide the scales over the saw before turning it on and making the cut just a little deeper. Then I fitted again and decided to make the cut a little wider at the "wedge"-end, again with the jig-saw.
To smoothen out the inside of the scales and further widen the gap, I used folded-over sandpaper of 80 and 180 grit.
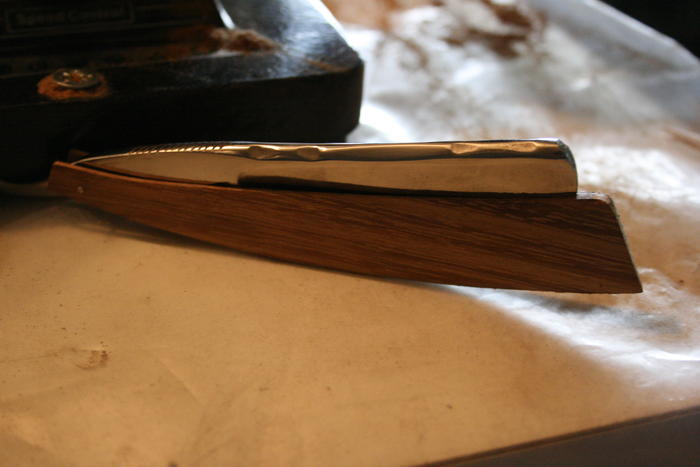
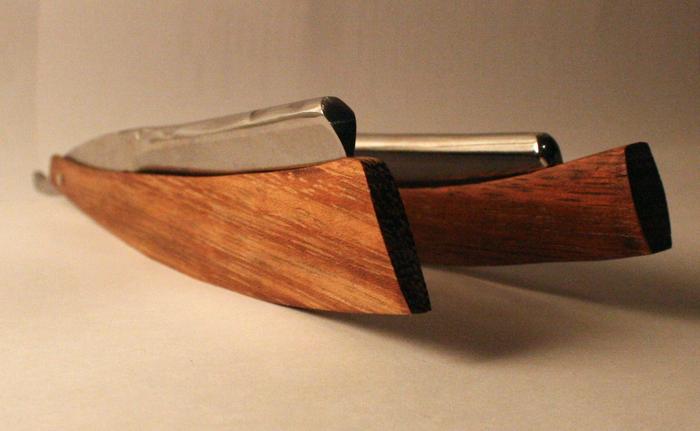
When the scales were finished, I moved to pinning. I like using washers on the inside, they too help keeping the rotation resistance even. I used brash washers that I gave a few hits with the hammer to flatten them a little.
Getting the washers in place can be tricky. I put the first washer between the scales and used a thin piece of scrap wood (not in the pic) to move it over the hole and then held it in place while I put the pin through the washer.
The next washer I laid on the razor in hopes of getting it right the first time, but that didn't work out as planned. Again, that small piece of wood served to put it in place and hold it down while I slid the pin through.
Next was regular pinning. I have a few more pictures coming up!Last edited by Laurens; 09-14-2013 at 09:59 PM.
I want a lather whip
-
-
09-14-2013, 10:02 PM #2Scheerlijk
- Join Date
- Feb 2013
- Location
- The Hague, the Netherlands
- Posts
- 1,184
Thanked: 164
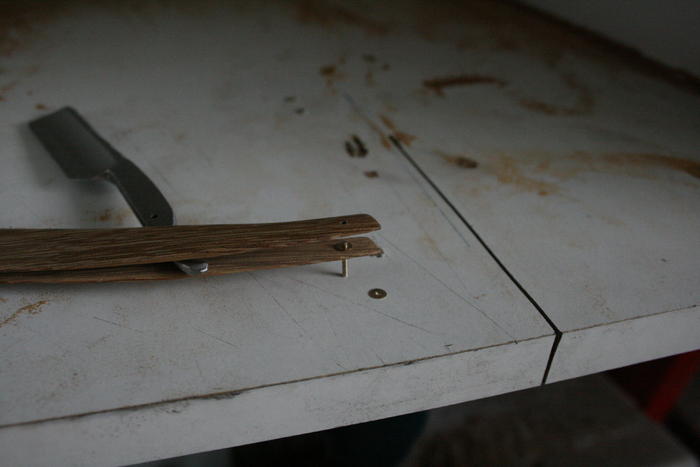
These pictures illustrate the difference between a single jig-saw cut and two (one left, one right):
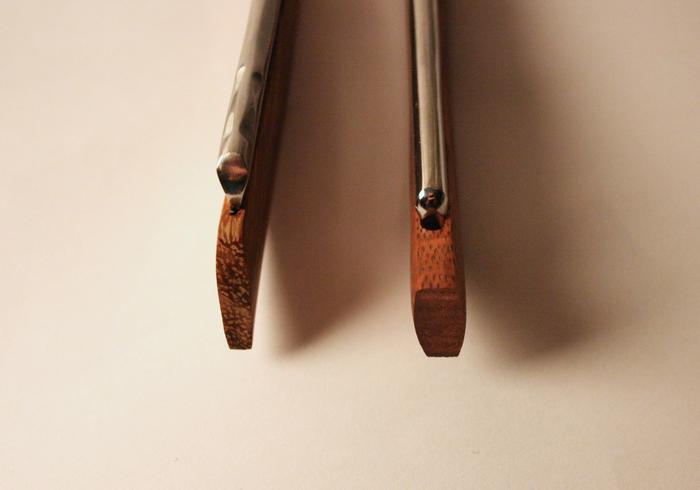
Both blades are the same width, but the exposure when closed is quite different:
Thank you for reading and I'm happy to answer questions!I want a lather whip
-
The Following 3 Users Say Thank You to Laurens For This Useful Post:
Adam G. (09-16-2013), bongo (09-15-2013), RONNIEJNZN (09-17-2013)
-
09-14-2013, 10:09 PM #3Senior Member

- Join Date
- Jan 2011
- Location
- Roseville,Kali
- Posts
- 10,432
Thanked: 2027
Using what you have to work with,they turned out very nice.
-
The Following User Says Thank You to pixelfixed For This Useful Post:
Laurens (09-14-2013)
-
09-15-2013, 12:39 AM #4Senior Member

- Join Date
- Dec 2012
- Location
- Perth, West Australia
- Posts
- 1,431
Thanked: 497
Laurens, I'm glad I found this thread, it's added to my knowledge

Thank You for posting !!
Bongo.Geezer likes this.
-
The Following User Says Thank You to bongo For This Useful Post:
Laurens (09-15-2013)
-
09-15-2013, 12:51 AM #5Senior Member


- Join Date
- Nov 2012
- Location
- Across the street from Mickey Mouse in Calif.
- Posts
- 5,320
Thanked: 1184
Great job, and keep up the good work ! The more you do the better you will get. Have you used some sort of finish on the wood ?
Last edited by 10Pups; 09-15-2013 at 12:53 AM.
Good judgment comes from experience, and experience....well that comes from poor judgment.
-
The Following User Says Thank You to 10Pups For This Useful Post:
Laurens (09-15-2013)
-
09-15-2013, 05:08 AM #6Member
- Join Date
- Feb 2013
- Posts
- 58
Thanked: 15
Great looking razors... What kind of wood did you go with. I'm really diggin' the grain and colors.
-
The Following User Says Thank You to Ketsco101 For This Useful Post:
Laurens (09-15-2013)
-
09-15-2013, 08:54 AM #7Scheerlijk
- Join Date
- Feb 2013
- Location
- The Hague, the Netherlands
- Posts
- 1,184
Thanked: 164
I tried using some mineral oil for the first time and am curious how it will hold up. It's the same oil I use for making crox paste and oiling locks and bike chains Originally Posted by 10Pups


You should see it in real life, it gets even better when it catches the light at different angles Originally Posted by Ketsco101
 I got it for free at a wood-working factory and if memory serves, it is nut or walnut. Sanding it very smooth and adding a light oil coat help making the grain stand out.
I want a lather whip
I got it for free at a wood-working factory and if memory serves, it is nut or walnut. Sanding it very smooth and adding a light oil coat help making the grain stand out.
I want a lather whip
-
09-15-2013, 03:50 PM #8Senior Member


- Join Date
- Dec 2006
- Location
- Burkburnett TX
- Posts
- 3,100
Thanked: 2392
The scales look great, but even more impressive it how you work with tools you have. I like your attitude toward making stuff.
CharlieGeezer likes this.
-
The Following User Says Thank You to spazola For This Useful Post:
Laurens (09-15-2013)


 Reply With Quote