
Results 1 to 8 of 8
 18Likes

Thread: Finally got to work on my Greaves
 LinkBack URL
 About LinkBacks
Hybrid View
-
05-04-2015, 01:26 PM #1Member


- Join Date
- Jan 2015
- Location
- Tampa, FL
- Posts
- 98
Thanked: 18 Finally got to work on my Greaves
Hello all,
Well, I am finally finished with my three month stint as a hospitalist working 80 hours/week.
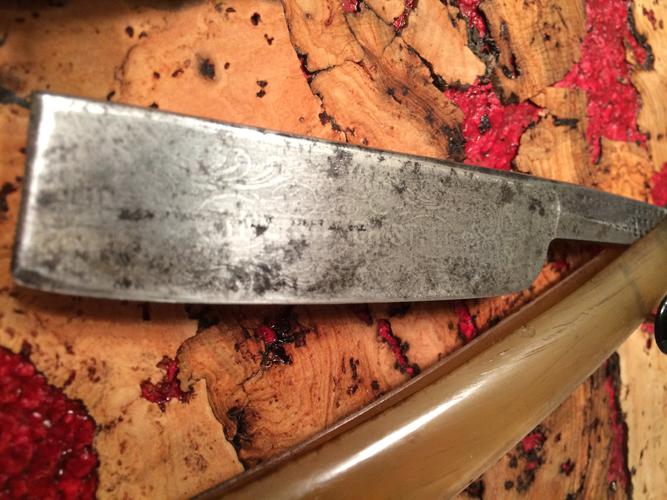
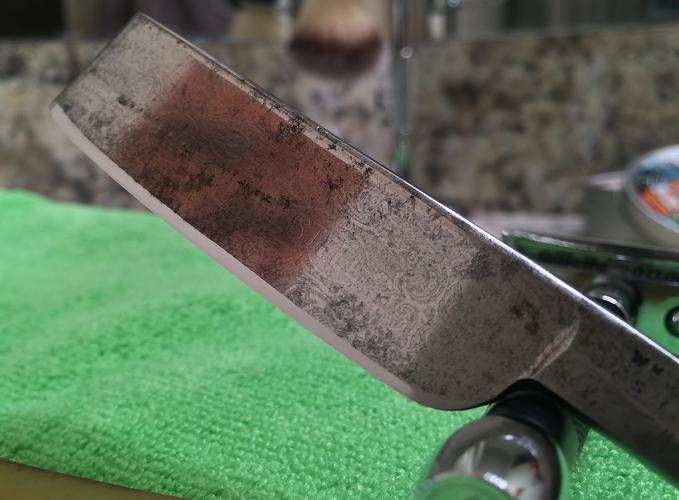
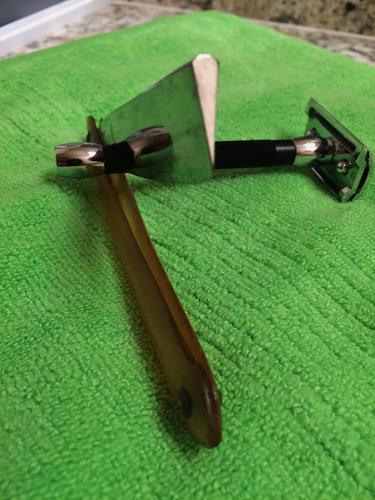
I treated myself to a Greaves wedge a couple months ago (to cope with the stress), but was never able to give it the love it deserves. It has a beautiful raised design on the face that says "FINE SILVER STEEL" surrounded by a filigree pattern. Yesterday was my first day free, so I cleaned her up a bit.
This is how it looked when it arrived.
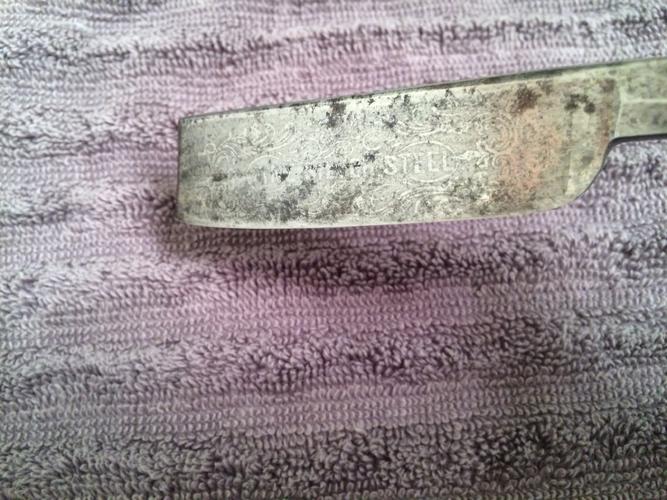
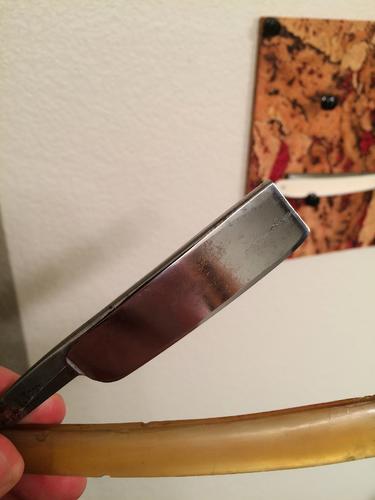
So I started cleaning up the blade with a rag and metal glo, but that didn't get me very far. I then very carefully took my Dremel with a loose cloth buffing wheel and Enkay "green stainless" polishing compound. After a couple light passes, I called it good. I would rather have some devil's spit and a little discoloration than sacrifice the design on the face for a pristine blade.
I was more aggressive with the other side of the blade (using felt wheels and various compounds), but didn't go crazy. I intentionally left the tang a bit rougher, just because I like it that way.
The scales were soaked in neatsfoot oil upon receipt of the razor, so they were nice and supple. I cleaned them up and lightly buffed them with some "brown tripoli" polishing compound on a felt wheel. They have plenty of bites, so I knew that it was hopeless to make them perfect. Still don't look too bad for ~150 year old horn.
Honing required three layers of tape and a lot of patience. I started with my newly acquired Chosera 1K (I see what the hype is about), then worked through a lapping film progression down to 1 micron. I then lightly finished on my little old school Jnat. She certainly mows the hair down with authority.
This is the current result:
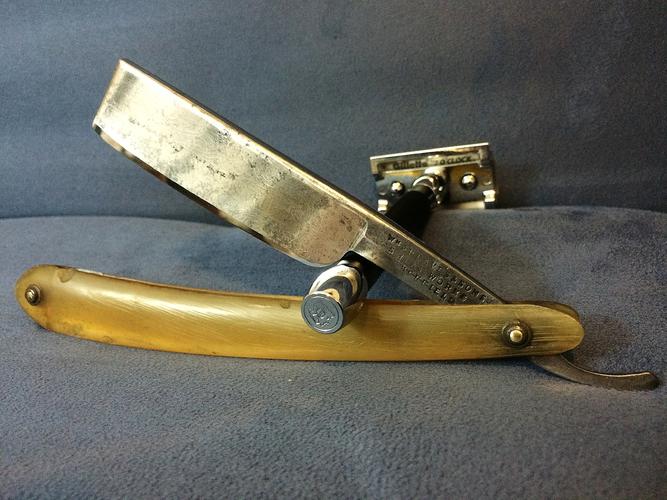
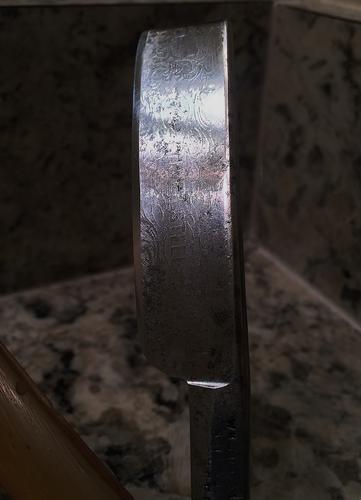
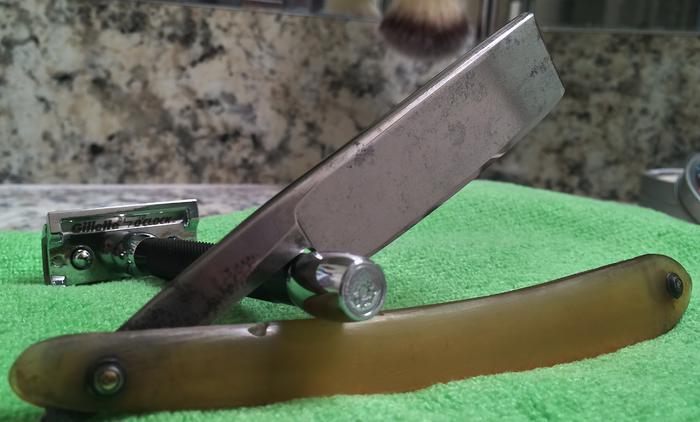
I am pleased with the improvements, and dig the "been around the block" look. It reminds me that I am shaving with a piece of history. Although I have more pristine blades, this is the pinnacle of my current collection.
My question is, does anyone have any tricks that may clean up the face a bit more without grinding down the raised design?
-
The Following User Says Thank You to DocMartin0321 For This Useful Post:
wbc85 (05-04-2015)
-
05-04-2015, 02:00 PM #2Senior Member

- Join Date
- Oct 2013
- Location
- vermont
- Posts
- 778
Thanked: 207
wow look at the polish on that bevel! nice job

for some reason on old wedges like this, when i leave the effects of age on the blade (not often) i almost always hone it up without tape. something about seeing those bright strips of metal at both top and bottom of the blade, showing the wear the way the blade was intended to really speaks to me. some i have even honed up that way all the way through 8k or 12k and then add a lyer of tape to produce a tiny micro bevel and tape the spine on subsequent honings.Silverloaf
-
The Following 2 Users Say Thank You to silverloaf For This Useful Post:
DocMartin0321 (05-04-2015), wbc85 (05-04-2015)
-
05-04-2015, 11:21 PM #3Member
- Join Date
- Jan 2015
- Location
- Tampa, FL
- Posts
- 98
Thanked: 18
Thank you so much sir! Means a lot coming from someone with your skills and experience. Originally Posted by silverloaf


I never thought of trying the two stripes. I started with three layers of tape, saw how wide the bevel was, and went "whoa, better keep the tape this thick". I have my eye on another wedge now, and may give that a shot.silverloaf likes this.
-
05-04-2015, 11:33 PM #4Senior Member
- Join Date
- Oct 2013
- Location
- vermont
- Posts
- 778
Thanked: 207
thank you Originally Posted by DocMartin0321

here are two that i did not too long ago. not the prettiest blades and it just felt right to hone these two up with no tape. some will hate this look, some will agree that this is how a 150 yr old near wedge is supposed to look.....Silverloaf
-
05-04-2015, 11:42 PM #5Senior Member
- Join Date
- Oct 2013
- Location
- vermont
- Posts
- 778
Thanked: 207
the one in the top pic above is a greaves near wedge that also had a few chips in the edge. i first honed with no tape to establish an even plane and provide a basis for using tape. i then breadknifed the chips out, then angled the blade down 45 degrees and breadknifed on both sides, then lowed angle more and did same. i did this relatively quickly til the point where i loaded 5 pieces of tape on the spine. i progressed through setting the bevel and removing layers of tape one at a time, taking the bevel just down to the cutting edge each time. the point isnt to reset the bevel each time, it is to bring the bevel in plane with the cutting edge and spine/tape. finally i removed the last layer of tape and honed with spine and cutting edge/long bevel laying evenly on the stones. this is the result above. if i just honed and honed and honed without tape while trying to remove the chips there would be a true wedge sitting in front of us with bright shiny bevels from spine to cutting edge hahahaha!
JimBC and DocMartin0321 like this.Silverloaf
-
The Following User Says Thank You to silverloaf For This Useful Post:
DocMartin0321 (05-05-2015)
-
05-05-2015, 12:09 AM #6Member
- Join Date
- Jan 2015
- Location
- Tampa, FL
- Posts
- 98
Thanked: 18
Thank you for sharing your process. I will definitely give it a shot the next time I score a big hunk of Sheffield steel.
silverloaf likes this.


 Reply With Quote