
Results 1 to 7 of 7
 26Likes

Thread: Ideas for restoration of horn scales
 LinkBack URL
 About LinkBacks
-
05-09-2019, 05:06 AM #1Senior Member

- Join Date
- Sep 2009
- Location
- Plymouth, UK
- Posts
- 313
Thanked: 19 Ideas for restoration of horn scales
Hello to the Forum!
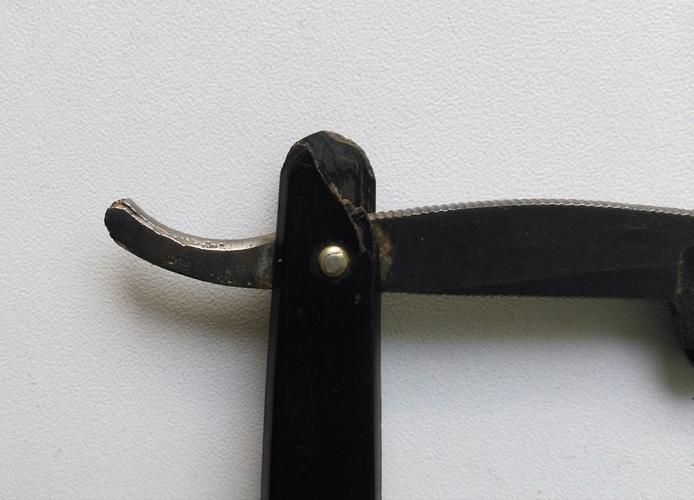
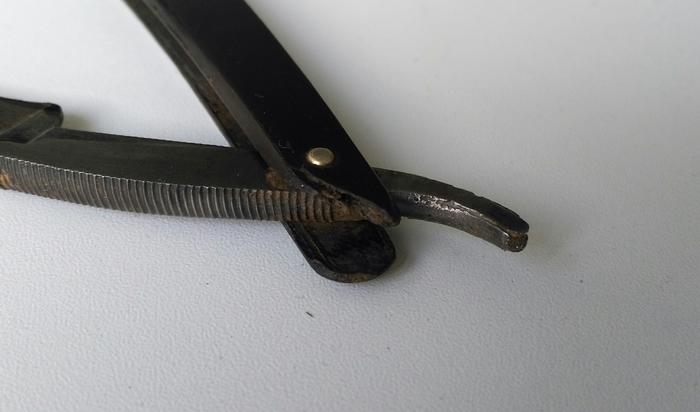
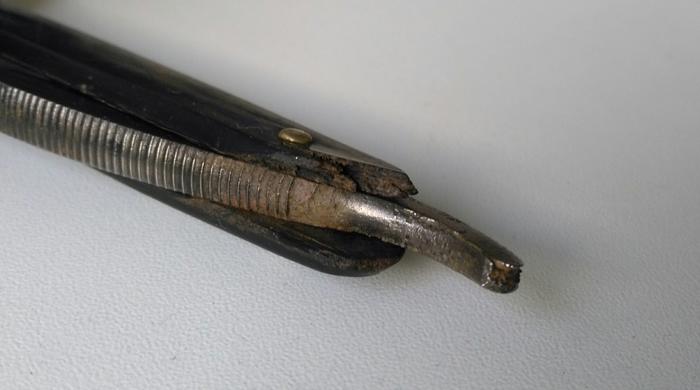
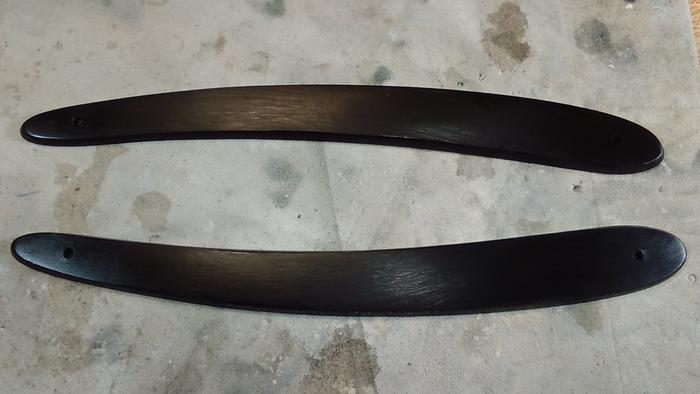
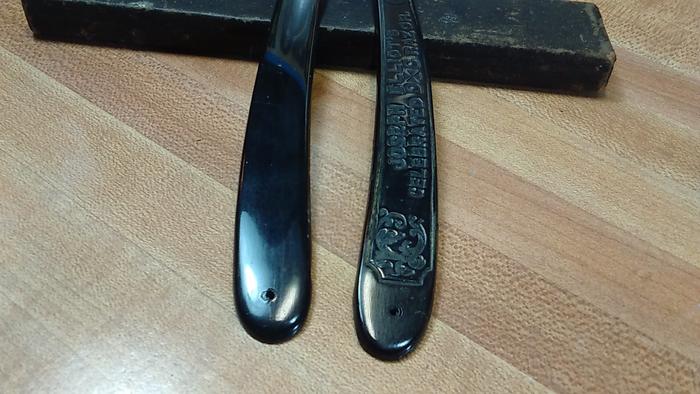
I'd like to ask about general tips for restoring these scales. As the pics should show, there is a chunk out of the end of one of them. As far as I can tell, the scale is solid where the pivot is, so we are looking at a cosmetic restoration. The plan is to unpin the razor, steam the scales straight, glue up any splits in the horn, then restore this section with epoxy, before finishing and oiling the scales. The break is pretty jagged, so I think the epoxy should have plenty to hold on to, but I am wondering whether a pin or 'biscuit' might be a good idea.
Any comments/ideas/suggestions?
Many thanks!Last edited by Montgomery; 05-09-2019 at 11:49 PM.
-
05-09-2019, 10:47 AM #2Senior Member


- Join Date
- Mar 2015
- Location
- Akron, Ohio
- Posts
- 12,118
Thanked: 4316
Burn some wooden matches and remove the heads, then grind into a powder for a filler to your epoxy.
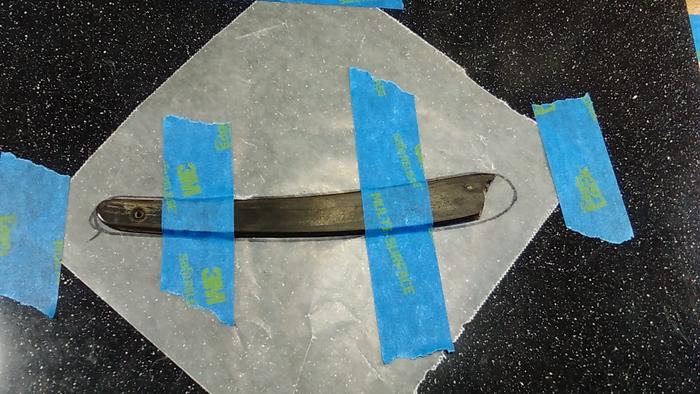
Put the scale on a piece of waxed paper, and slightly overfill the repair.
If your going to polish them, sand the epoxy so its slightly below the original scale, and put a couple coats of CA on it, and sand to blend in the parting lines.
Now you can soak in neatsfoot oil.
Scales must be flat before the epoxy is added.

 Mike
Mike
-
The Following 5 Users Say Thank You to outback For This Useful Post:
BobH (05-09-2019), DoughBoy68 (05-09-2019), Geezer (05-09-2019), MikeT (05-09-2019), Montgomery (05-09-2019)
-
05-09-2019, 11:12 AM #3Senior Member
- Join Date
- Sep 2009
- Location
- Plymouth, UK
- Posts
- 313
Thanked: 19
Brilliant. I see the chunk out of the scales you show is bigger than mine, so I'm not going to worry about some sort of supporting pin. Thanks! Originally Posted by outback
 MikeT likes this.
-
05-09-2019, 11:59 AM #4Senior Member

- Join Date
- Jun 2015
- Location
- South Carolina
- Posts
- 1,838
Thanked: 516
I will never grow tied of reading Oubacks tutorials!
Definitely do a search on it, many posts concerning these repairs.
Good luck with your restore!You must unlearn what you have learned.
Yoda
-
The Following User Says Thank You to MikeT For This Useful Post:
outback (05-09-2019)
-
05-09-2019, 01:12 PM #5Senior Member
- Join Date
- Sep 2009
- Location
- Plymouth, UK
- Posts
- 313
Thanked: 19
The advice above is the feedback I needed. I would have gone ahead anyway, but sometimes it is good to have an experienced eye look at the problem and give the green light. Sometimes they see things I don't. Originally Posted by MikeT
-
05-09-2019, 04:44 PM #6Skeptical Member


- Join Date
- Nov 2016
- Location
- Colorado Springs
- Posts
- 10,559
Thanked: 2197
Hard to beat an answer from the master of scale repair. Your in good hands and should be an easy fix. Enjoy the fun of the job.
It's just Sharpening, right?
Jerry...
-
05-09-2019, 07:00 PM #7Senior Member
- Join Date
- Jun 2013
- Location
- Pompano Beach, FL
- Posts
- 4,049
Thanked: 636
I do something similar. I fill in most of lost material with super glue and horn dust saved from sanding scales. After it dries go over surface with black permanent marker. Apply final coat of super glue. Sand and polish.
-
The Following User Says Thank You to bouschie For This Useful Post:
Montgomery (05-09-2019)


 Reply With Quote