
Results 1 to 10 of 16
 5Likes
 LinkBack URL
 About LinkBacks
Threaded View
-
11-17-2009, 01:00 AM #1< Banned User >

- Join Date
- Apr 2008
- Location
- Newtown, CT
- Posts
- 2,153
Thanked: 586 You Can Make A Wedge! The Icedog Method
We are very fortunate in this community to share the company of many teachers, artists, craftsmen and generally fine and knowledgeable gentle-people. Although membership in Straight Razor Place comes with no warrantees, it is a safe bet that at least one answer will be available for any question that may arise. In those questions regarding woodworking, there will always be at least two answers. The question today is, when re-handling a straight razor, what is a safe and efficient method to fabricate the wedge between the scales opposite the pivot.
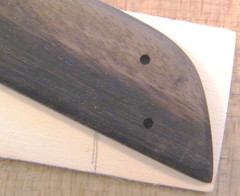
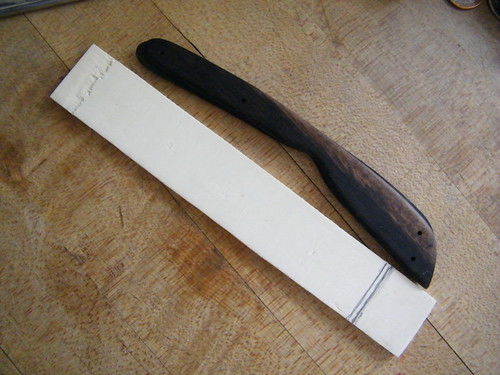
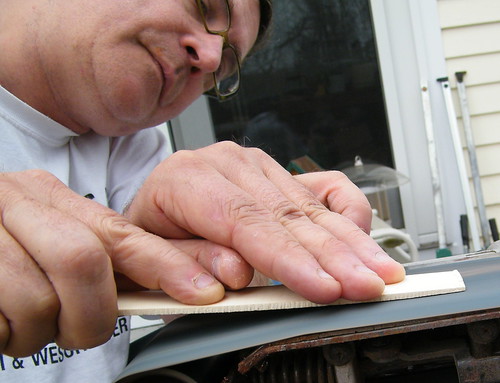
First a material for the wedge must be selected. Aesthetically we like everything from a strong color contrast with the scales to no contrast at all as can be seen some modern razors (Filarmonica 13), you can find plastic scales that have the wedge as part of the casting process. That is, the handles are molded with one half of a wedge on each scale. I have made wedges from a blank made from laminated veneers, effectively a striped wedge. Wedges are a completely subjective subject. In this example, we are making a wedge for a razor that belongs to SRP member Wulfgar. The scales are Gabon ebony and he has decided the wedge should be holly. Holly is a pure white, very dense wood with grain so straight and tight that it seems to have no character at all. This procedure is equally effective whether you select wood, plastic, metal, bone or stone for your wedge.
Beginning with a thick enough¹ piece of the chosen material, cut a strip about 25% wider than the final wedge will be (if the finished wedge will be one inch wide, cut your blank 1 1/4" “). The wedge (during normal conditions) is subject to only compressive stress. However, it is important for uniformity of finish to match the grain direction with the scales. Note: If the wedge and scale materials are metallic, plastic or something else with no discernable grain, “grain direction” is immaterial. The strip must be as long as the finished wedge plus enough to facilitate handling while tapering. I typically will make my wedge blanks 4 to 5 inches long.
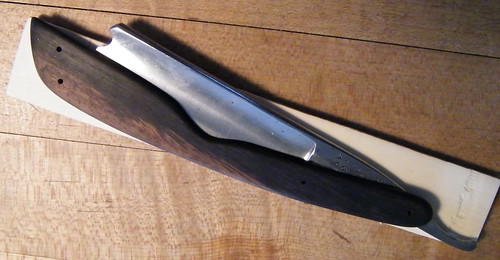
Lay the new scales out with the wedge strip blank.
Mark the position of the thick end of the finished wedge. The thick end is inboard so that you taper from inboard to the end. In other words, the wedge will be tapered toward the end of the blank, like a chisel.
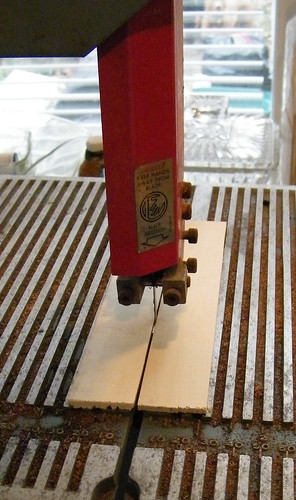
Once the strip is fully prepared, you are ready to begin tapering. You can taper manually with a rasp, Microplane™, hand plane or a sanding block. You can also use sandpaper flat on a hard surface (glass, MDF, plywood or bench top)

If you don’t have access to a disc or belt grinder is very easy to taper your wedges with a hand held belt sander clamped to a sturdy table.
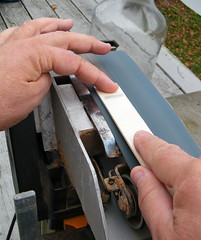
Taper one or both sides of the wedge. Working only one side is perfectly acceptable as the inside end (the thick end) will be adjusted or “squared up” after your wedge is cut from the strip.
1 “Thick enough” means the at least the thickness of the desired wedge at its maximum. It is better to begin with stock that is approximately 25% thicker than the thick end of the desired wedge.1
Last edited by icedog; 11-17-2009 at 10:07 PM.
Mcbladescar and Chevhead like this.
-


 Reply With Quote