
Results 11 to 20 of 28
 27Likes
 LinkBack URL
 About LinkBacks
Threaded View
-
09-20-2012, 06:05 AM #1The First Cut is the Deepest!


- Join Date
- Feb 2010
- Location
- Upper Middle Slobovia NY
- Posts
- 2,736
Thanked: 480 Rolls Razor Hone Restore (picture heavy)
Its what you get almost every time you pick up a Rolls Razor. A pile of cracked and crumbling little bits.
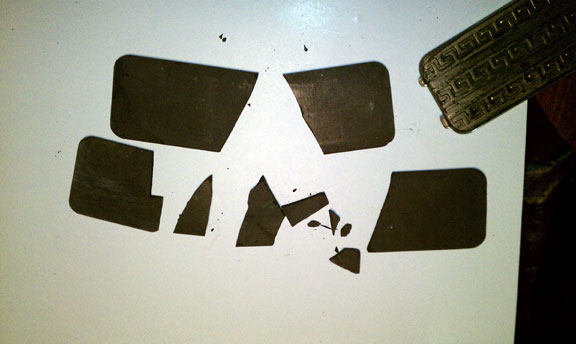
So what to do with them? Make a McNugget Hone! This will take at least 2 broken stones to make a single good one, depending on the sizes of the broken pieces.
To save on photos, I will skip some of my own learning process and just give you the basics. I needed 3 pieces to make one hone. So first I put two together to make the first section.
So lets pretend that this is only 2 pieces, and get to it!
Lay out some basic lines to help determine how long the pieces need to be to fit into the hone cover.
Leave yourself some extra length. It disappears quicker than you think, and is much harder to put back if you make it too short. (why I needed 3 pieces instead of just 2)
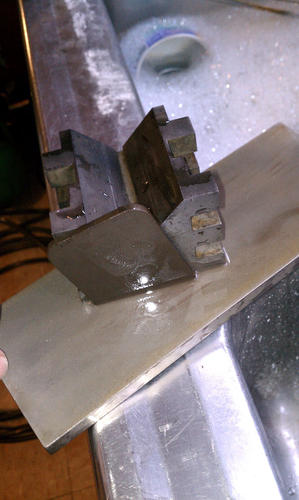
I turned a re-purposed guide into a fixture/clamp to hold the pieces parallel to each other. Very important if you don't want the 2 sections going off at angles to each other. This will give you a rough starting point.
Select the largest pieces and set them in the clamp. A true fixture with an angle setting would be superior. Trial and error shows a better result is achieved with at least some angle. Larger angles require larger pieces, and these are not typically to be found!
Angles are also a stronger bonding structure, and less likely to fail.
A fast touch to the belt grinder will get the 2 pieces closely set to each other.
After they are close, edges are cleaned up, and squared away by lapping on a worn DMT using a machinist block to hold the edges square. It is imperative that the edges be square, or you risk gaps or weak spots that may catch on the blade, or chip out during use.
These stones have a very weak binder, and they slurry quickly, and its easy to wear an 1/8 inch off of one in a hurry! Go slow, and use plenty of water to keep things clean and flat.
Once the ends are clean and properly matched, LET THEM DRY OVERNIGHT! Rolls hones are very porous, and should be completely dry before you try to glue them together.
I tried a variety of glues, standard CA, some clear epoxy, and JB Weld. I liked the JB best of the bunch, (the "quick" not as much as the original formula) and standard CA glue was the poorest bond.
Do a close up inspection of the fitted parts, and determine which side you want for the working surface.
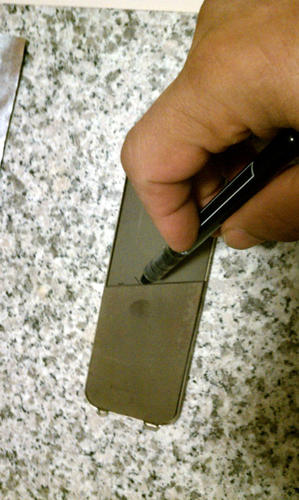
I used a granite plate for a flat surface, and placed a sheet of aluminum foil shiny side up. Apply glue to the first hone piece, and place the stone on the foil, honing surface down against the foil. Place second piece on the foil, and push/slide it up against the first, while at the same time maintaining downward pressure so glue does not creep under and onto the hone face. Press together hard enough to force the excess glue out the top and sides.
(sorry no pics, I needed both hands to do this!)
After the glue is cured, carve off the excess with a razor.
Leave the stones on the flat surface and do a rough clean up to get the bottom section smooth. This is important for 2 reasons.
1) So the stone will sit flat in the cover plate
2) So the stone will be sitting flat when you lap the hone side. If it is not flat, you risk the bond failing from the stress. After all this work, you dont want to risk it just to save a little time.
Flip the hone over. It will probably be stuck to the foil. But if you are careful, you can usually manage to peel the foil off the stone leaving little if any residue or foil bits behind.
Now comes the fun part, Lapping the stone to prep it for use. You have to make sure the joint is perfectly clean and smooth, so it wont catch the blade when honing.
CAUTION! pressing hard can cause the repair to fail, OR can cause a new break!
DO NOT ALLOW SLURRY TO BUILD UP!
The hone will wear down faster than some of the glues you might use, leaving a high spot made of glue. Keep it clean and well watered as you flatten.
(for anybody interested in such things, you might try experimenting with a rolls stone bit as a slurry stone, just for the S&G factor)
You will likely need to round the corners on each side, and sand an angle to fit the hinge end of the case.
This is the end result after much ado about something or other. Depending on the angle, you can see the repairs, or not. In this photo, only one of them is readily apparent.
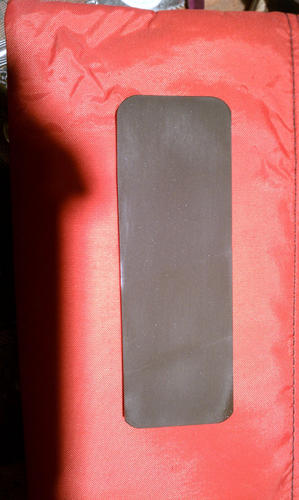
Now to dial it in and install.
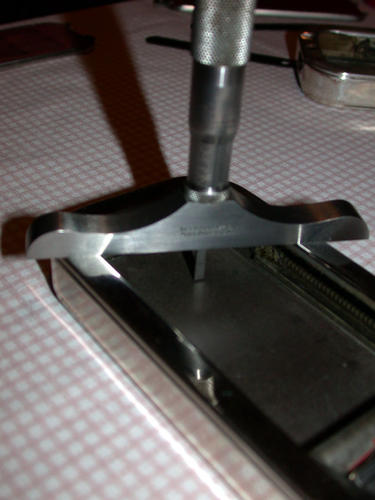
A quick reading with a depth gauge on (3) all original rolls razors shows the depth from top to hone to be .570 on one side of the box, and .580 on the other. For those interested to know, the strop side is set at .610-.620
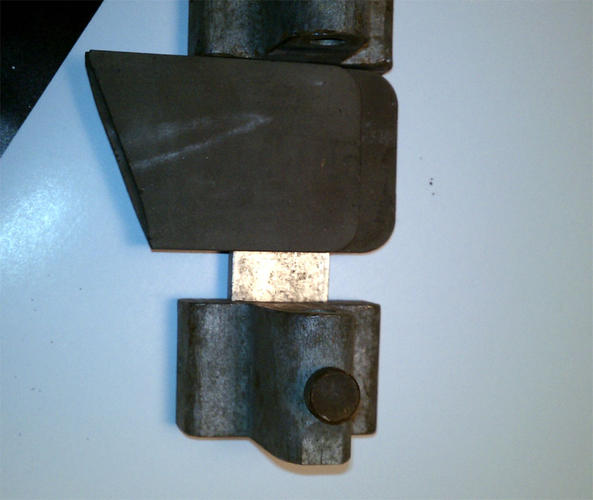
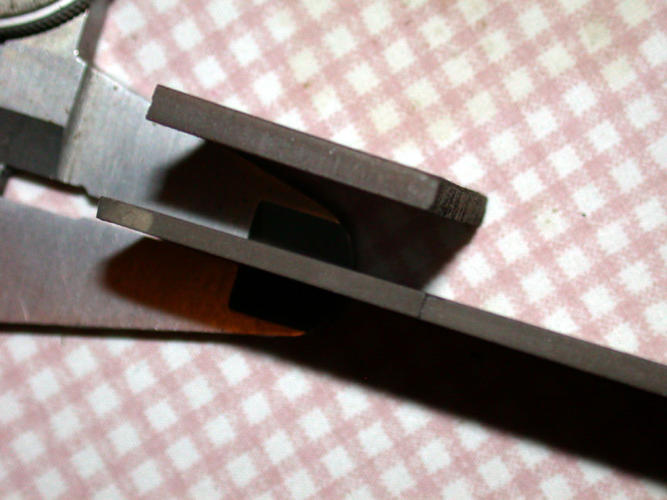
Its important to know this, because the process of honing the stone thins it out. depending on HOW MUCH you thin it, it could become a problem. Here is my stone, after being fully prepped. Remember I said it was made of 3 parts? well, the first 2 parts were assembled and flattened, and then the third part was assembled to finished size, and flattened again. This meant the first section was flattened 2x. resulting in a stone that was nice and flat on one side, but had a tapering thickness from one end to the other.
In the photo, you can see how one end is thicker than the other, and how much thinner the entire thing is compared to original thickness. ( original thickness being .143 approx)
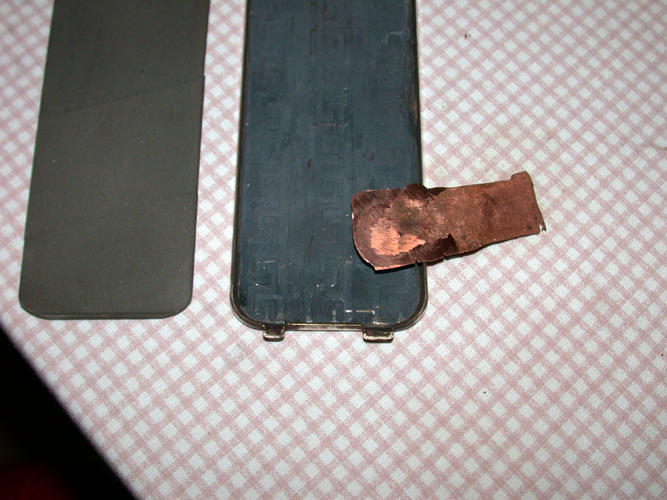
Knowing how thick the stone is, and how thick it SHOULD be for proper honing, its simple enough to determine what size shims to place under the stone for height adjustment. (make sure to take all measurements at the same spots where stone will contact spacer)
I used a bit of copper pipe hammerd flat. I needed 2 strips. one of .01 inch, and another of .04 inch. They dont need to be large, the main purpose is to keep the stone at the correct height in relation to the cover.
Nows the tricky bit. if you just glue the shims in place, it might work fine. OR, it might leave a nice gap under the belly of the hone, where it can flex, and possibly break again.
So, using some lovely gooey silicone rubber, I filled in the gap area. This is also good, because the silicone can be removed without a hammer and chisel should you ever need to replace the stone again.
Then I placed the stone carefully on top.
VERY IMPORTANT!
Cover face should be properly supported on a flat surface. I do NOT recommend using one of your honing stones for this.
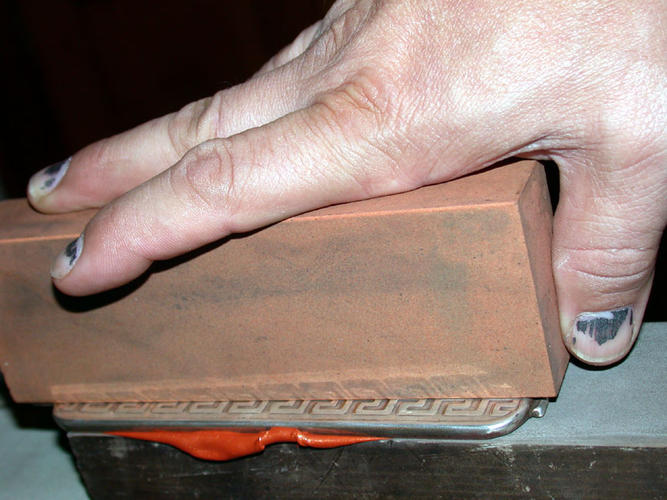
MORE IMPORTANT!!
Do NOT press the stone down with your fingers! use another flat block to be certain there is no pressure placed on one area of the stone, which could cause it to crack.
I do not recommend using one of your honing stones for this either. Because as you gently work the stone down into position, the goo comes oozing out the sides, and gets all over them
Once the goo has dried, its easy to trim off any excess with a razor (not one of the ones you shave with you goose!)
and Presto! a working Rolls Razor!
Very Special thanks to Tom (Sharptonn) for sending me lots of bits and pieces to play with!
Hope somebody gets some use out of this venture into madness.
-


 Reply With Quote