
Results 11 to 17 of 17
 1Likes
Thread: Bringing the smile back...
 LinkBack URL
 About LinkBacks
-
01-29-2009, 06:01 PM #11Senior Member


- Join Date
- Feb 2008
- Posts
- 32,564
Thanked: 11042 It is a PITA no matter how you go about it. I have done it on a real bear of a frown. I first tried the coarse DMT 325 with three pieces of tape but the frown was so severe that I went to the breadknifing. The circles and back and forth strokes followed on the DMT 1200 to set the bevel. Had it not been a brand I really wanted I would have thrown it in the trash bin.
 Originally Posted by Sticky

The link to the barber manual that Steven provided is one of my favorite resources. It displays sideways on my computers both at work and at home so I printed out a copy for each location to easily refer to it. The author provides a drawing or what he feels is the ideal blade profile and a method of honing to keep it that way. I have been playing with this in my regular honing and I like it.Be careful how you treat people on your way up, you may meet them again on your way back down.
-
01-29-2009, 07:44 PM #12Coticule researcher
- Join Date
- Jan 2008
- Location
- Belgium
- Posts
- 1,872
Thanked: 1212
Let's be real for a minute. No single tool maker (re)profiles and sharpens a cutting tool at the same time. First you need to establish the proper profile. Next you need to put an even bevel on that profile. Then you hone that bevel till it suits your needs. Whether I am talking about a woodworking gouge, a billhook, or a smiling razor makes not the least bit of difference.
By far, the easiest way to grind a smiling curve on a razor blade, is to put it with its edge down on a coarse hone (the DMT 325 is great for that), and "breadknife" with a rocking motion. It's easy to control, and pretty quick too. After you made the curve you wanted, you need to put 3 or 4 layers of tape on the spine and start using the rolling X-stroke. Use the same coarse hone and apply a bit of pressure, while completing the bevel till it extents all the way to the apex again. Next start backing of on the pressure, reduce the tape to 2 layers, and move up one grit-level. After that, finalize the bevel (with or without one layer of tape, according to your personal preference) on your normal bevel-correction hone (such as a DMT1200).
That's it.
Hone as smiling razor after that.
All the rest is making a straightforward task very complicated.
Bart.Euclid440 likes this.
-
01-29-2009, 07:59 PM #13Rusty nails

- Join Date
- Jan 2009
- Location
- Winchester, MA
- Posts
- 910
Thanked: 159
I've just turned this
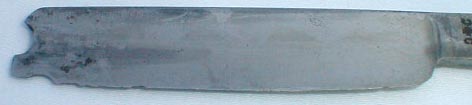
Into this

with aggressive angles and bredknifing on a King 800 hone. It gave me an ok shave last night. Removing a frown should not be much more difficult.
-
01-29-2009, 09:30 PM #14< Banned User >
- Join Date
- Feb 2008
- Posts
- 3,763
Thanked: 735
This may be true, but for the sake of discussion, no other tool also includes a second surface that is also intended as a reference to use for sharpening. Originally Posted by Bart
And axe, knife, or whatever is a single edge, and thus can be shaped and sharpened however one pleases.
In my opinion, a razor is a peculiarity, as it has the spine upon which the razor is designed to rest to establish the final cutting bevel angle and edge.
Adding tape to the spine I guess adds a degree of "squish" to allow there to be some misalignment between the spine bevel and edge bevel. And that certainly is one way to skin the cat. I myself, prefer having the spine bevel match the edge bevel as it is less levels of ambiguity when honing, stropping, and re-honing a particular razor.
-
01-29-2009, 10:14 PM #15Coticule researcher
- Join Date
- Jan 2008
- Location
- Belgium
- Posts
- 1,872
Thanked: 1212
I sharpen most of my tools on a Tormek machine, that has tremendous accuracy in setting and holding the honing angle. This is irrelevant for the need to establish the desired tool shape first. Originally Posted by Seraphim
Doing that "honingly" is asking for difficulties.
I couldn't agree more. For establishing the bevel, the angle is dialed in by resting the razor on spine and edge. But that has nothing to do with altering the edge curvature, if that is desired. In this particular case, it is desired: the original poster wants to produce a smiling edge. Originally Posted by Seraphim
The logical thing to to is to produce that smile first, and then create a bevel on it.
I am fairly sure that a razor maker would take the same approach while making a smiling razor blade. I can't imagine a razorsmith producing a straight edge before honing a smile to it. He will first grind the smile and next cut the bevel on a coarse hone.
I don't add tape for "squish". I add the tape, because I want to apply some pressure. That flexes the blade a bit, which flats out the honing angle, producing a slightly wider bevel. A few layers of tape counteract that. Before ending the bevel setting stage, I always remove the tape, back off on the pressure and continue honing for the most accurate bevel. I did my first bevel restores without tape, and they shave equally well, but their bevel starts with a small strip of coarse scratches, that can be seen with magnification only. Adding tape avoids that. I don't care about a spine bevel. I only care about a steady honing angle. Originally Posted by Seraphim
There is no single downside to this approach. It does not remove more steel than needed for the new edge shape. It is reliable, reasonably quick, and far easier than any other method that requires honing with variable pressure throughout the stroke, or shaping with a cutting disc on a Dremel.
If any method holds a risk to removing more steel than needed, then it's honing the new shape into the razor. With that method, it's very likely that you won't be able to recess the tip and the heal without affecting the middle part as well.
Bart.Last edited by Bart; 01-29-2009 at 10:18 PM.
-
05-15-2013, 07:05 AM #16< Banned User >
- Join Date
- Feb 2013
- Location
- Denmark (irish)
- Posts
- 45
Thanked: 1
Originally Posted by Sticky
Anybody still have this ??
It doesn't work :-((((
-
05-15-2013, 07:42 AM #17BHAD cured

- Join Date
- Jan 2008
- Location
- Indiana
- Posts
- 1,306
Thanked: 230
This should be the new link to the same pdf file: File:Help Files Permanent Archive Barbering Textbooks 1961 Barbering Text - Honing.pdf - Straight Razor Place Wiki Originally Posted by pet3r
-
The Following User Says Thank You to Sticky For This Useful Post:
Euclid440 (05-17-2013)


 Reply With Quote