Results 1 to 7 of 7
 15Likes
Thread: Don't have a chuck any suggestions?
Hybrid View
-
11-22-2015, 05:30 PM #1
 Don't have a chuck any suggestions?
I figure I could cut the knot hole and turn a jamb chuck and use that to finish the body, but idk seems like when I try and finish the bottom I'll just push it off the chuck.
I'm hoping for a chuck for Christmas, but I don't think my current brush will last that long as it sheds more than my Lab in summer.
-
12-06-2015, 08:01 AM #2Junior Member

- Join Date
- Nov 2015
- Location
- Moapa Valley, Nevada
- Posts
- 11
Thanked: 3
Pictures of the brush, and lathe will help figure out what will work for you.
Do you have a drill press available?
-
12-07-2015, 01:20 AM #3I love Burls....... and Acrylic


- Join Date
- Mar 2012
- Location
- Baden, Ontario
- Posts
- 5,475
Thanked: 2284
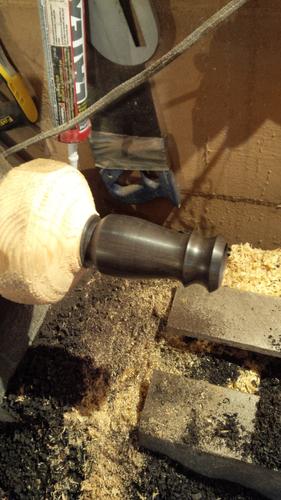
Got a face plate that uses screws? You can do a setup much like this if you do.

That's a 2x4 cut perfectly square with a piece of African blackwood Super glued to it. I used super glue with an activator here, to have instant adhesion. Hot glue (glue gun) will also work very well. Make sure everything is square, flat and lined up properly and this works quite well. If you don't have the right sized forstner bit to drill the hole for the badger, a very small and sharp parting tool will do the job too. Just take your time.Burls, Girls, and all things that Swirl....
-
The Following 4 Users Say Thank You to HARRYWALLY For This Useful Post:
FacialDirt (06-12-2020), Geezer (11-30-2016), jfk742 (01-19-2016), rolodave (06-12-2020)
-
11-27-2016, 05:03 PM #4Member

- Join Date
- Jan 2016
- Location
- Georgia, USA
- Posts
- 83
Thanked: 4
Drill your brush hole and use that end on the tail stock. Part off the end closest to the headstock. That's how I do it with a standard claw.
-
11-30-2016, 02:42 PM #5

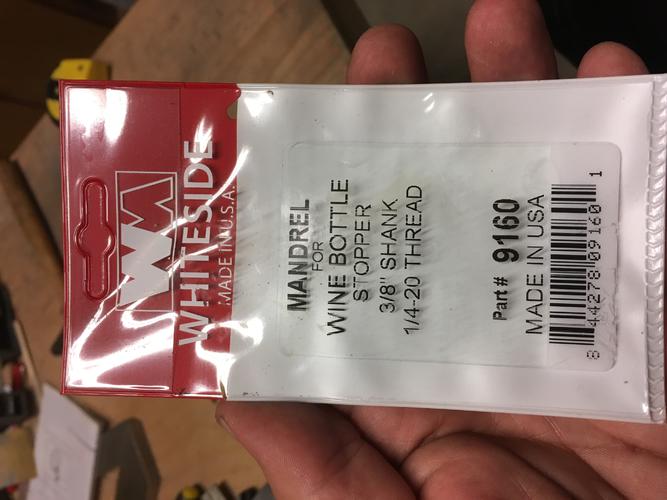
Cheap and easy solution is a bottle stopper mandrel. They are about $7 from woodcraft . If you have a collet set.


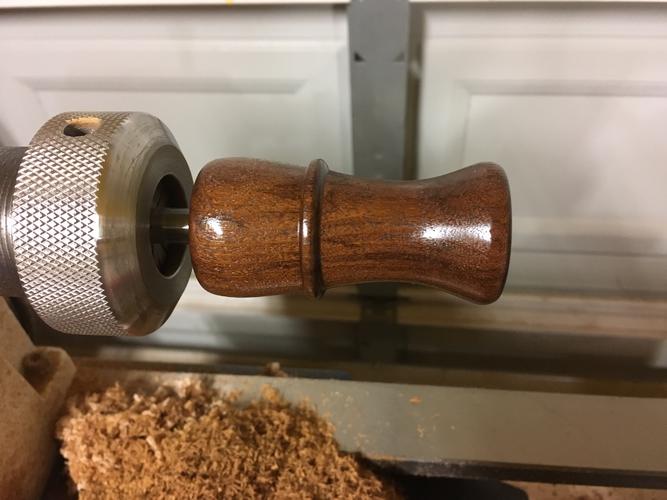
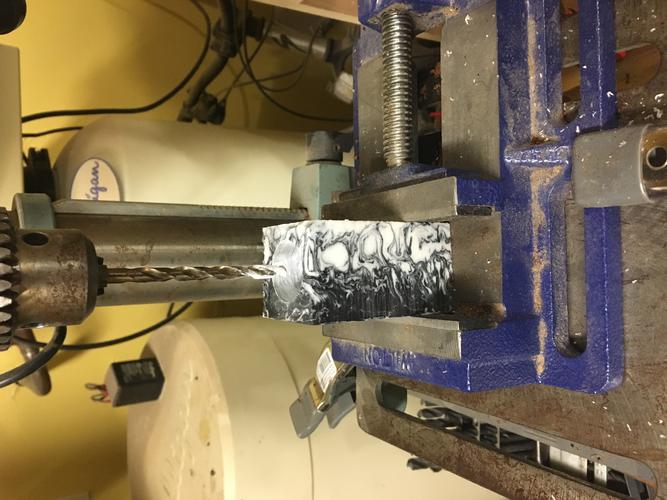
The shank is 3/8 so you will need a collet set or drill chuck for the lathe. the threaded portion is 1/4x20 threads. Set up your drill press with your blank in a vise, drill a small pilot hole 1/16 is what I use, next w forester bit drill the pocket for your knot, then while the blank is still in position drill a 7/32 hole down another 3/4" using the original pilot hole, once the drilling is done run a 1/4x20 tap down through that 7/32 hole and you are set , thread your blank on the mandrel that is set up in the lathe and turn.

It sounds like a lot but I can mark the center of the blank and have it set up on the lathe in about three minutes, very quick and simple, the key is not moving the blank once it is in the vise on your drill press and running the three step process (pilot, pocket, and hole for the mandrel.)
This was my set up before my chuck arrived. the pilot hole just helps keep everything centered during the process and ensures you will be turning a concentric piece, if you move the blank from the vise between steps you take chance of that final threaded hole being off center which will give you an off center bore once turned.
( sorry for the horizontal pics, something is happening between my I phone and upload, I can't figure out.)Last edited by AKmik; 11-30-2016 at 04:38 PM.
-
The Following 3 Users Say Thank You to AKmik For This Useful Post:
FacialDirt (06-12-2020), Geezer (11-30-2016), NOTSHARP (05-28-2017)
-
12-01-2016, 05:22 AM #6Previously lost, now "Pasturized"


- Join Date
- Oct 2005
- Location
- Winnipeg Manitoba Canada
- Posts
- 1,333
Thanked: 351
1. Mount something like that 2 x 4 on a face plate, glue your handle blank to it and turn the handle and drill the hole for the knot, making sure you have a nice flat bottom in the knot hole, but drill a small pilot hole a bit deeper in the centre.
2. Finish handle and part off from the 2 x 4 where it was glued.
3. Glue another piece of junk wood to the 2 x 4 on the face plate and turn it to a mandrel that will just fit the knot hole in your handle and goes right to the bottom of the knot hole, but you do not want it to be a jamb fit... just snug. Drill a hole just large enough to epoxy the shank part of a wood screw (cut the head off the screw) into the the hole you drilled in the mandrel you just turned.
4. Now you can screw the handle onto that mandrel with the short wood screw sticking out. If you kept the fit snug without interference so it doesn't split the handle, the handle will turn true and you can shape the other end of the handle and finish it as you wish. The pilot hole inside the handle where the screw went will get filled with epoxy when you glue in the knot, but the hole should be small enough that it won't make any difference if you don't get any glue into it.
Sorry, this might make more sense if I had pictures to go with it.... As long as you have a face plate and some wood scraps, a drywall screw and some epoxy you should be good to go.
Oh, and when working on that end of your handle.... a nice sharp skew chisel would make a great tool for shaping it. Don't get carried away hogging off wood as it's only held on by that one screw! I'd do most of the shaping at the time I'm parting it off the face plate, leaving just the nub and sanding/finishing to be done.
Regards
Christian"Aw nuts, now I can't remember what I forgot!" --- Kaptain "Champion of lost causes" Zero
-
The Following User Says Thank You to kaptain_zero For This Useful Post:
FacialDirt (06-12-2020)


 LinkBack URL
 About LinkBacks


 Reply With Quote