
Results 1 to 10 of 28
 97Likes
 LinkBack URL
 About LinkBacks
-
04-10-2019, 04:29 PM #1Senior Member


- Join Date
- Jun 2015
- Location
- South Carolina
- Posts
- 1,838
Thanked: 516 Knotilus
Howdy gentlemen, thought I'd post my work process on this one.
The Knotilus, first of the "20000 Leagues Under the Lather " series.
Definitely the most challenging brush I've attempted, as technical hurdles quite often mocked the virility of my imagination and will, yet I triumphed none the less!
To start, I had two candlesticks to work with.
First I made The Faberge Brush (pipe brush thread). With the spare parts I made the latest piece.
My first step after conception, is the sketch. Though there's always deviation from the initial drawing.
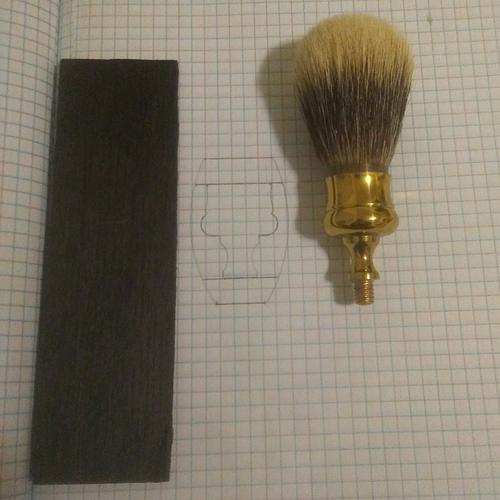
At first it was to be more simple, but soon took a life of its own.
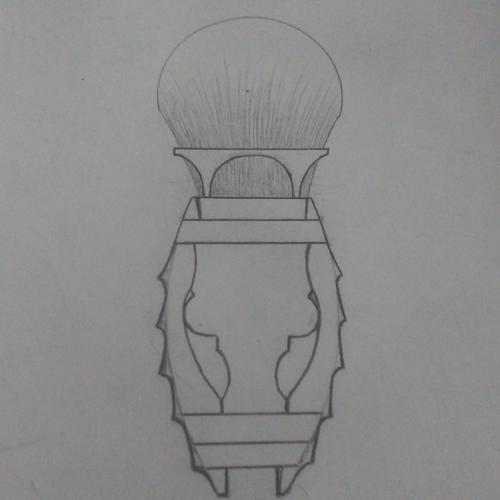 You must unlearn what you have learned.
Yoda
-
04-10-2019, 04:33 PM #2Senior Member
- Join Date
- Jun 2015
- Location
- South Carolina
- Posts
- 1,838
Thanked: 516
The materials:
Bog oak 8k yr old, from Ireland.
Candlestick parts.
22 F knot. (Can't remember specifics)
Strong magnet.
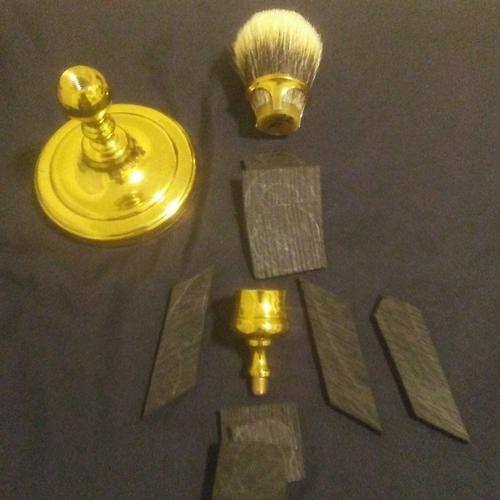
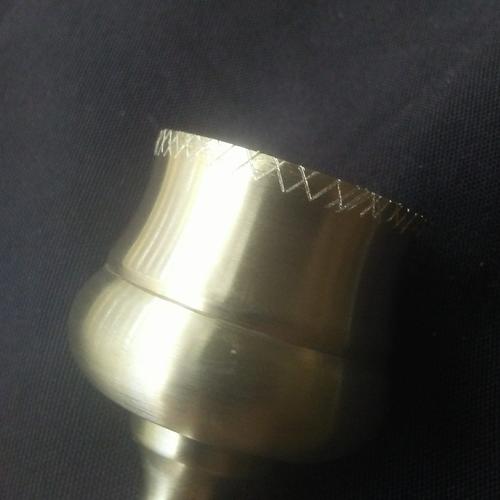
The rim extension was an add on. Very happy with it! I took some measurements, marked it with a sharpie, and went crazy with the dremel. Specifically using the cutting discs and sanding drum. The flex-shaft is a significant game changer!
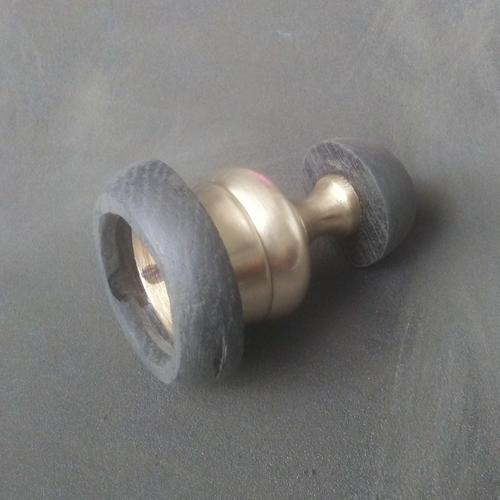
Here is a pic of the wood bottom piece and middle rim.. The wood was too thin to simply cut and use, I had to attach 3 pieces, glued and clamped. CA works great for this. Make sure to align the wood grain.
*When cutting wood, always think about the grain direction with regard to the design for strength and looks.*
When I glue things, I make sure to create "structural adhesion". Not just with sand paper but (when I can) I'll make deep scratches with a razor. I think it helps.
 You must unlearn what you have learned.
Yoda
-
04-10-2019, 04:36 PM #3Senior Member
- Join Date
- Jun 2015
- Location
- South Carolina
- Posts
- 1,838
Thanked: 516
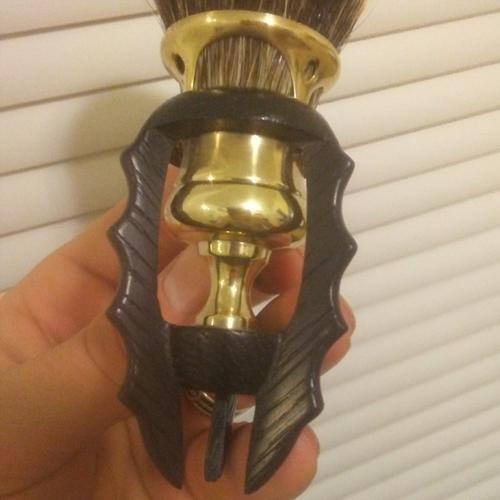
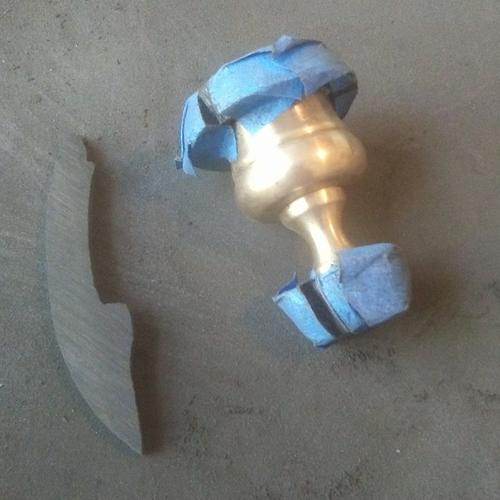
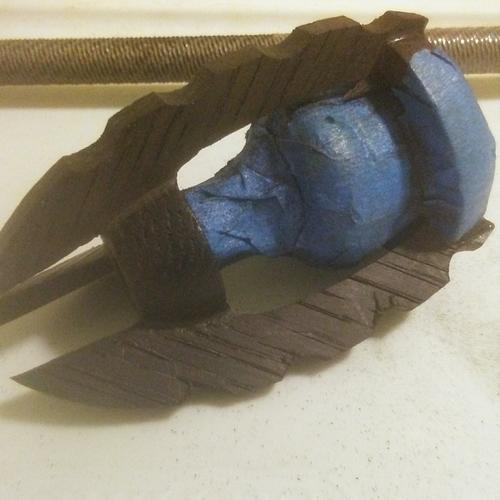
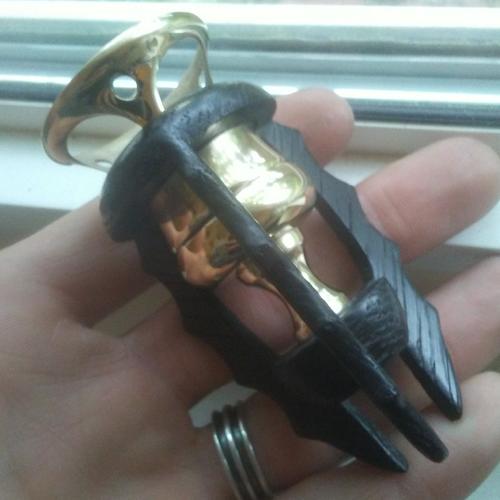
Here's those two pieces glued on. In the confusion that happens when not perfectly planned out (is it ever?) I did not align the bottom wood grain to the top, thankfully not really noticeable. One of the notches for the rim extension can be seen.
And a couple pics getting the ribs sized and notched onto the rim and base.
Serious tinkering. Long time! Will do a little different on the next one to speed it up.
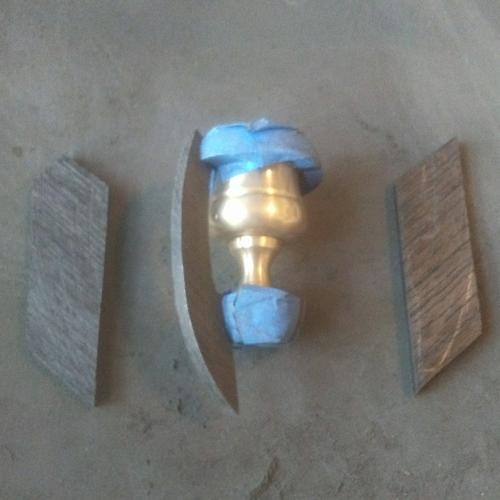
I got them all attached with Bog-Epoxy before doing the final shaping. Always leave some meat to work with when carving and detailing. The rib extension NOT glued in yet, just to get a look.
 You must unlearn what you have learned.
Yoda
-
04-10-2019, 04:39 PM #4Senior Member
- Join Date
- Jun 2015
- Location
- South Carolina
- Posts
- 1,838
Thanked: 516
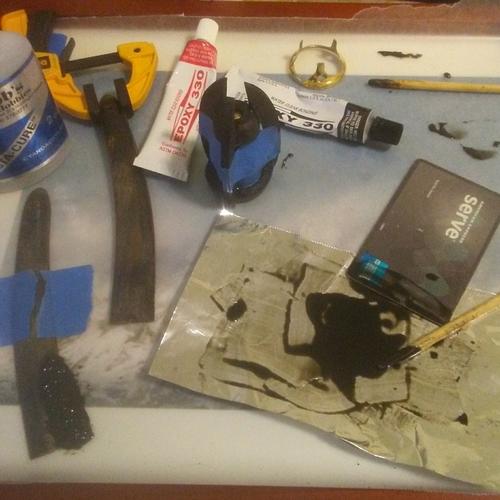
A mistake I made was not wiping away the excess epoxy that squeezed out. This created hours of sanding work when it hardened!
Here's a pic: a picture frame with glass, wax paper, epoxy 330, old bank card, tip flattened chop-stick, cool little clamp (love those things), thin CA.
Did a little work on some scales while it was all out.
I like to mix the bog dust with the resin and hardener before mixing the two part epoxy with a bank card, plenty of experience with a card in such a way! Works great!
Always remove epoxy from tools while wet.
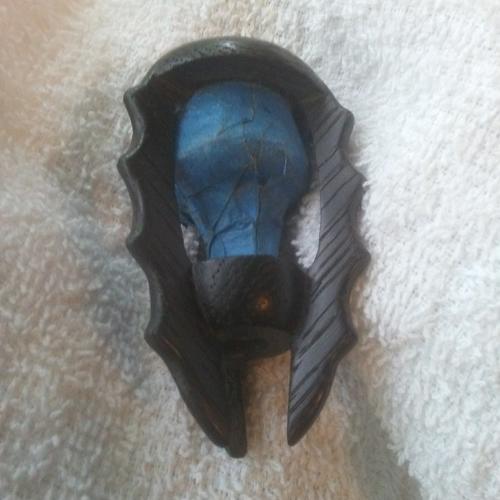
And for the shaping! Man I gotta say that I really really like those little drum sander bits for the dremel.. That with the flexshaft and your gold! Just don't take too much off.
Finished the sanding with a scratch pad to "dig out" the wood grain and then some fine sand paper. Wish I had some micro-mesh.
Don't forget an eraser with sandpaper, excellent tool.

 You must unlearn what you have learned.
Yoda
-
04-10-2019, 04:41 PM #5Senior Member
- Join Date
- Jun 2015
- Location
- South Carolina
- Posts
- 1,838
Thanked: 516
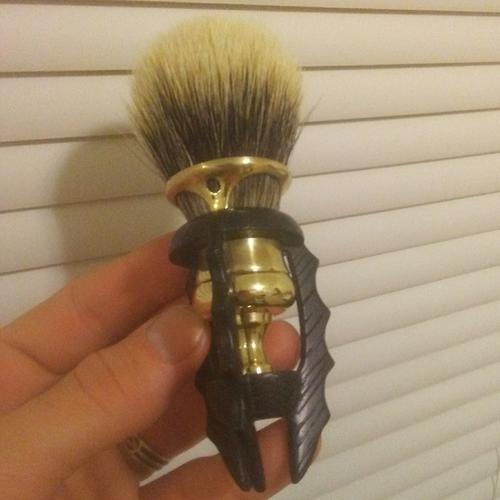
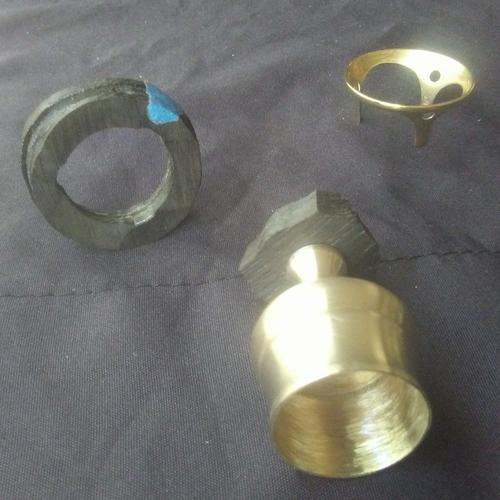
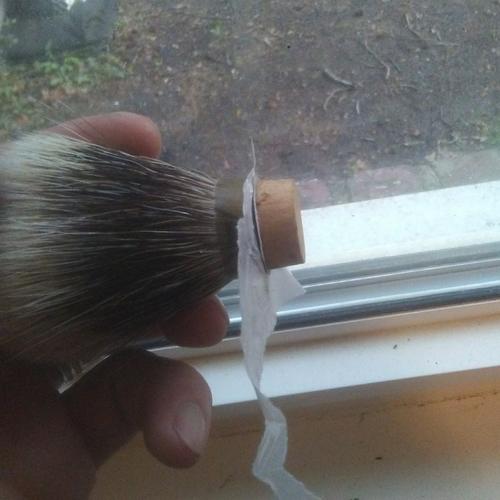
On the rim extension, I coated the inside with CA after scratching it up. This is because it is brass making contact with the wet fur.
Here is a pic with it attached.
Also a pic of the knot. I used a cork, and two strong magnets to attach to the knot. In the pic you can see the wax paper used while it dries.
Now the knot can be removed. Not necessary, but allows for a change, the new owner of this fine piece of insanity can choose to change the knot, or glue it in, but I think it should hold strong.
 You must unlearn what you have learned.
Yoda
-
04-10-2019, 04:42 PM #6Senior Member
- Join Date
- Jun 2015
- Location
- South Carolina
- Posts
- 1,838
Thanked: 516
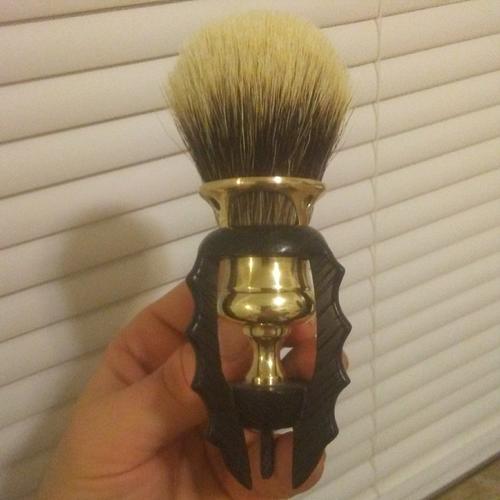
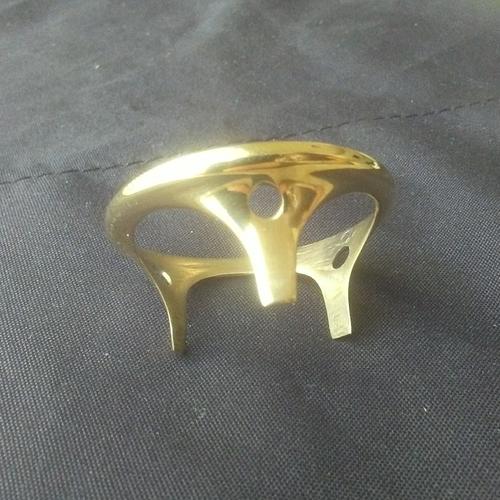
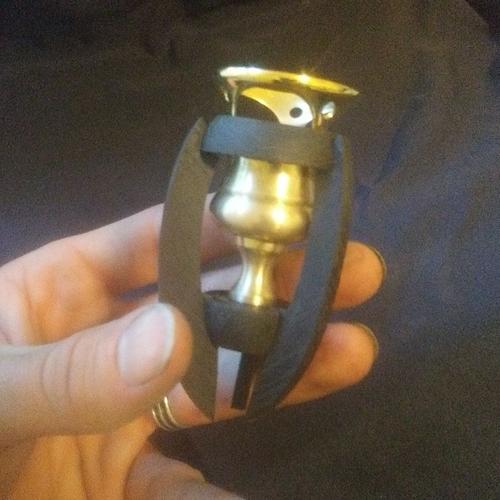
And the final piece! The new owner opted out of the brass candlestick base. Though the brush is designed to use one, as it does not stand well on its own, he thinks it looks more like the Nautilus while resting on its side. Which I can agree with.
I put a magnet in the base for good measure, just in case he wants to hang it.
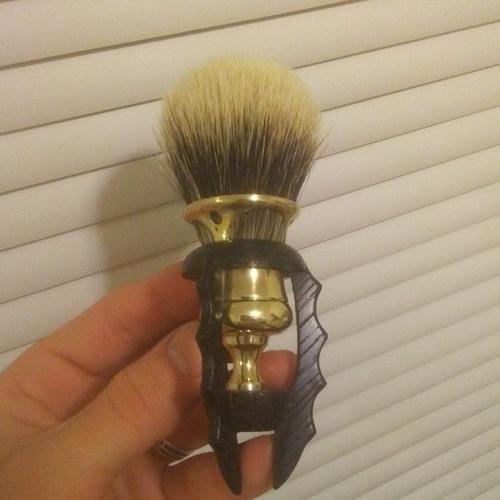
It's very sturdy, and strong.
Works great! Many positions available, once your fingers become accustomed to the feel of the contours.
So I'm glad that it's not just a display piece, but functions quite well.
Thanks for looking, I hope to make and see more strange projects! It was a fun one!
Cheers GentsYou must unlearn what you have learned.
Yoda
-
04-10-2019, 04:48 PM #7Razor Vulture


- Join Date
- Oct 2010
- Location
- Lone Star State
- Posts
- 26,195
Thanked: 8624
That's far-out, MikeT!
I can see Nautilus in that MikeT likes this.
-
The Following User Says Thank You to sharptonn For This Useful Post:
MikeT (04-10-2019)
-
04-10-2019, 04:53 PM #8Senior Member
- Join Date
- Jun 2015
- Location
- South Carolina
- Posts
- 1,838
Thanked: 516
Thanks man, this is a special project for me and it's good to know the Nautilus design shows in this rendition.
You must unlearn what you have learned.
Yoda
-
04-10-2019, 05:56 PM #9Senior Member

- Join Date
- Feb 2018
- Location
- Manotick, Ontario, Canada
- Posts
- 2,814
Thanked: 563
I think Jules Verne had a beard, but he’d shave it off in a minute if he got to use that brush.
Spectacular!David
Shared sorrow is lessened, shared joy is increased
― Spider Robinson, Callahan's Crosstime Saloon
-
The Following User Says Thank You to DZEC For This Useful Post:
MikeT (04-10-2019)
-
04-10-2019, 06:29 PM #10~ Life is but a Dream ~

- Join Date
- Dec 2014
- Location
- Oakham, Ma.
- Posts
- 3,844
Thanked: 1218
Very creative and very cool!
Pete <:-}"Life is short, Break the Rules. Forgive quickly, Kiss Slowly,
Love truly, Laugh uncontrollably, And never regret ANYTHING
That makes you smile." - Mark Twain
-
The Following User Says Thank You to petercp4e For This Useful Post:
MikeT (04-10-2019)


 Reply With Quote