Results 1 to 6 of 6
Like Tree27Likes
  • 17 Post By TheBaron
  • 2 Post By DZEC
  • 2 Post By TheBaron
  • 2 Post By tintin
  • 2 Post By AlanQ
  • 2 Post By DZEC

Thread: My recent brush, build images

  1. #1
    Information Regurgitator TheBaron's Avatar
    Join Date
    Aug 2009
    Location
    So Cal
    Posts
    578
    Thanked: 171

    Default My recent brush, build images

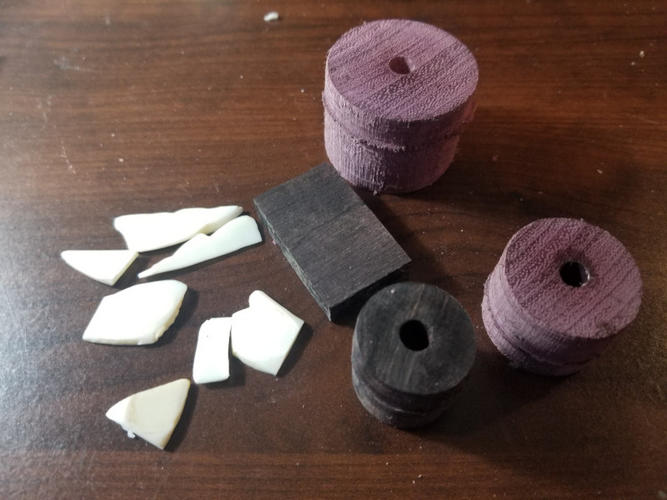
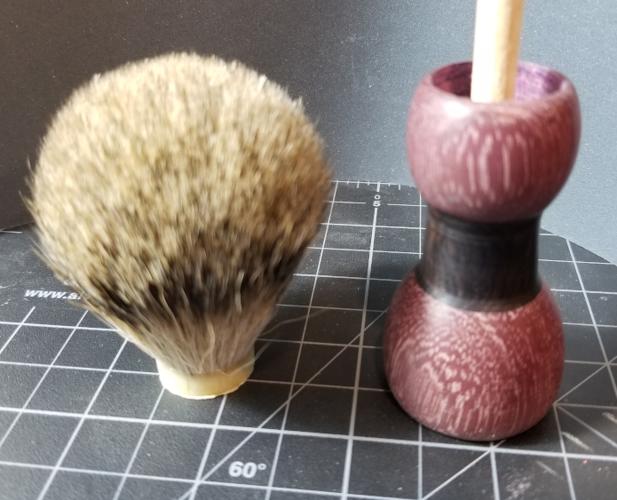
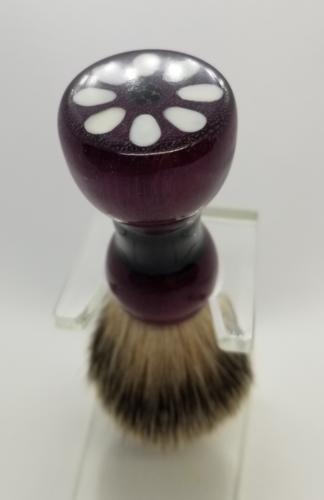
    Couple days ago I posted this brush here and should have put that thread in the gallery as it didn't contain any build images (moderators are welcome to move that thread).

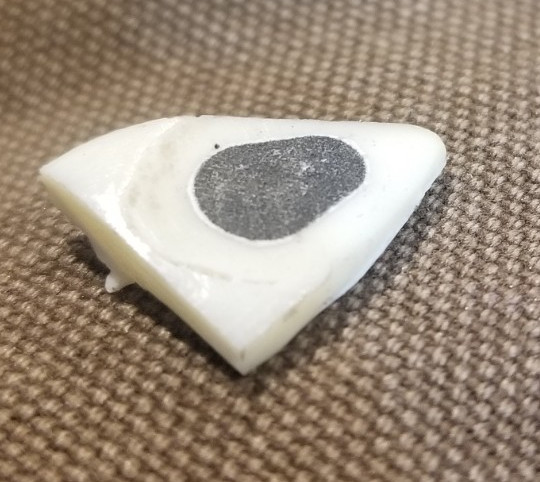
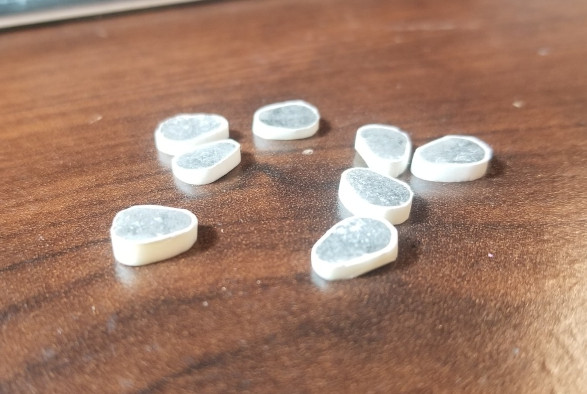
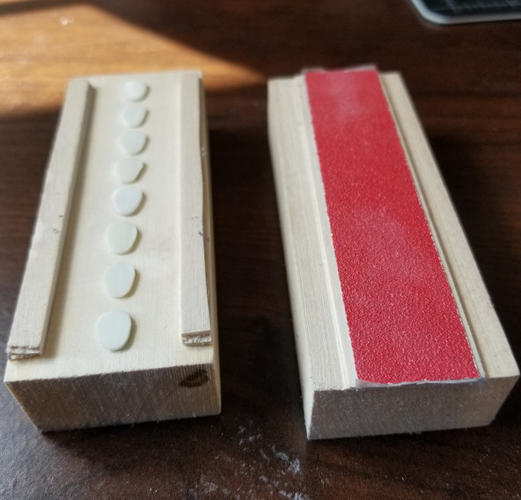
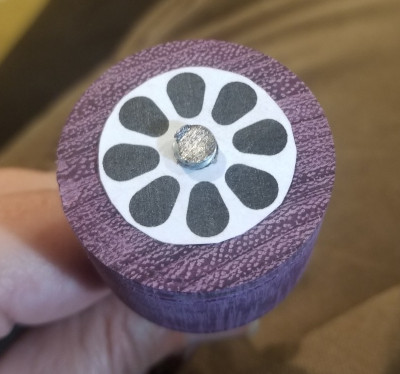
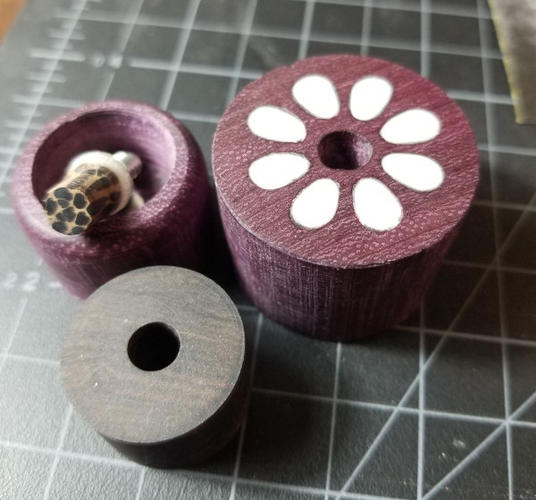
    Thought I'd create a thread showing the images of the build I captured along the way. I don't have a lathe, just some hand tools, a drill and a Dremel; and this is only the second time I've done an inlay in anything.

    The brush was designed using the hole saw method I've posted in the past, this has the advantage of being able to inlay the back of the brush while it's still only an inch high instead of trying at full length. Enough yammering, here's the pics...

    Name:  1.jpg
Views: 232
Size:  43.6 KB

    Name:  2.jpg
Views: 255
Size:  79.9 KB

    Name:  3.jpg
Views: 340
Size:  71.1 KB

    Name:  4.jpg
Views: 245
Size:  32.7 KB

    Name:  5.jpg
Views: 218
Size:  45.1 KB

    Name:  6.jpg
Views: 233
Size:  39.6 KB

    Name:  7.jpg
Views: 205
Size:  42.8 KB

    Name:  8.jpg
Views: 197
Size:  37.0 KB

    Name:  9.jpg
Views: 195
Size:  10.3 KB

  2. The Following 4 Users Say Thank You to TheBaron For This Useful Post:

    jfk742 (12-19-2019), Johntoad57 (12-12-2019), markbignosekelly (12-12-2019), tintin (12-12-2019)

  3. #2
    Senior Member blabbermouth
    Join Date
    Feb 2018
    Location
    Manotick, Ontario, Canada
    Posts
    2,768
    Thanked: 550

    Default

    The way you set up a jig to make sure the inlays were of uniform thickness was simple and ingenious.

    Hand tools and a Dremel, you say - impressive.

    I am curious about how you shaped them so uniformly and how you managed the depth of the inlay space in the receiving part of the handle.
    rolodave and AlanQ like this.
    David
    “Shared sorrow is lessened, shared joy is increased”
    ― Spider Robinson, Callahan's Crosstime Saloon

  4. The Following User Says Thank You to DZEC For This Useful Post:

    TheBaron (12-12-2019)

  5. #3
    Information Regurgitator TheBaron's Avatar
    Join Date
    Aug 2009
    Location
    So Cal
    Posts
    578
    Thanked: 171

    Default

    @DZEC

    The jig worked so well I cracked one of the inlays in half and had to make another, used the same jig to get that correct height.

    Shaping them uniformly was just file, check, be patient, repeat ...for a long time. They are not all perfectly uniform but close enough for the eye.

    For the depth of the inlay holes? sockets? trench? not sure what you call that recess you create to put inlays in. I have the plunge router attachment for my Dremel and you have to watch the pressure but it gets me by. I had to glue some boards together and use the holesaw to drill a cavity to put the top of the handle in, this gave me a large flat surface to run the Dremel router on when cutting the inlay channels.
    rolodave and DZEC like this.

  6. #4
    Senior Member blabbermouth tintin's Avatar
    Join Date
    Jun 2013
    Location
    archbold ohio
    Posts
    2,364
    Thanked: 545

    Default

    Yes, neat idea for thicknessing. Don't see why it wouldn't work for scales as well.
    AlanQ and DZEC like this.

  7. The Following User Says Thank You to tintin For This Useful Post:

    AlanQ (12-12-2019)

  8. #5
    Senior Member AlanQ's Avatar
    Join Date
    Aug 2015
    Location
    Montreal
    Posts
    853
    Thanked: 128

    Default

    More proof you people are all smarter than I.
    Thanx for sharing and giving me some ideas
    rolodave and DZEC like this.

  9. The Following User Says Thank You to AlanQ For This Useful Post:

    TheBaron (12-12-2019)

  10. #6
    Senior Member blabbermouth
    Join Date
    Feb 2018
    Location
    Manotick, Ontario, Canada
    Posts
    2,768
    Thanked: 550

    Default

    Quote Originally Posted by tintin View Post
    Yes, neat idea for thicknessing. Don't see why it wouldn't work for scales as well.
    Can’t find it now, but a while back I saw a post using a similar jig with an electric palm sander to thickness wood for scales.

    Found the link - https://shavelibrary.com/w/Palm_sand...or_scale_slabs
    Last edited by DZEC; 12-12-2019 at 10:21 PM. Reason: Found the link
    32t and AlanQ like this.
    David
    “Shared sorrow is lessened, shared joy is increased”
    ― Spider Robinson, Callahan's Crosstime Saloon

Posting Permissions

  • You may not post new threads
  • You may not post replies
  • You may not post attachments
  • You may not edit your posts
  •