
Results 1 to 10 of 11
 24Likes
Thread: Setting a Brush Knot (pic heavy)
 LinkBack URL
 About LinkBacks
Threaded View
-
05-22-2010, 06:06 PM #1Junior Member


- Join Date
- Sep 2009
- Posts
- 29
Thanked: 38 Setting a Brush Knot (pic heavy)
This is a quick photo essay how I set my brush knots. I will preface it by saying this is not the only way or the correct way - it is what works best for me after making a bunch of brushes.
Would also ask anyone else with some good tips to please add to the thread.
Simple elements are
The Knot
Handle
Epoxy
Important parts:
Prep Work and a clean work station.
The Knot - a matter of preference , loft height , plug size , badger hair , boar bristle or synthetic .
I prefer badger hair in a short chubby loft. The origins of the best badger hair/knots is a subject of contention with many "wet shaving connoisseurs", some even believe that places like England and France actually still cull badgers to source the hair from them to use in their brushes - anything is possible.
The Handle - An endless selection of materials that could be used for a shaving brush handle - use your imagination.
Unfortunately plastic seem to be the norm these days - raw materials for these cost about $1 each per handle - the labor is the expensive part.
Epoxy (not glue) - I suggest two part plumbers waterproof epoxy in separate tubes (easier to mix than the dual plunger variety) - this is made to be used around water and suits the purpose of gluing a knot quite well. I use a German brand called Pattex this works best for me. Have read folks using Gorilla Glue , clear silicone tub caulking and even crazy glue - think epoxy
The most important thing before attempting to set the knot is your handle is clean and free of any dust or debris - this is true for any material being used whether or not you are doing a refurb of and old handle scored on eBay or petrified wood or stainless steel like the examples I am showing - same goes for the knot you are using - it should dry and dust free.
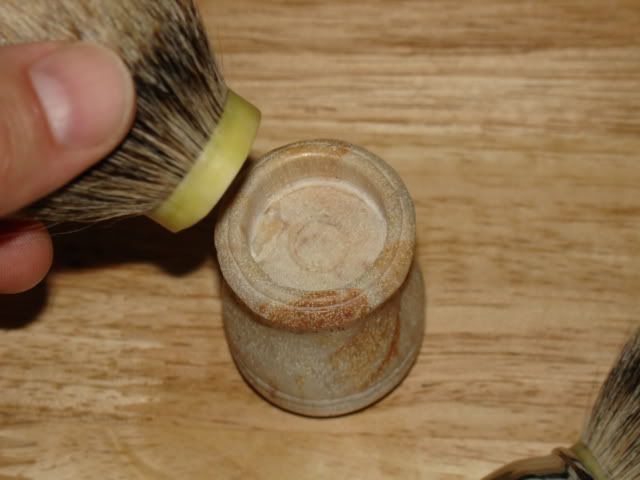
Second is the fit - prior to setting the knot you want to make sure you have a perfect or as close to it as possible "fit" - like the old saying "To Be Sure , You Have To Make Sure" - be sure of the fit before epoxying anything.
Mixing the epoxy -
I use a Q-Tip with the end snipped off to do this and keep some other Q-Tips on hand to wipe away any excess epoxy
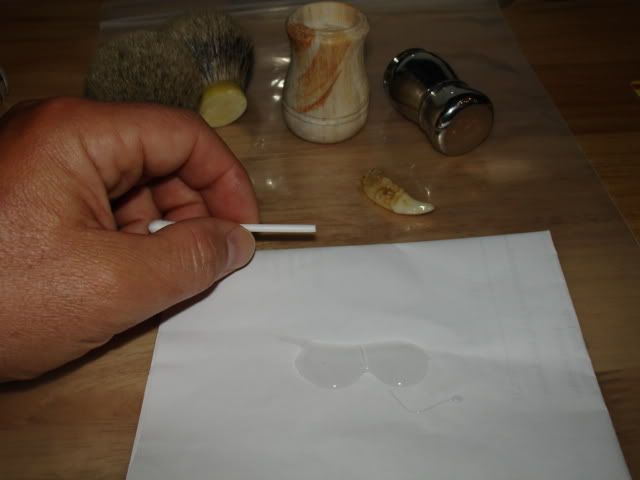
How much epoxy? , use enough but work clean - if you gunk up the knot base with glue it sure will not look very nice.
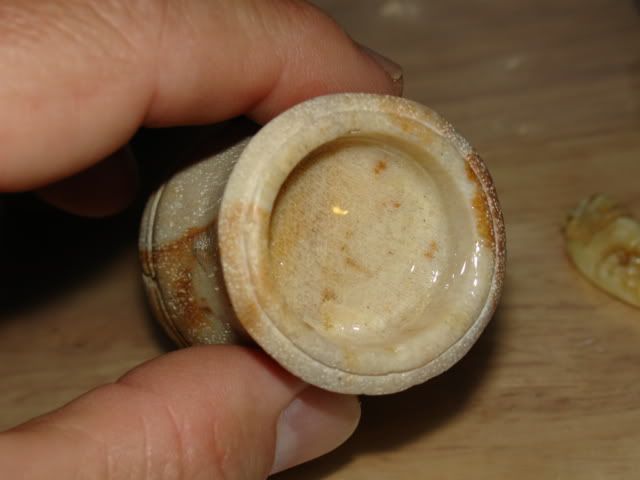
I suggest to use most of the epoxy in the handle portion - this is your anchor - keep the rim of the handle opening as glue free as possible , use the q-tip ( the q-tip can be slightly damp with warm water) to wipe any excess away from the top and rim of the handle opening.
Epoxy's work by joining bonds - so you need to apply epoxy to the plug (the yellow knot base) as well ,but this can be a light coating - as long as there is enough to form a bond.
Again work clean here and use less than you may think is needed.
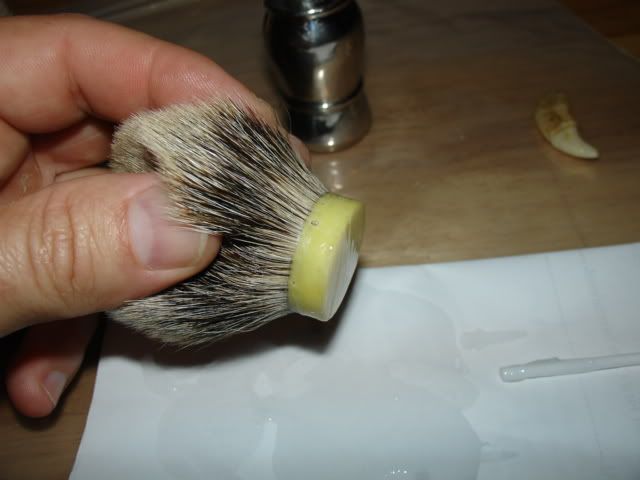
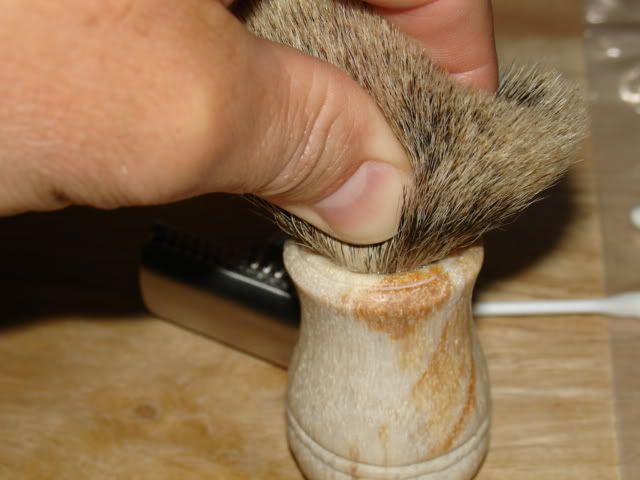
Below image shows adhesion - I am pushing down on it using a bit of force - a small bit of epoxy squirts out around one edge - this quickly gets wiped away with the q-tip.
Here is the knot "set" and ready for drying
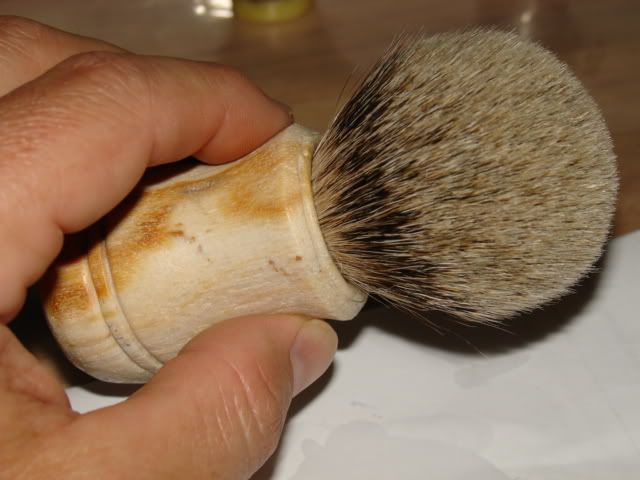
This epoxy is strong - I let it cure for a full 24 hours before the brush is even touched again - then it is fully dry and ready for use.
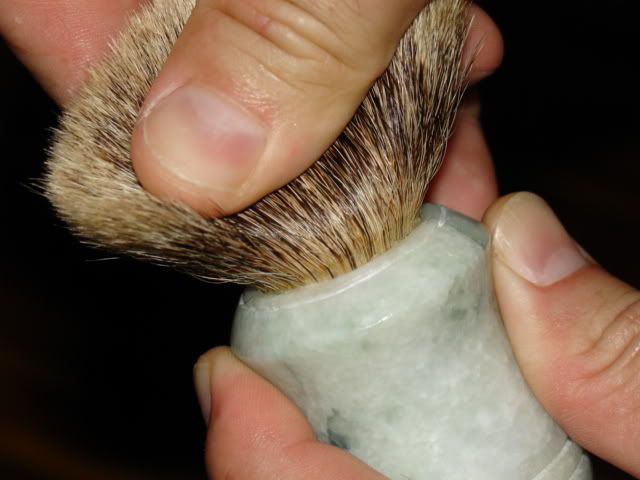
Below image is of my personal brush made with a Jade handle - I'm trying to pull the knot out - the bond is very strong - this is the objective.
Hope this helps some folks out there with their own projects.
--- Greg / iKon Razors
-
The Following 28 Users Say Thank You to iKon For This Useful Post:
Bazz (05-23-2010), Blazinrazor (05-23-2010), BobH (09-19-2013), Chevhead (09-20-2013), cyclelu (05-23-2010), FacialDirt (06-16-2020), Geezer (09-19-2013), HCpawpaw (07-01-2017), Hirlau (06-27-2013), irish19 (09-19-2013), jdto (10-25-2011), jfclark12 (05-23-2010), kwlfca (10-11-2013), Lemur (09-20-2013), mahtay (02-06-2013), matt321 (05-23-2010), MattCB (09-20-2013), Miner123 (05-22-2010), Muguser (05-25-2010), Mvcrash (05-01-2013), Neil Miller (05-23-2010), Razorfeld (03-24-2014), RezDog (09-20-2013), Scipio (05-22-2010), shutterbug (05-23-2010), thebigspendur (05-22-2010), walleyeman (09-25-2013), Warpiper (12-11-2013)


 Reply With Quote