When I was forced to move from my home to the Boars Nest, my oldest daughter bought me a little 110V weed eater trimmer for my little yard. It worked OK, but it really was a POS as the bump feed never worked well but it would eventually get the edging done. However it finally was dying so I put it in the trash can for a proper burial at the City' Landfill.
I'd been looking at the Stilh gas powered trimmers but with the small yard I just couldn't see justifying it. I also looked at corded trimmers but I hated dragging the cord out and then having to drag it around the lawn.
And then I found that Makita makes a 36V trimmer. I also quickly found that they were on the pricey side and then I found this one.
https://www.amazon.com/gp/product/B0...?ie=UTF8&psc=1
I already used the 18V drill and driver plus the 36V leaf blower so the extra batteries AND a dual charger would be a big plus.
So far I love the machine, but the bump feed sucked! The factory loaded line kept breaking inside of the head and when I opened it up I found the line so intertwined that I couldn't even pull it apart so I cut it out and bought some other line and after struggling to get it properly wound and reinstalled the frigging line once again broke inside the unit. :banghead:
So what's this got to do with having any skills? Well I went looking for tips on operating the trimmer and found many videos of pro lawn guys swearing by a Speed Feed unit sold by Echo. It's not made by Echo and I guess that there are other companies selling the same thing under their name.
https://www.homedepot.com/p/ECHO-Spe...0907/204159249
When you run out of line, you turn an arrow to where it's pointing to where the line feeds out and then feed the line straight through and then pull it up even and just ratchet the line in. No taking the damn thing apart! :tu
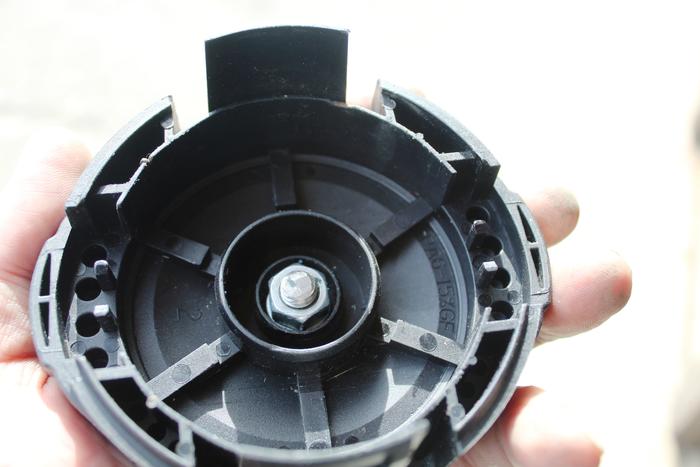
The Pro's also showed how that eventually the bumping would wear the plastic to where the spring would actually shoot through the bottom. So what they did was to pull the bottom piece off then remove the spring and drill a hole in the center, install a hex headed bolt and a washer then secure it with a nut inside and reinstall the spring.
This made sense to this old redneck country boy, but----------I wanted to be a bit different. So I picked up a Stainless Steel 5/16"X1" Carriage Bolt, a 3/8" ID fender washer and a 5/16" ID regular washer and a 5/16" self locking nut all in stainless steel and once home I got to work.
I used a small 3 sided file to make four flats on the inside of the fender washer until the shoulder of the bolt would barely pass then I broke out my dapping block and fashioned the washer to match the curve of the bump feed.
The small washer wouldn't fit inside of the plastic tube so I mounted it on a bolt with a nut and got it pretty centered then chucked the bolt in my drill, turned on my stationary grinder and started the drill and ground the OD until it easily fit. I also ground the bolt back to about 3/4" so that my socket wouldn't bottom out.
My 1/2" socket for my 1/4" drive wouldn't fit inside of the tube either but I had an old 1/2" socket made by the C. H. Ina Company so I mounted it on a driver and used my drill and grinder to get it ground down till it would fit.
I did run into a problem when I went to put it all together as the nylon on the locking nut wanted to make the bolt spin but I had a SS regular nut and lock washer. I also broke out some Blue Loctite and the the thing went together really slick.
Enough War and Peace reading. Here's some pics.
Attachment 331705
Attachment 331706
Attachment 331707
