Results 11 to 20 of 31
Thread: A Wood Turning Tutorial
-
03-19-2009, 10:01 PM #11
- Join Date
- Apr 2008
- Location
- Newtown, CT
- Posts
- 2,153
Thanked: 586Okay I'm back. Sorry for the delay.
After the epoxy has cured overnight your mold is now a big heavy chunk that must be cut into a circular blank. This is not as simple as you might think. It is important to make careful measurements with two separate objectives:
1. You want to make the blank as big as it can be and still fit on the headstock of your lathe. The distance from the center of your spindle to the bed is called "Swing over center". On the Nova DVR machine I used, the swing over center is 9". So the radius of any piece I turn on that machine must be less than 9". Very often people will just eyeball it and put a rough blank up on the lathe. It happens to fit when mounted in one position but as soon as the turner switches the motor on, the out of round chunk of wood acts like a cam and jams against the bed of the lathe. It always pays when working with big wood to make a quick mark of your center and draw a circle with a marker to follow on the band saw.
2. With this particular design and most glued up blanks, your finished piece will greatly benefit from carefully centering the pattern of the glued up assembly. The herringbone zigzag can be deceiving so what I do iscut a disc of cardboard the same size as the desired blank (this time it was 17") and move it around on the glue-up until the pattern is centered under the disk. Then, mark the center of the cardboard disk into the wood glue-up and trace the circle with a marker. Remove the disk and before cutting on the bandsaw, check the pattern for centration. Once satisfied, cut it.
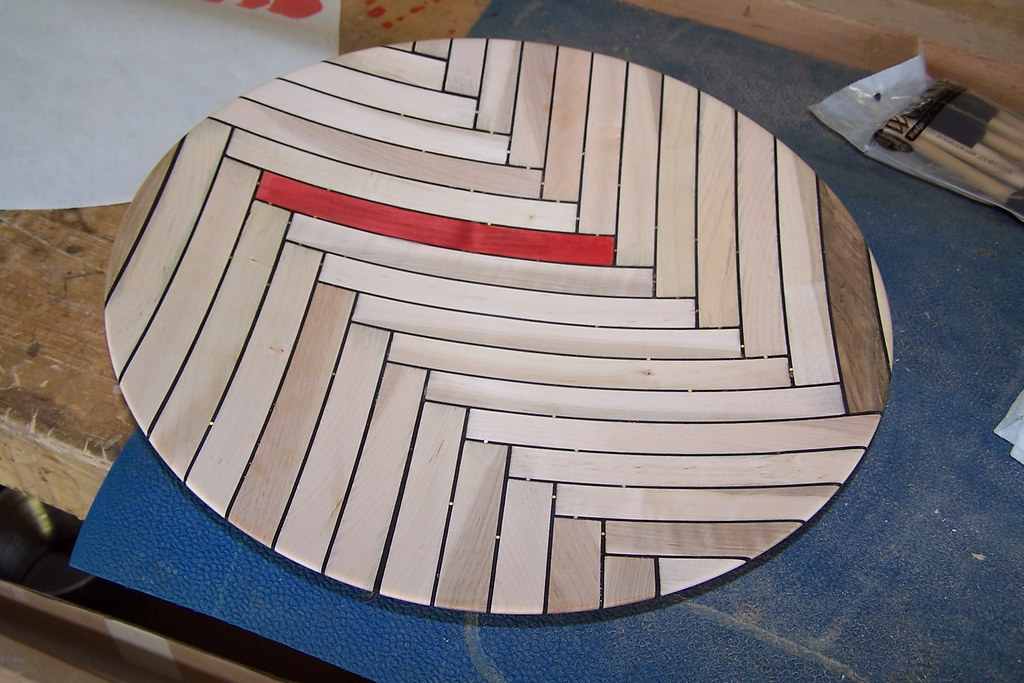
The blank gets mounted to a faceplate. I use a three inch machined steel faceplate and number12 x 1.5" phillips head screws. The screws are going into what will be the top or concave side of the bowl. Here's what it looks like when you have the blank mounted andcleaned up:
You are now cutting the outside profile and bottom of the bowl. It helps to have Basil with you in the shop.
Once it cleaned up the balance should be very good. That means you can work at 1500 RPM or higher. I usually work at or above 2000 rpm with a 5/8" bowl gauge. The quality of the cut is better but there is alot of heat generated. This is maple and hard plastic with bits of brass. The chips from this baby at two grand can and will make you bleed so it would behoove you to wear a glove on your forward hand. The brass pins come out when they get short enough and of course they are extremely sharp little darts sowear eye protection too. If you start this project with just a T-shirt, after taking one or two of those brass darts in the belly or a nipple, you'll be donning a coat or sweater for protection of your upper torso.
Once up to speed, this thing is like a spin balancer with a car tire mounted. It takes a while to spin down. be sure you have no loose sleeves or scarves or anything hanging off you. You can become one with your work faster than you can imagine. Notice the close proximity between the tool rest and the piece. This is the way it should always be. When you remove enough stock to widen that gap, stop the machine, move the tool rest in so it is just clear of the piece and restart the machine. Never move the tool rest while the machine is running. If that big piece of steel hits the rotating chunk of wood, the steel will win.
Break time for Braddie. I'll be back with more of the exciting world of chip production.
-
03-19-2009, 10:55 PM #12
Very interesting stuff!I'm really enjoying this.Thanks for posting it.
-
03-20-2009, 01:08 AM #13
- Join Date
- Apr 2008
- Location
- Newtown, CT
- Posts
- 2,153
Thanked: 586Okay, back again. I am in the process of moving from the farm where we've lived for the past eight years to a more private little house a mile up the same road. I am doing it with one recycle bin and my MINI Cooper S. I fill the bin with stuff, put it in my little car and take a ride with Basil to the new crib where I unpack the bin and then I head back to repeat the cycle. We aren't officially "moving" until 4/1 but I hope to have it all out except for the couches and dressers for which I'll rent a truck and shame a buddy into carryin' the other end of stuff for an hour or two. But I digress.
I'm not going to tell you how to use a bowl gouge or how to sharpen your tools. I am assuming a certain level of expertise or madness if you are ready to attempt a project like this. However, if you have any questions, fire away. I can tap dance pretty good.
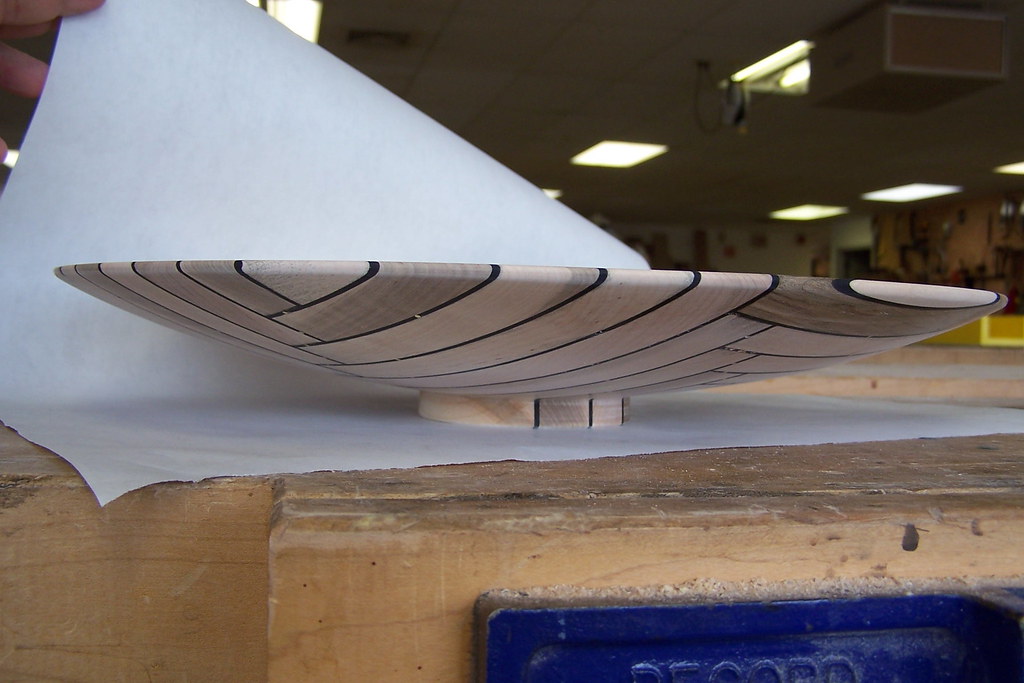
There's an old kid's joke, Q: How many sides does a circle have? A: Two, the inside and the outside. Well, that's the way with a bowl and when I turn them, I always turn the outside first. This is my method. It isn't very popular because folks like to use those expensive chucks. I rarely have any use for a chuck to hold my work. I have been doing this for a little while and my pieces have won some awards and folks seem to like my work so I will keep doing it my way. Here is the bowl with the outside completed:
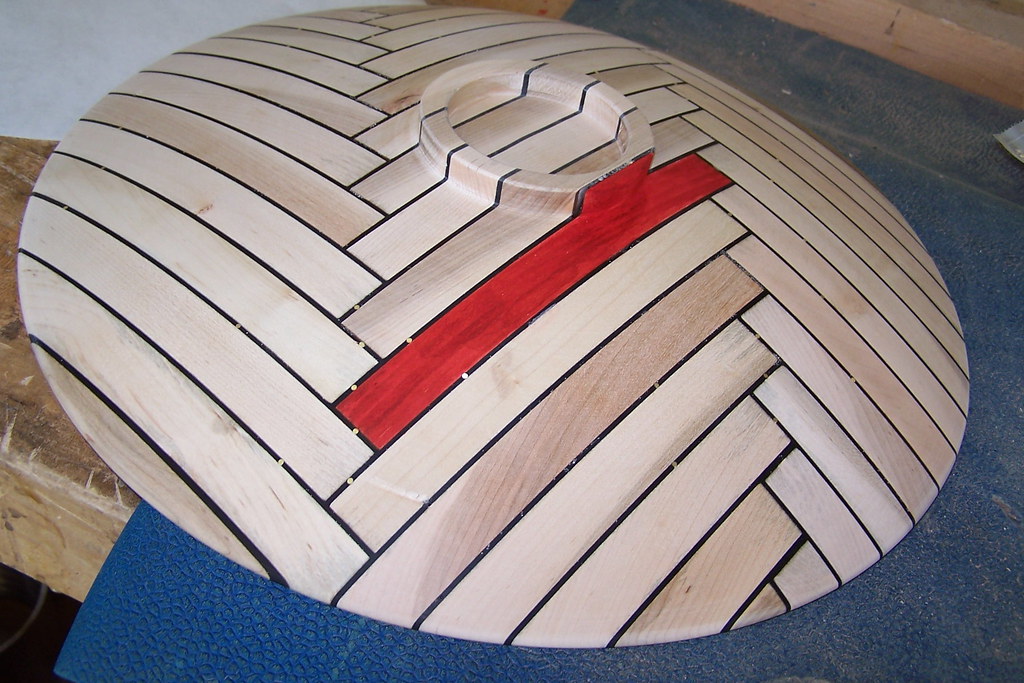
The coolest thing about the design is that all the lines are straight, parallel and perpendicular but when you study the piece it is all graceful curves. Anyway, the important thing in this picture is that ring in the center of the bottom. It is called a "foot". For this method of bowl turning this foot serves two important purposes. It is also very important for the design. I'll talk about the design aspect first.
The foot of course provides a stable base on whiich the bowl will rest. The foot is a ring and it can be infinitely adjusted. You can make it square from the table or it can angle in or out. The wall thickness of the ring can be adjusted from very thin to very thick. The foot can be very shallow or precariously tall. I made one bowl where the foot has been modified to actually be another bowl that basically intersects with the primary vessel. Tha may very well be the most challenging piece I've completed. But in this case the foot is square, about three inches outside diameter, about a half an inch thick and about 5/8 inch tall. It works well with the shape and size of the bowl because the scale is comfortable to observe. I often make the foot considerably taller than most would settle on. I find a relatively small diameter foot, about 1/6th the diameter of the bowl with a slightly exaggerated height provide a remarkable lightness to the appearance of the finished piece. If the proportions are right, the foot will be unseen from most typical viewing angles and the bowl will seem to be defying gravity. Here's another view of the foot:
Looking at this shot will help me explain the mechanical purpose of the foot. In order for this to be a bowl, it must be hollowed out. In order to hollow it out, we have to get to the other side of the piece. The trick is to remove the partially completed bowl from the machine and be able to turn it around, hold it securely to the rotating headstock spindle and maintain the identical axis of rotation for the inside as the outside. Failure to maintain alignment of these axis' can cause the bowl to have negative portions, an undesirable feature. Okay, so the foot is now technically a mortise and will receive a tenon when we turn the bowl around. In the event you can't picture what I am saying, here's an illustration to save me a thousand words:
mor·tise also mor·tice 27CDB6E-AE6D-11cf-96B8-444553540000 http: fpdownload.macromedia.com pub shockwave cabs flash swflash.cab#version='6,0,0,0"'>
(môr'tĭs) Pronunciation Key
(click for larger image in new window)
n.- A usually rectangular cavity in a piece of wood, stone, or other material, prepared to receive a tenon and thus form a joint.
Last edited by icedog; 03-20-2009 at 01:12 AM.
-
03-20-2009, 01:22 AM #14
Brad, that's a beautiful bowl and a great design. If they don't love it completely, I can pm my address!
-
The Following User Says Thank You to Quick Orange For This Useful Post:
icedog (03-20-2009)
-
03-20-2009, 02:03 AM #15
Thanks for the tutorial.. at first I was kind of worried that there were not going to be any process pics... but this is good. I love this piece...not really my style, but that's the beauty of it.. it is a creative, "thinking out of the box" type project and that is what I love. You have presented things that people probably wouldn't have considered attempting. The real genius of a craftsman is in the special creativity they bring to a piece that makes it art... instead of a chunk of wood or metal. My 2 cents.
-
The Following User Says Thank You to Del1r1um For This Useful Post:
icedog (03-20-2009)
-
03-20-2009, 02:30 AM #16
Awesome! It is really the most unique bowl I've ever seen and your use of the brass pins is ingenious. What gave you the idea to build it like this and will you continue to apply different stains to each peace; which by the way makes the design contrast all the more brilliant!
Hands and knees
-
The Following User Says Thank You to jmueller8 For This Useful Post:
icedog (03-20-2009)
-
03-20-2009, 03:15 AM #17
That is just really nice man , I like it a lot.
-
The Following User Says Thank You to Mike257 For This Useful Post:
icedog (03-20-2009)
-
03-20-2009, 03:52 AM #18
Thanks for posting this, Brad. That's a very impressive work of art and an amazingly heartfelt wedding gift.
Chris L"Blues fallin' down like hail." Robert Johnson
"Aw, Pretty Boy, can't you show me nuthin but surrender?" Patti Smith
-
The Following User Says Thank You to ChrisL For This Useful Post:
icedog (03-20-2009)
-
03-20-2009, 04:21 AM #19
Wow, no step in that process wasn't impressive to look at.
Also your dog looks exactly like my friends dog(except my friends dog is a girl)
I couldn't find a good pic of her white chest fur, but it's a very similar shape.
-
The Following User Says Thank You to Kanahmal For This Useful Post:
icedog (03-20-2009)
-
03-20-2009, 04:35 AM #20
I see where the red came from. That looks like a nice piece of work. I can't really tell, but it looks like the curves are all nice and even/smooth. How do you keep a nice, even, consistent curve? Some kind of depth guage? Did you have any problems with the epoxy swelling or shrinking with all the heat that was involved? Again, nice work.
-
The Following User Says Thank You to crazycliff200843 For This Useful Post:
icedog (03-20-2009)