
Results 1 to 10 of 10
 15Likes
Thread: Hammesfahr Restore [Pic Heavy]
 LinkBack URL
 About LinkBacks
-
03-28-2014, 08:12 PM #1Junior Member


- Join Date
- Dec 2010
- Location
- The Netherlands
- Posts
- 10
Thanked: 2 Hammesfahr Restore [Pic Heavy]
Heya,
Some time ago I found this old Hammesfahr on the bay. To be honest I dont know a great deal about old straight razor companies and this wasnt an exception. The only reason why I picked it up was the price. It was on auction with a reserve of 10. With 1 day to go it still had zero bids, so I decided to post the reserve. A day later I mostly forgot about it, being sure someone would have outbid me, but what do you know, I won it.
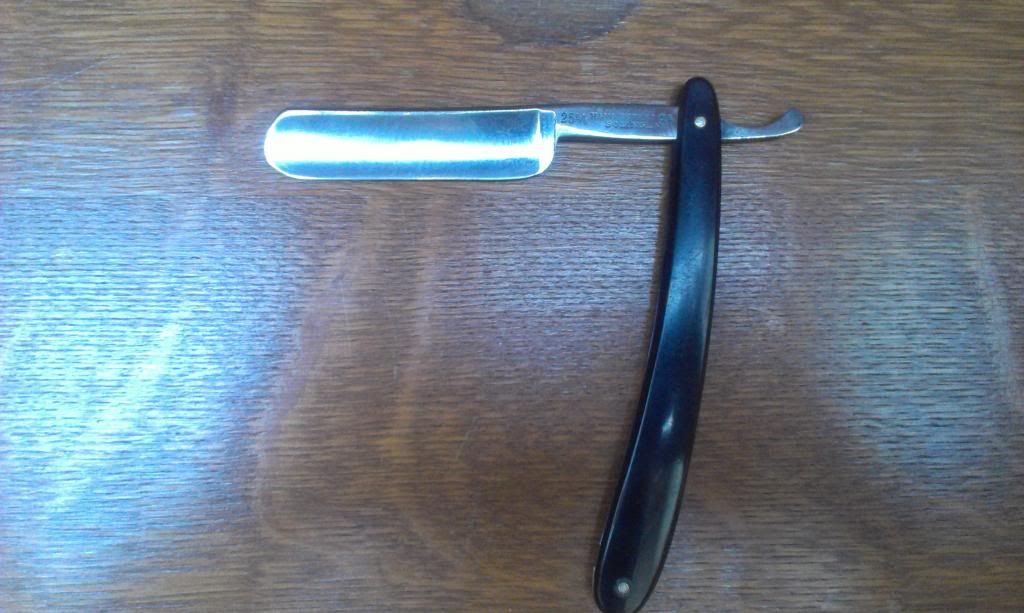
When I received it and examined it, I found a lot of rust and some minor pitting, but I had seen razors in worse condition at flea markets and the like. So I decided this would be a good blade for a first restore. When I say restore, thats kinda pushing it. I dont have any power tools (yet), no workshop (yet) and no real in depth knowledge about restoring razors (yet).
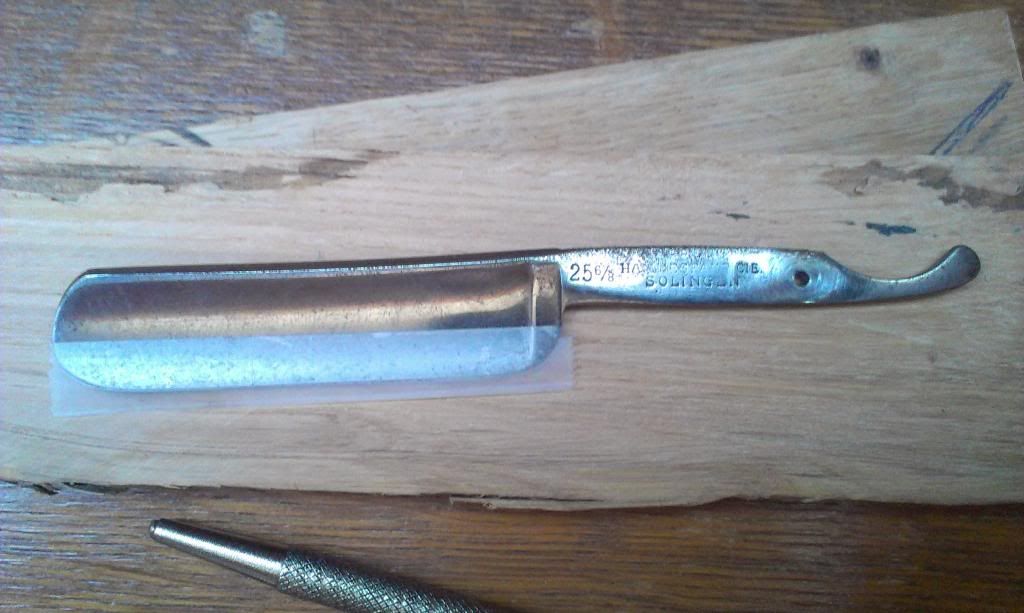
I started off, taking the handles of the blade. There was a lot of rust on the spine and I found a bit more rust around the pivot area. Using steel wool I removed the surface rust, after which I went to town with my newly acquired micro mesh, trying to shine up the blade. It worked out better than I would have though. You can still see some of the pitting, but the blade shines nicely and I dont really mind that you can see it is in old blade.
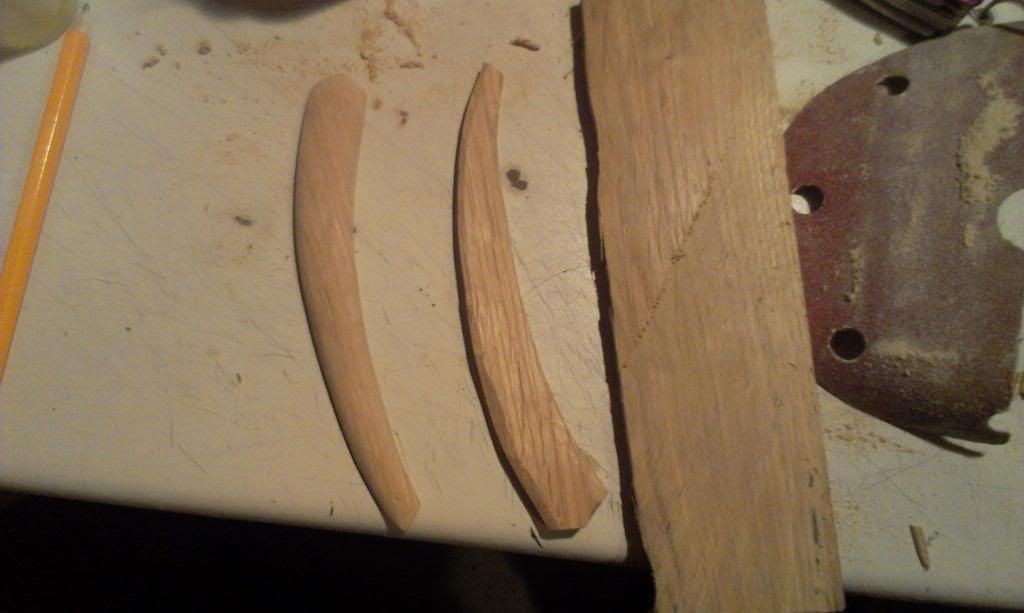
For the scales, I managed to save a piece of oak that my brother was ready to throw into the bonfire he was having with a few mates. It was a plank, about 2.5 cm (1) thick, which is kinda on the thick side for a few scales so I used a normal hand saw and cut myself some thinner pieces. After that I followed the instructions in the SRP library for making the scales. Tracing them on paper first, cutting them out with a fretsaw and then using a belt sander to refine them oh, wait, I dont have a belt sander, so I substituted that for a woodcarving knife and some sandpaper. After a lot of work, I ended up with some pretty decent looking scales.
Now it was time to pin everything together again. So off to the hardware store, where I could find a brass rod, however no small washer to fit it. So I decided to just pin it together without the washers and see how that would go. Well. Thats the part Im least pleased about. The brass started to crack after mushrooming. I think because I thinned it out too much and since there were no washers underneath, it had to stretch too far. But well, its pinned, and it functions.
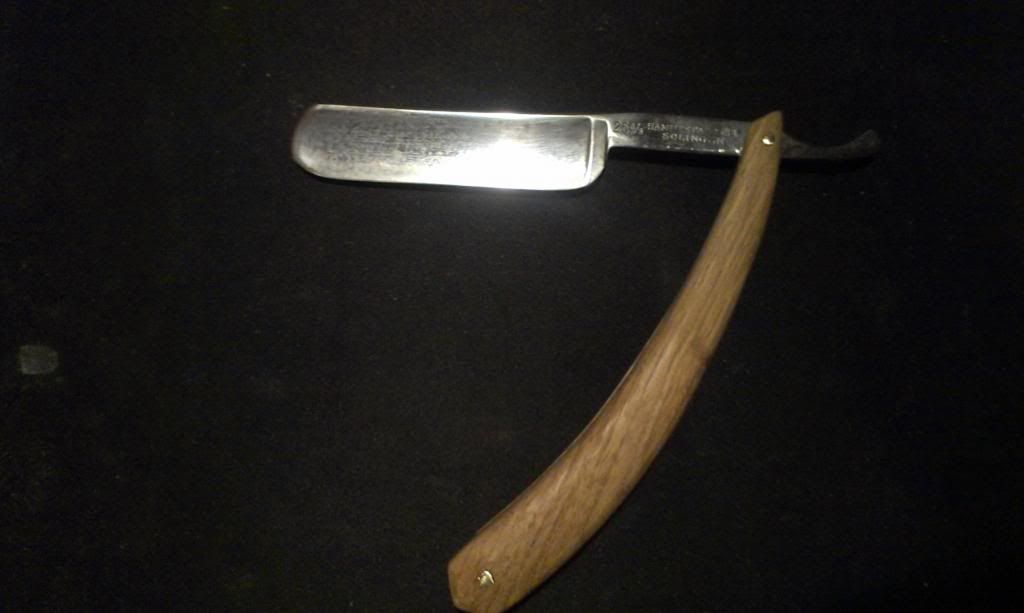
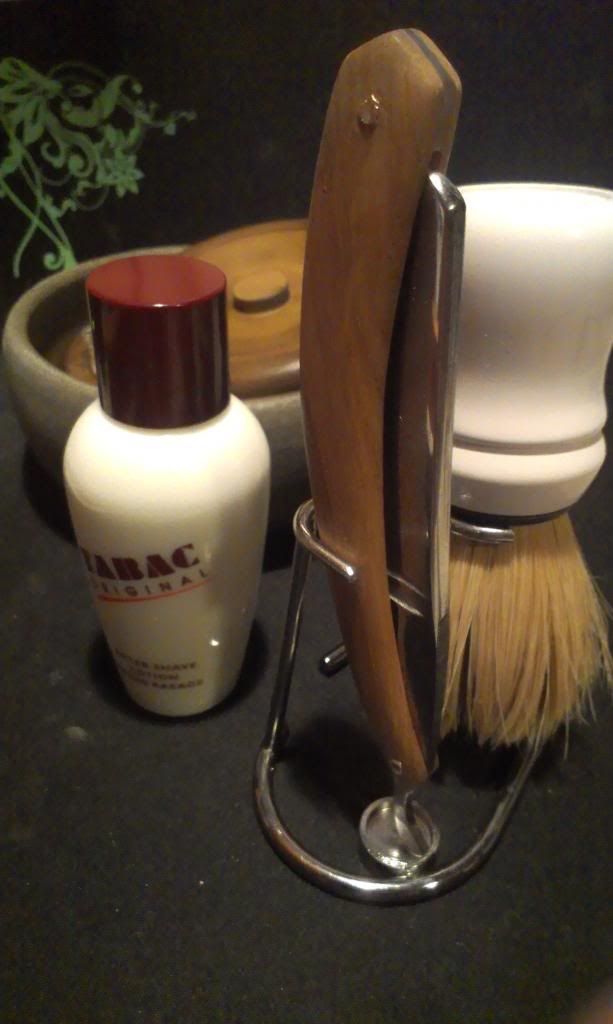
Lastly I honed up the blade. Setting the bevel, then moving on to the Coticule and finishing on my Chinese. On to my pasted strop, first on the green, then the red pasted strop and finally a regular strop. So now its waiting for my whiskers to grow for a first test run.
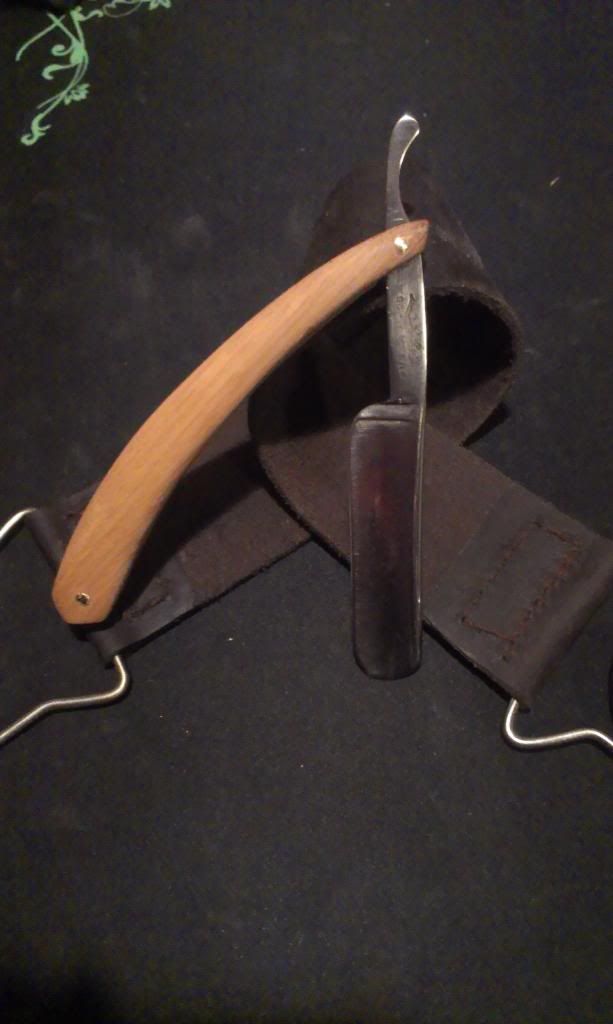
In the end I thinks it went pretty well for a first restore. At least I learned a lot and I think Im just gonna keep it like this as a reminder that you have to start somewhere. Maybe, in a few years, I have my own little workshop and Ill be able to make much better looking blades, but this was the first.
-
The Following User Says Thank You to Jos For This Useful Post:
Dzanda (03-28-2014)
-
03-28-2014, 08:15 PM #2Senior Member

- Join Date
- Dec 2013
- Location
- North Bay, Ontario & Reno, Nevada
- Posts
- 146
Thanked: 28
Good job! First time, no shop, no power tools and a few missing parts but you adapted and overcame. I hope that it shaves well for you.
Gerry
-
03-28-2014, 09:49 PM #3Str8Faced Gent.


- Join Date
- Aug 2013
- Location
- Orangeville, Ontario
- Posts
- 8,465
- Blog Entries
- 1
Thanked: 4207
Nice work. Great find, and recovery..
-
03-28-2014, 10:24 PM #4Senior Member


- Join Date
- Sep 2013
- Location
- Southeastern Virginia, USA
- Posts
- 706
Thanked: 155
Jos,
Thanks so much for this post! You've reassured me that I shouldn't be hesitant to try a basic restoration myself. I don't have any equipment, either, but your result shows that elbow grease and a little ingenuity goes a long way!skipnord likes this.
-
03-28-2014, 11:36 PM #5Senior Member

- Join Date
- Oct 2013
- Location
- vermont
- Posts
- 778
Thanked: 207
very nice, keep up the good work. there are some impressive results as of late by gents using only hand tools, including yours. I find that the best work (for me) is accomplished through a marriage of power tools for rough and bulk work, hand tooling for best finishing. I try to keep a couple large containers of elbow grease within arms reach everywhere in the shop, indispensable stuff! Originally Posted by Dzanda

 Silverloaf
-
03-28-2014, 11:48 PM #6Senior Member

- Join Date
- Feb 2013
- Location
- McAdoo, PA
- Posts
- 370
Thanked: 57
That came out pretty nice. I like the scales.
-
03-29-2014, 01:33 AM #7Senior Member


- Join Date
- Nov 2012
- Location
- Across the street from Mickey Mouse in Calif.
- Posts
- 5,320
Thanked: 1185
Very nice first ! Hint ...when you cut the pins they don't have to stick out very far. Think about it this way. When you peen the pin the first couple of wacks isn't that enough to keep the scales from coming apart ? You only have to widen the top of it a little. The next part of it is to keep the wide part close to the scale so it is tight. See where I am going with this ? You could also pratice pinning on something like a scrap piece of wood before you do another one. It doesn't waste that much material and you will learn quick without having to risk your new scales :<0)
skipnord likes this.Good judgment comes from experience, and experience....well that comes from poor judgment.
-
03-29-2014, 10:31 AM #8Junior Member
- Join Date
- Dec 2010
- Location
- The Netherlands
- Posts
- 10
Thanked: 2
First of all, thanks for all the replies. It means a lot to me. And, Dzanda, you can indeed do a lot more than you think without power tools. I was amazed at some of the results I got.
Yeah i figured I would to some testers. When pinning this one, I just followed a video I found on youtube where the dude showed the pin sticking out about 1 mm. Turns out that was too much for this build. However I don't really wanna redo it, as I've said, this is a good piece to keep as an example and I'm afraid I'll ruin the scales. lol. Originally Posted by 10Pups
-
03-29-2014, 03:08 PM #9Senior Member
- Join Date
- Mar 2011
- Location
- Corcoran, Minnesota
- Posts
- 665
Thanked: 170
It might help to anneal the brass rod before you pin next time. This will make it as soft as it can be, and easier to pin. Heat the rod with a propane torch until it changes color, and let it cool slowly. You could even use a cigarette lighter, if you don't have a Bernzomatic or something similar. Nice work for your first time, and it will just keep getting better..
-
03-29-2014, 03:57 PM #10Senior Member
- Join Date
- Apr 2012
- Location
- Diamond Bar, CA
- Posts
- 6,553
Thanked: 3215
You can take a plastic jug like a one gallon milk bottle, cut a small thin piece a bit wider than the scales and about 2-3 inches in length. Drill a hole in one end of the plastic that will fit over the pin head and tape the plastic mask tight to the scale. With a small fine file or a piece of fine sand paper glued to a popsicle or coffee stir stick, dress and shape the pin head to make it domed and round.
Then take a bamboo chopstick and cut off about a 4 inch piece and chuck in to a drill press or hand drill. Drill a small divot on the end add a dollop of Chrome Ox, metal polish or Diamond paste and polish the pin head. You can get them perfectly domed and round in a couple of minutes.
Or as said anneal the rod, cut closer to the scale, shape and flatten the pin with a file and or sandpaper before you hammer the pin… next time.
Nice work.


 Reply With Quote