
Results 1 to 10 of 13
 13Likes
 LinkBack URL
 About LinkBacks
Hybrid View
-
04-12-2014, 10:29 AM #1Sharp Minded Citizen

- Join Date
- Oct 2013
- Location
- Bucharest
- Posts
- 434
Thanked: 156
Should come out nicely. The carbon fiber you are using is not woven so you may want to keep the rounding of the scales to a minimum or else you're going to replace the checkerd pattern witha a grey/ black stripes pattern. I suggest you look up the woven/non woven patterns on a google image search and see if you like it...also you can use a small piece of our cr to test round it an see how it looks.
If you are using 1/8 drill on the scale holes keep in mind that the pivot you cut should protude into the scales about 1mm each side with the washers in place for no blade play. If you drill 1/8 holes and the pivot does not protrude into the scales you are going to have blade play due to the fact that the screws are smaller in diameter then the 1/8hole.
You may also want to use anoter dremmel bit to sink the screw heads...i use a round stone bit to make a sink for the.screw heads.
Also take care on the wedge so it has the same angle on eatch side or you could get an off center blade.
I sugest after rough profiling the.scales to hand finish them up under water with 800grit or higher...i go up to 2k....no dust, faster.
Also you can use a drop of CA to set the liners to the wedge for a snug fit.
Can't wayt to se how this turns out. I use cf in a lot of my restores and i love it.
Best of luck!
-
The Following User Says Thank You to ovidiucotiga For This Useful Post:
Graham (04-12-2014)
-
04-12-2014, 09:50 PM #2Junior Member
- Join Date
- Mar 2014
- Location
- Sydney, NSW, Australia
- Posts
- 27
Thanked: 0
Thanks all,
I've drilled the screw holes in the scales the diameter of the screw thread, which is less than than 1/8", not sure what diameter I used, just test drilled a bit of scrap wood to make sure that the screw fit snuggly.
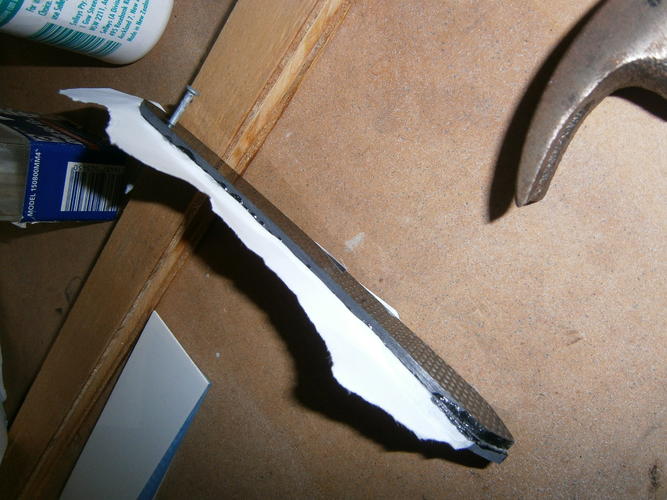
Last night I glued the two scales together and it spent the night clamped hard into the vise with a nail through the screw holes to ensure that they stayed aligned.
Although I like the idea of countersinking the screws slightly, I think that I'd need to shorten the screws as well, since they theoretically have only 1mm (and probably less) between the ends inside of the pivot. Maybe later...
This morning the scales are securely locked together in preparation for final shaping (except for the wedge end, which I'll wait until after the wedge is glued in).
FWIW, I'm intending to decapitate a couple of screws and glue them to the scales at the wedge end, just for symmetry with the other end of the scales. I've thought of using no glue to secure the wedge and essentially screwing the scales, wedge and lining together with a pivot that wont pivot as the thread, but I dont think the result will be as secure (although I like the idea of being able to dismantle it all)
Can anyone give a tip on what glue to use for the wedge? I figure the options are basically superglue or epoxy resin.
ovidiucotiga, what is "CA"? A glue?
-
04-12-2014, 10:07 PM #3Sharp Minded Citizen
- Join Date
- Oct 2013
- Location
- Bucharest
- Posts
- 434
Thanked: 156
I use 1/8 pivots from usaknifemaker all the time...the1/2 inch size is perfect for cutting in half ... I use one half for the blade end and anoter half for the wedge end. After cutting the pivot i run a 2-56hss tap trough it to clean the burr left by the.cutting weel and fine sand the cut end. The pressure of the tightened screws is enough to secure the wedge in place. I never glue the wedge when i use pivots...I think anyone who uses pivots can confirm the grip is stronger then that of pins. Just get the wedge faces straight. And yes, it is nice to be able to dissasemble it... I often swap handles betwen some of my blades

CA glue...i wanted to say cianoacrilate...aka superglue...if you sandwitch the wedge...I suggest you go with a pivot on the wedgw end...i think it's the cleanest way, no glue and no need to cut screw heads for simerty...I doubt they will stay glued for a long time.
You seem to have the.propper tools and material for the job...do it right)
Best regards!
-
04-13-2014, 09:39 AM #4Junior Member
- Join Date
- Mar 2014
- Location
- Sydney, NSW, Australia
- Posts
- 27
Thanked: 0
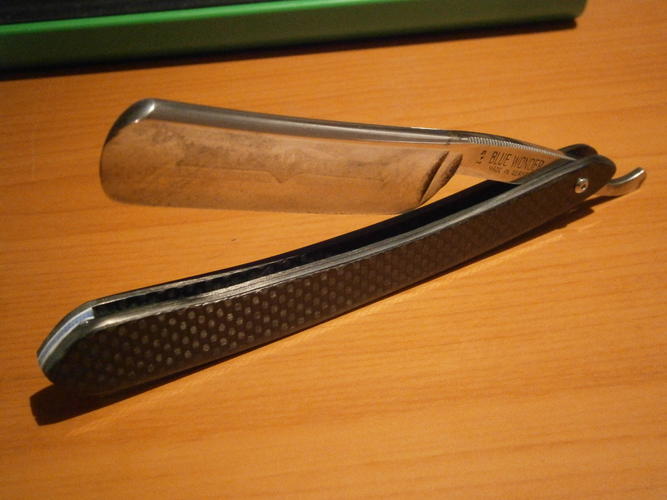
So got a lot further along that I expected to.
Smoothed the edges on the belt sander
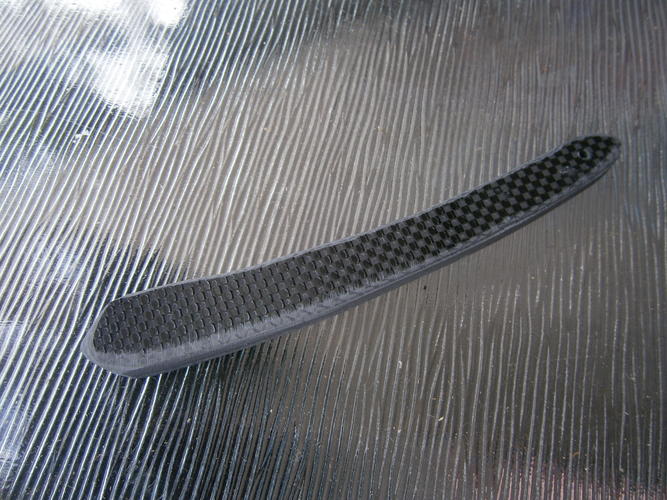
And here is my first mistake.. holding it at too acute an angle for a few seconds on the sander has lead to a striping effect. Oh well... live and learn. Maybe I'll make another one later on.
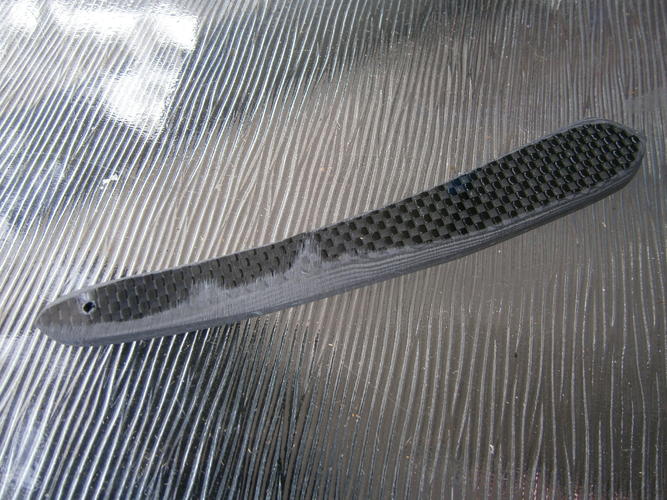
Wet sanded for 30 minutes using 800 and then another 15 using 2000 - definitely not long enough.
Narrowed down the G10 on the sander, glued the liner to each side with superglue and then because I've irretrievably damaged a scale, just wanted to finish this version (version 1.0) as quickly as possible by gluing the wedge between the scales using superglue. The first gluing attempt popped off on one side soon after - reglued and if it happens again I'll use epoxy resin, which will stick until the end of time.
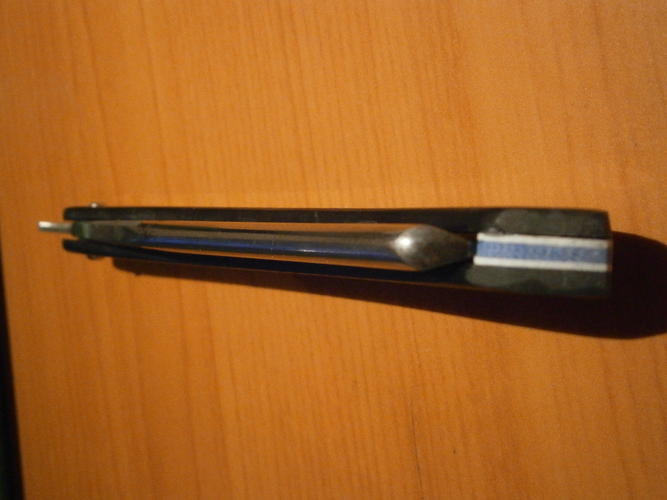
Turned out ok for a first attempt; I'm not all that happy with the wedge end of the scale, I think the sanding is a bit irregular, one side of the white liner on the inside of the blue part of the wedge is not seated flush (maybe it can be filed out) and of course, one of the scales is oversanded.
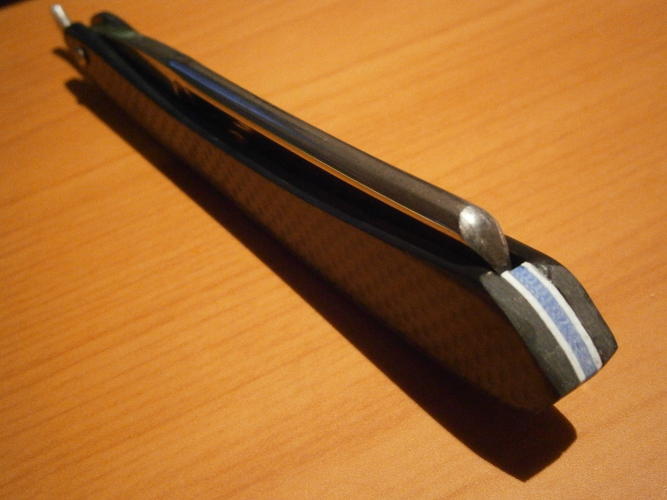
Needs finishing and shining up... If I keep at it with 2000 wet-n-dry sandpaper, will it start to shine, or do I need to coat with a clearcoat? I've got some automotive clearcoat in a spraycan somewhere - I used it on some speakers and it can be polished to a high shine.RADisorder likes this.
-
04-13-2014, 10:50 AM #5Sharp Minded Citizen
- Join Date
- Oct 2013
- Location
- Bucharest
- Posts
- 434
Thanked: 156
Lhey look ok, The end part needs some more shaping, mabe a little rounding of the corners.The scratches you see are from the lower grit sandpaper (belt sander)800 and 2k is to fine to take them out, i go like this after rough profiling 400-600-800-1200-1500-2000 and then polishing paste
the higher grit you go the less time you should spend if properly done. If you wet sand the scales, make sure to dry them up and look at them to see if the scratch pattern is consistent with the curent grit before you go up.After finishing grab s cloth and some polish...hand rub for like 10 minutes. It will shine. You can also use clearcoat,or epoxy coat but it's a tad messy imo.
Here is one i restored a couple of months ago:
http://straightrazorpalace.com/custo...4-steps-2.html
Not some of my best photography work but you can get an idea on the finish.
The carbon fiber is woven 1/8 from usa knifemaker, same as the pins and everything else involved in the scales. It's sanded as mentioned above and hand polished. That's about the best shine you can get from polishing, if you want more, go for clearcoat or epoxy coat.
Also after rough profiling the scales you should try a diamond coated file or a plain file for rounding the edges by hand...less risk of messing up...i prefere this metod...then sandpaper. For plain cf a 45 degree angle ~2mm works nice to preserve the pattern...it does dot look that great if you round it to much.
-
04-13-2014, 01:26 PM #6Senior Member


- Join Date
- Sep 2013
- Location
- Tucson, AZ
- Posts
- 1,031
Thanked: 176
Carbon fiber dust is VERY dangerous. I hope you used a GOOD (certified filters) mask while shaping those scales!
The easy road is rarely rewarding.
-
04-14-2014, 09:05 AM #7Junior Member
- Join Date
- Mar 2014
- Location
- Sydney, NSW, Australia
- Posts
- 27
Thanked: 0
Nice work there, I like the colour scheme - I promise that I didnt copy it! Originally Posted by ovidiucotiga

I'm considering these scales as pretty much practice scales and want to give it another go at some stage in the near future, but want to use a material (CF or otherwise), that will maintain its pattern when sanded. After seeing the blue G10 I used for the wedge go all stratified, I know that G10 wont do it... what about some of the other CF weaves here?
Or I guess I could be more careful with the sanding
I might give these ones a couple of coats with clearcoat, since I have it on the shelf.
Yep - I wore professional breathing mask, disposable overalls with hood, gloves, safety goggles, boots with the overalls tucked over and earmuffs when using a powertool. I looked like an asbestos removal person. Nasty fine stuff that dust. Next time I'm going to rig up a vacuum cleaner to immediately suck most of it up - that way less cleanup.Last edited by Graham; 04-14-2014 at 11:29 AM.
-
04-15-2014, 06:38 AM #8Sharp Minded Citizen
- Join Date
- Oct 2013
- Location
- Bucharest
- Posts
- 434
Thanked: 156
Every material has it's own particularityes. Layerd materials tend to show the layers when brought to a high gloss. From the layerd ones paper micarta seems to keep its texture the best. Woven cf or woven glass fiber also have a consistent pattern, also the shintetic plastics like acrilic and faux ivory, fake mop...then there's wood and bone and horn
p
I was going to suggest a vacum but be sure to throw the bag away and change or wash the filters after you use it. Dont reuse it inside the house because the.dust is so fine it comes out the oter side)...not all of it, but a small amount does.


 Reply With Quote