
Results 1 to 10 of 11
 45Likes
 LinkBack URL
 About LinkBacks
-
05-25-2014, 04:37 AM #1Senior Member


- Join Date
- Jul 2013
- Location
- Kitsap County, WA USA
- Posts
- 1,549
Thanked: 351 Wade and Butcher brought back from the brink of a red rusty death. (Pic Heavy)
Since picking up the wet shaving bug I have cleaned up and honed a few razors and have been pretty satisfied with myself. I even tried to make a set of acrylic scales once....... those didn't go so well. I recently bit the bullet and bought a buffer from H.F. and a set of greaseless compounds and buffing compounds from Caswell Plating. This is the result of my first full restoration. Let me know what you think.
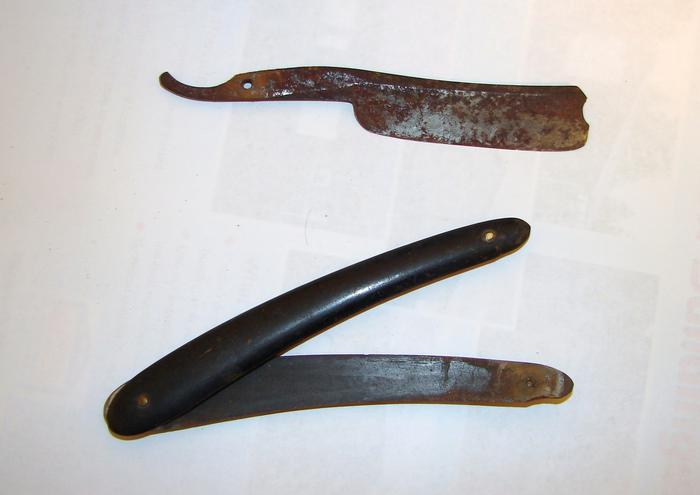
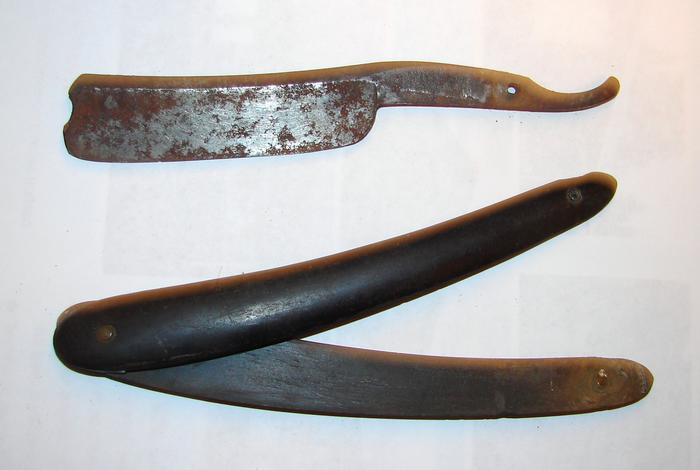
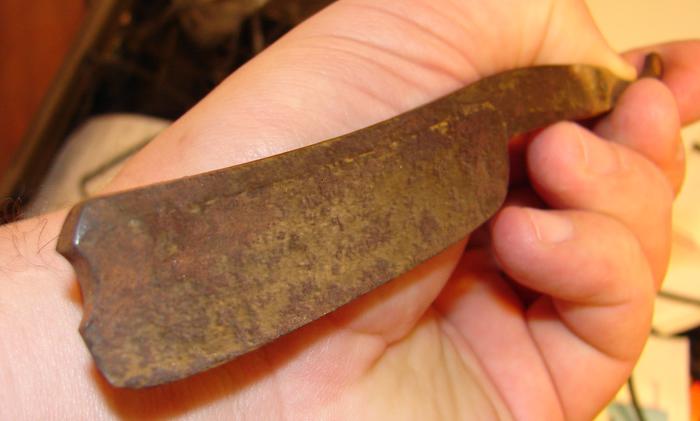
As found in the wild, $30 from ebay just for this purpose. I figured a little extra steel would give me a better chance of not destroying it right off the bat.
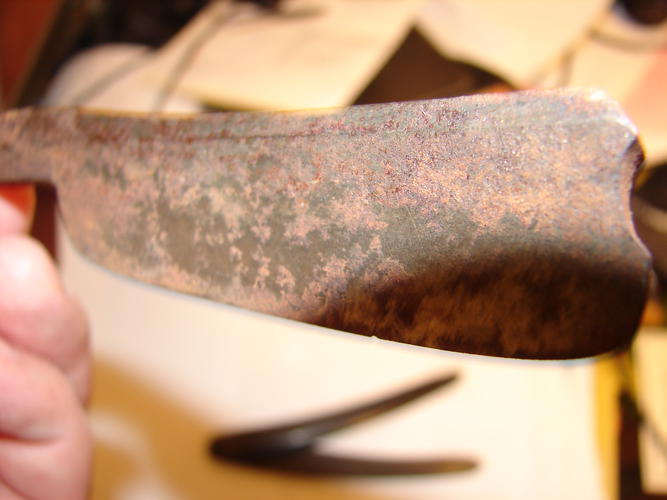
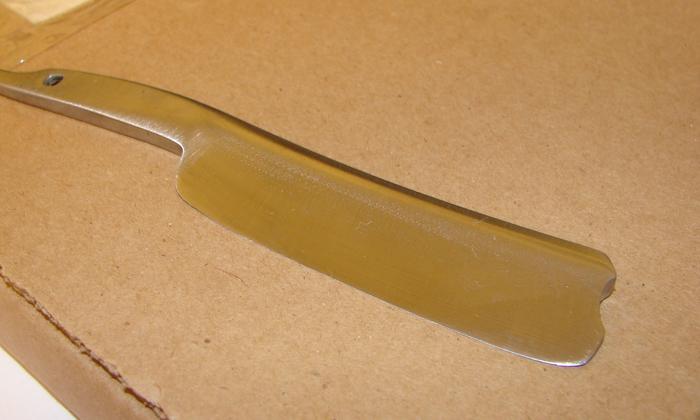
After a good amount of time at the 80 grit, up to 400 grit and back to 80 grit again...
 The older I get the more I realize how little I actually know.
-
05-25-2014, 04:45 AM #2Senior Member
- Join Date
- Jul 2013
- Location
- Kitsap County, WA USA
- Posts
- 1,549
Thanked: 351
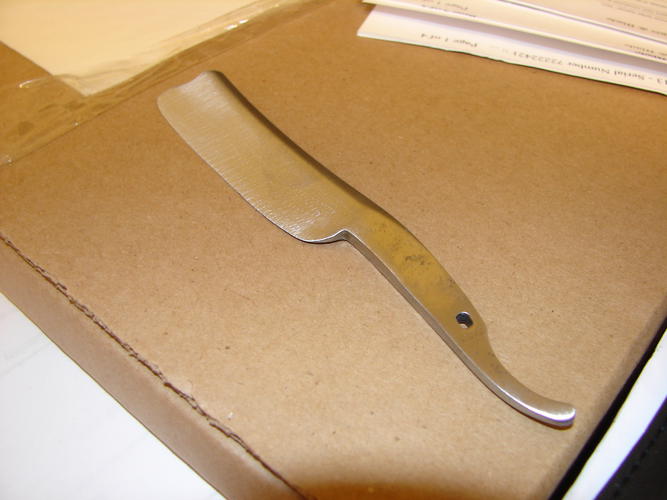
I read a thread in the archives which recommended taking a razor with a lot of wear up to final polish and back down to 600 grit for a Satin finish that helps with the "character" of an old blade. I attempted to do this, but went up to the Emery buffing compound which is a step finer then the 600 grit and a polish with Blue Magic.
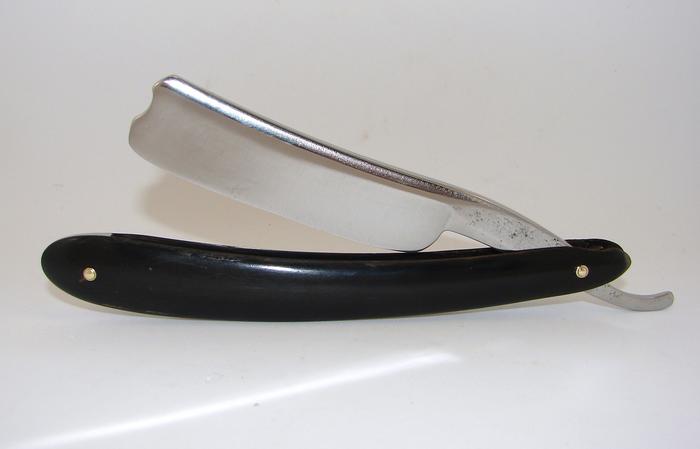

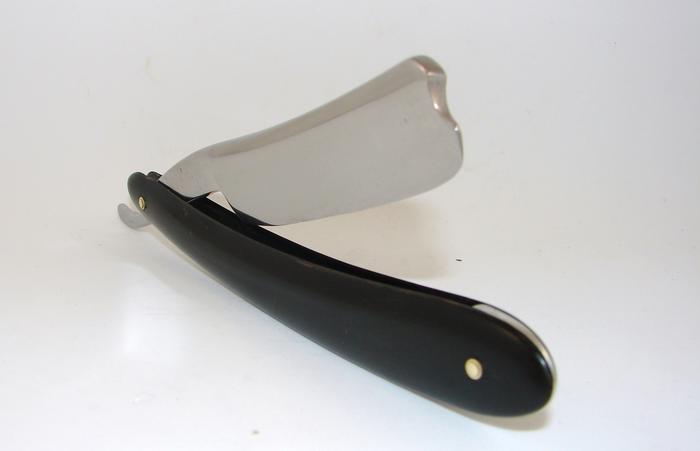
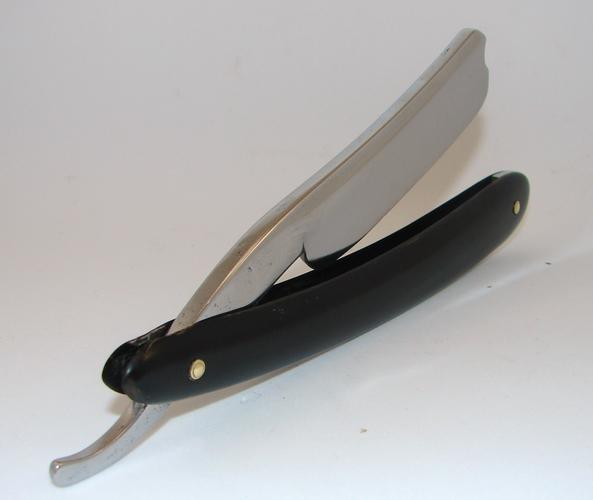
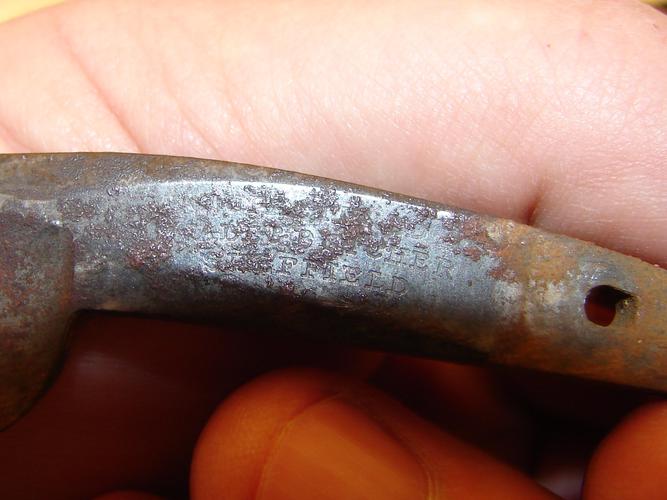
Near wedge blade with a taper torward the heel. 6/8 at heel, 7/8 at tip. Original black horn scales and lead wedge. Saved the scales and lead wedge. Micro mesh sanded scales and applied Ren Wax to scales and blade. Blade feels good in the hand.
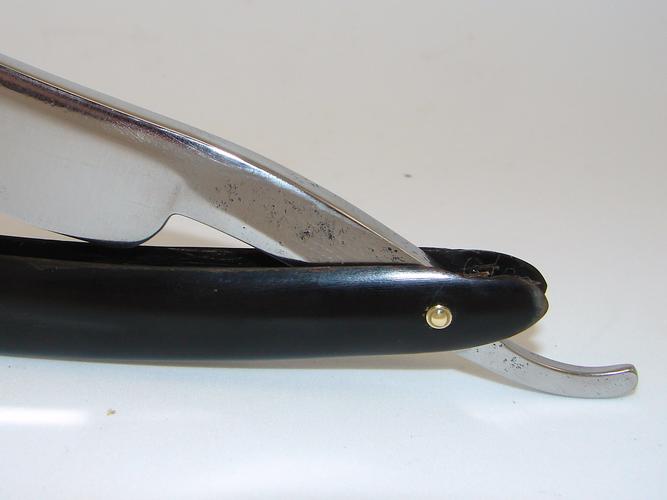
If I were to do it again, I would be more careful of the W&B stamp and try not to "melt" the edges of corners as much... but damn it's hard when you have to get the pitting out. Haven't put it to the hones yet but we will see how it goes.
The older I get the more I realize how little I actually know.
and try not to "melt" the edges of corners as much... but damn it's hard when you have to get the pitting out. Haven't put it to the hones yet but we will see how it goes.
The older I get the more I realize how little I actually know.
-
The Following User Says Thank You to MattCB For This Useful Post:
Geezer (05-25-2014)
-
05-25-2014, 04:51 AM #3
Nice job brother!
-
The Following User Says Thank You to Chevhead For This Useful Post:
MattCB (05-25-2014)
-
05-25-2014, 06:09 AM #4Senior Member


- Join Date
- Nov 2012
- Location
- Across the street from Mickey Mouse in Calif.
- Posts
- 5,320
Thanked: 1185
Sometimes the pits are a red cat hair lower than the stamp. Power tools don't care :<0) I always watch the stamp and not the pits. If I start to lighten the stamp at all, the rest of the pitting stays. Sneaks up on you too.
Now you got a razor to shave with .Good judgment comes from experience, and experience....well that comes from poor judgment.
-
The Following User Says Thank You to 10Pups For This Useful Post:
MattCB (05-25-2014)
-
05-25-2014, 06:13 AM #5No that's not me in the picture

- Join Date
- May 2013
- Location
- Los Angeles South Bay
- Posts
- 1,340
Thanked: 284
Hey that's nice! Looking great!
I love living in the past...
-
The Following User Says Thank You to RoyalCake For This Useful Post:
MattCB (05-25-2014)
-
05-25-2014, 07:44 AM #6Senior Member

- Join Date
- Jun 2013
- Location
- Gladstone QLD AUSTRALIA
- Posts
- 3,245
Thanked: 804
Nice job Blade came out looking great,
Been contemplating a buff also and this helps with the pros and cons
blade looks good but, you lose the sharpness of the line edges etc
But all comes with practice I spose
Job well done all the sameSaved,
to shave another day.
-
The Following User Says Thank You to Substance For This Useful Post:
MattCB (05-25-2014)
-
05-25-2014, 02:19 PM #7Razor Vulture


- Join Date
- Oct 2010
- Location
- Lone Star State
- Posts
- 26,183
Thanked: 8620
Cool, Matt! Great save! Nice to have that much meat on the bone, eh?
 Walterbowens likes this."Don't be stubborn. You are missing out."
I rest my case.
-
The Following User Says Thank You to sharptonn For This Useful Post:
MattCB (05-25-2014)
-
05-25-2014, 02:19 PM #8Senior Member
- Join Date
- Jul 2013
- Location
- Kitsap County, WA USA
- Posts
- 1,549
Thanked: 351
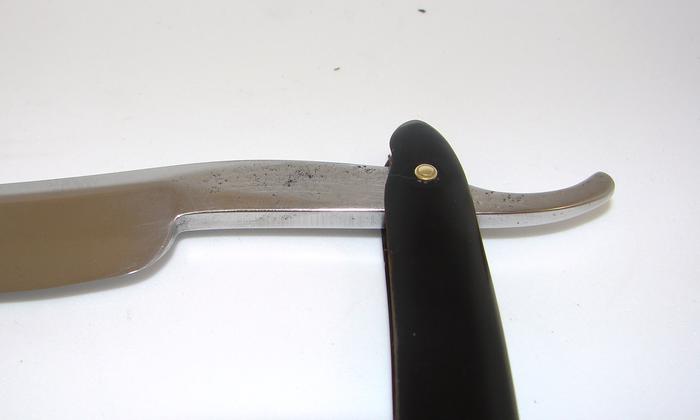
Overall I am happy with the result. Even if I had trashed the blade I still would of gained a better feel for the buffer. There are still two pits on the blade I didn't get out and quite a bit of "dimpling". The W&B stamp can still be seen at an angle, so not a complete loss. I do think it's possible to maintain the edges of the grind better than I did. Going to have to work on control of the buffer wheel and the amount of pressure applied. I know it has been stated before, but a light touch is all that is needed. If you start applying pressure to the buffing wheel it builds up heat MUCH faster and seems to leave deeper scratches as well.
The older I get the more I realize how little I actually know.
-
05-25-2014, 02:47 PM #9Senior Member

- Join Date
- Sep 2009
- Location
- smoky mountains, TN
- Posts
- 136
Thanked: 22
Wow, looks great! Reminds me of the rust covered W&B I 'inherited' from my wife's great uncle. I sent it out to be made shave ready and never expected anyone to remove the rust. But the guy I sent it to took the initiative and did a complete overhaul...I was amazed. He even saved a fairly clear imprint of the stamp though he couldn't save all of it.
You guys have the gift of patience that, my kids will agree, I ain't got!
-
The Following User Says Thank You to pstrjp For This Useful Post:
MattCB (05-25-2014)
-
05-25-2014, 03:53 PM #10Shave This

- Join Date
- Jan 2014
- Location
- Pickering, Ontario
- Posts
- 1,036
Thanked: 183
As a novice, I've come to the conclusion that if I want to retain definition in the finer details of a blade, heel and toe edges, stabilizer, bevels on the tang, and stamps, I'm going to have to hand sand these areas with the paper backed by a solid surface like a cork or wood. If you use your finger or other soft surface it will allow the paper to wrap around and wear the edges and dip into the lettering of a stamping causing a concave at each letter. Nothing beats the speed and ease of the buffer but, in my hands at least, it's going to cost me in unwanted erosion if used in the wrong places. Here is a hollow ground I've been working on, all hand sanded. It started out with an orange peel like pitting over most of the blade. The tang is made with a rounded surface and had some of the stamp worn off to begin with. Originally Posted by MattCB

It's not perfect but I'm happy with it. I'd never take a full hollow like it to the buffer anyway.
Last edited by Hart; 05-25-2014 at 07:45 PM.
Than ≠ Then
Shave like a BOSS
-
The Following User Says Thank You to Hart For This Useful Post:
MattCB (05-25-2014)


 Reply With Quote


