
Results 1 to 10 of 21
 51Likes
Thread: This Reaper scared me :<00
 LinkBack URL
 About LinkBacks
Threaded View
-
09-21-2014, 06:56 AM #1Senior Member


- Join Date
- Nov 2012
- Location
- Across the street from Mickey Mouse in Calif.
- Posts
- 5,320
Thanked: 1185 This Reaper scared me :<00
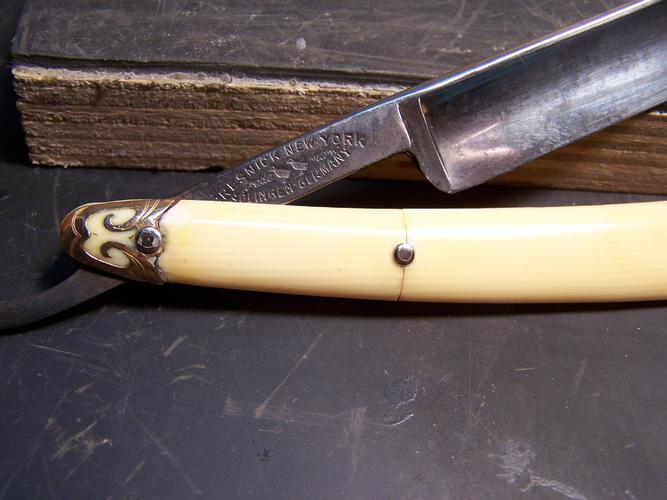
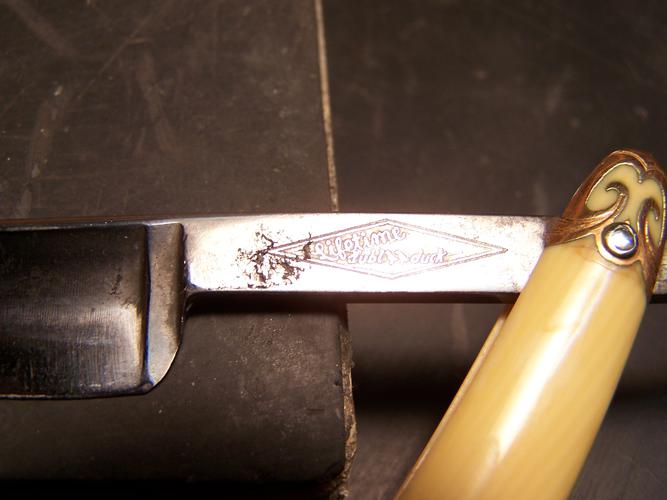
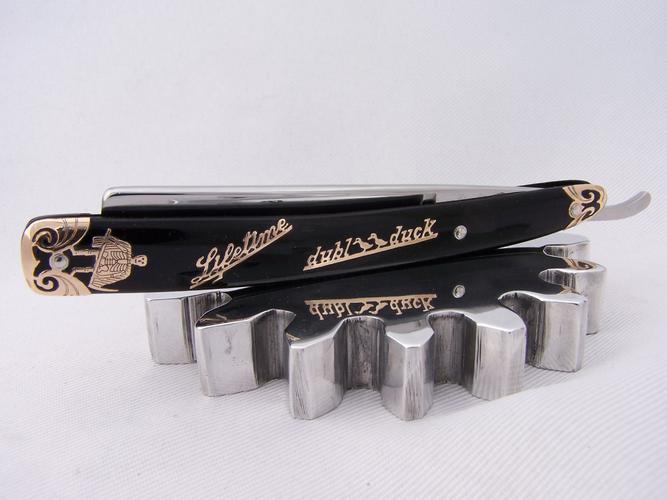
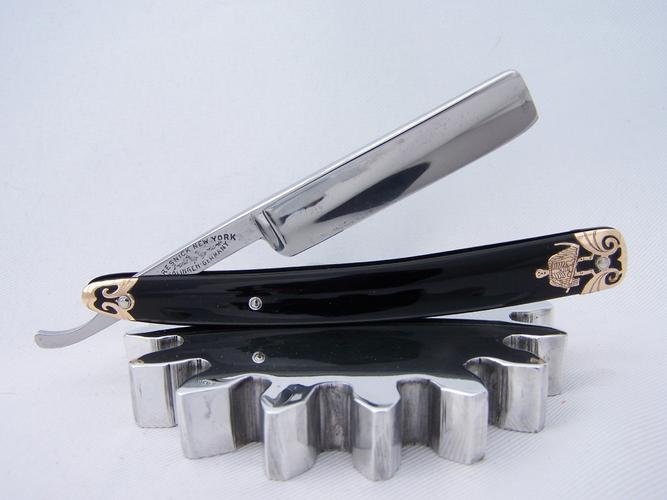
I was asked to do a transfer/rebuild on this Reaper. From the description and pictures I knew I had my work cut out for me. When I got it in hand I started to wonder how this would turn out. The before pictures aren't that great but it had some problems that could be seen best under a loupe. Think cell rot. I went to fixing the geometry first. The stabilizer had to be raised as it was already causing a hook and frown. A pretty good smile at the toe and some definite hone wear above that. It looked as though it was going to lose some serious metal before a clean bevel appeared so I took the stabilizer up a ways. I then leveled out the edge which made it all look a lot better. I started to make the scales while I worried about the edge. I couldn't take it anymore so I went looking to see how bad this was going to get. The blade width measured average was about 11/16. After getting it all straight it was only 1/32 less. Now comes the search for good steel. I went with 2 layers of tape and started on the 1k to see how it would go. It grabbed twice as it went down the hone [add pinging and clinking sounds here] and the 3rd time it stopped. Glad I was holding loosely or it may have cracked. Big scare and close call for me. I have a Frictionite and 106 Carborundum which work fast but smooth. It was still like grinding teeth but it smoothed out after awhile. Constantly checking it with the loupe I would get 3 chips out and 5 more would show up. After what seemed like forever I got it down to 2 pits on the bevel 1 on the edge and decided to go back to the scale work for awhile. More praying needed and I needed to relax a little. Once the scales were done I got everything pinned up and clean and then, here we are at the edge again. Feels more natural honing with scales on but still a little hard to do with your fingers crossed. With all the edge fixing the bevel took a while to get set but once it was I went to looking for chips real close. Only found 1 in the edge and it disappeared with a little more work on the 4k. After some laps on the 8k hair started falling off my arm with ease. Finished it on 12k Nani and then the Zulu to smooth that out. First shave test showed the edge still lacking in the middle so back to the Frictionite for a little concentrated effort and through the progression again. Yippie yahoo it shaves. And still at a respectable 5/8 width. This old blade has life again having given it about a year of mine :<0) Oh and the scales came out okay too !
Doesn't really look that bad.
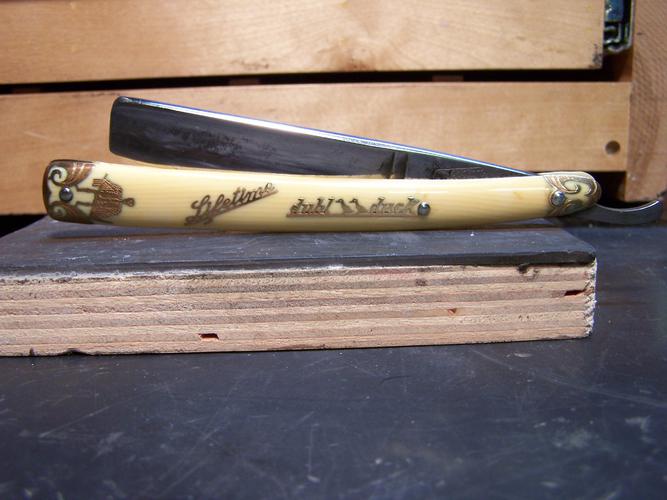
Scales are broke in a couple of spots plus rotting.
I don't have a good picture of previous geometry but the worn stabilizer says it all.
New everything except brass and blade.
I found that little grin at the toe handy in those hard to reach spots.
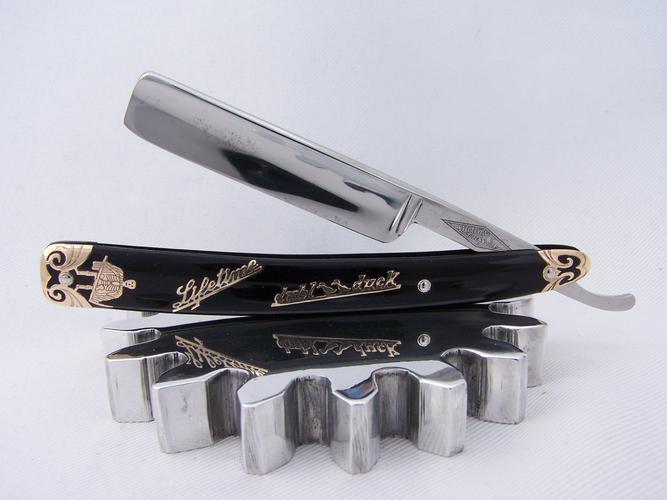
This looks like a carbon copy of another Reaper I did but what else would you do to one ?
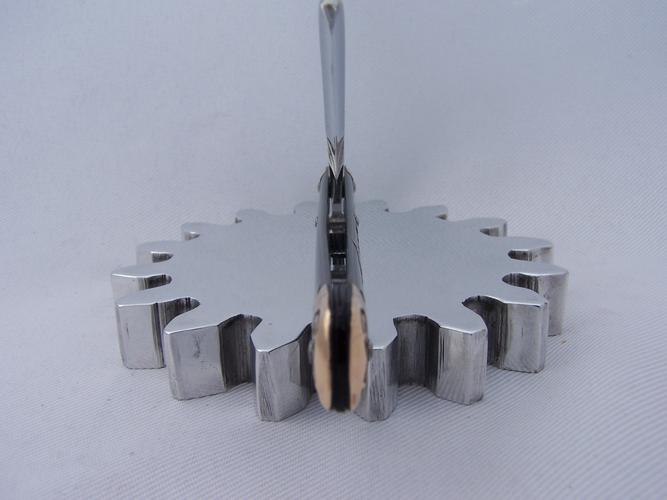
The sun and clouds weren't cooperating with the tent today so you can't see the translucent red wedge
and maybe some of the clear spacer.
Just a note : Everyone of these is different to some extent. The original wedge was more like a spacer and the thickest I have ever seen on a dduck. The new one is a tad smaller with some wedge added to it.
Thanks for looking, hope you enjoy :<0)Good judgment comes from experience, and experience....well that comes from poor judgment.
-
The Following 7 Users Say Thank You to 10Pups For This Useful Post:
Chevhead (09-21-2014), Geezer (09-21-2014), JimmyHAD (09-21-2014), lz6 (09-21-2014), Martin103 (09-30-2014), ScienceGuy (09-21-2014), ultrasoundguy2003 (09-23-2014)


 Reply With Quote