
Results 1 to 8 of 8
 6Likes
 LinkBack URL
 About LinkBacks
-
09-22-2014, 02:04 AM #1Senior Member

- Join Date
- Jul 2014
- Location
- Boise ID
- Posts
- 102
Thanked: 8 New Here! First restore/custom scales, Old sheffield
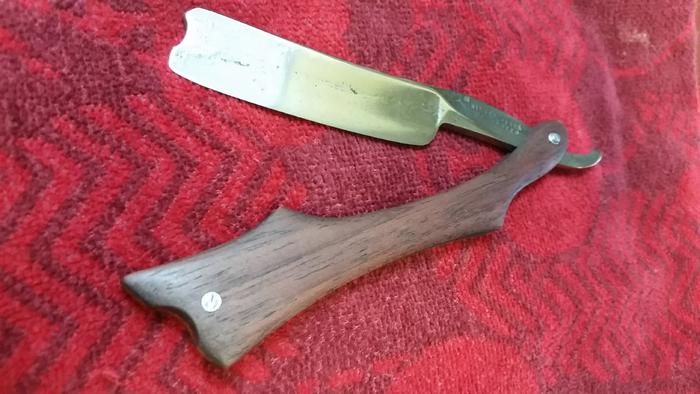
I am new to the forum and straight razor shaving but I really wanted to make my own set of scales. Please bring on the suggestions and tips!
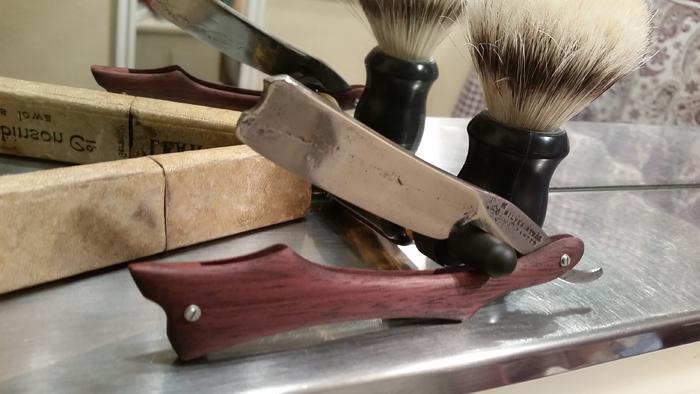
I picked up this razor from an antique store and re-did it using only hand tools and a small dremel. I now have carpal tunnel from sanding
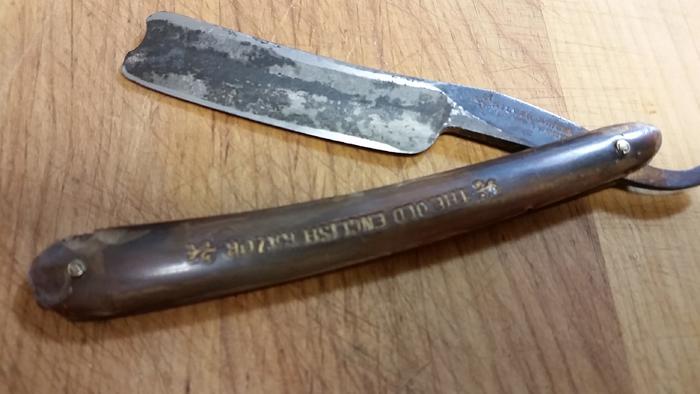
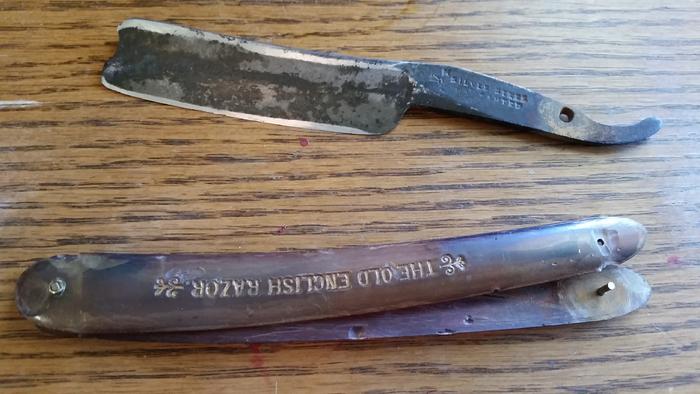
It was in rough shape and i decided new scales would be better until I learn how to restore old ones.
 cleaned up ok, still needed to get out some pitting, I will go back and try for a better finish later. Maybe and etched blade??
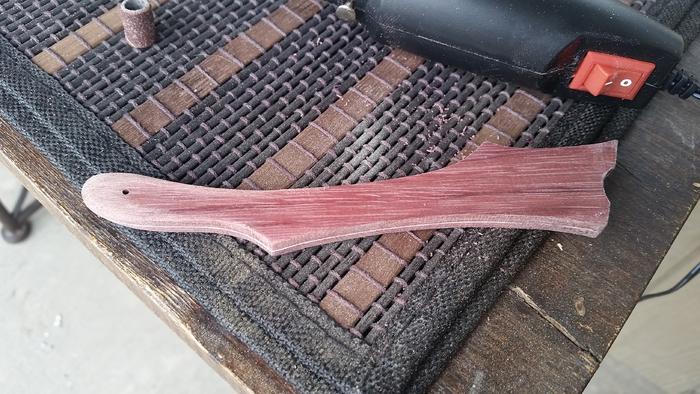
 I decided to go with purple heartwood for the scales and bloodwood for the wedge.
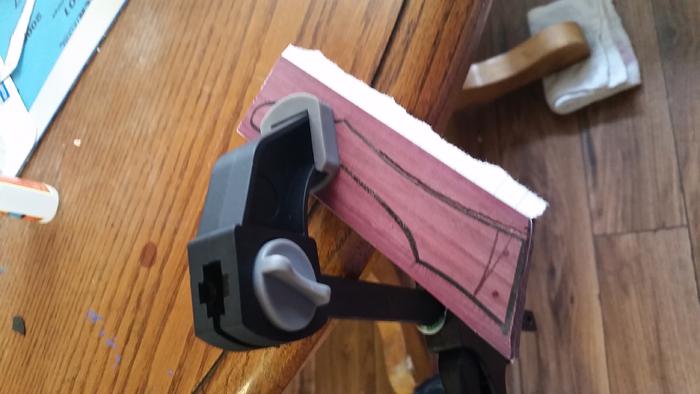 After making a template for the scales I glued two piece of wood together and cut the shape out with a coping saw.
 after plenty of sanding I drilled the pivot hole with a dremel tool, to make sure it was as straight as posible, I used a 1/16th dremel tool collet to drill through and it worked fairly well!! safety glasses of course.
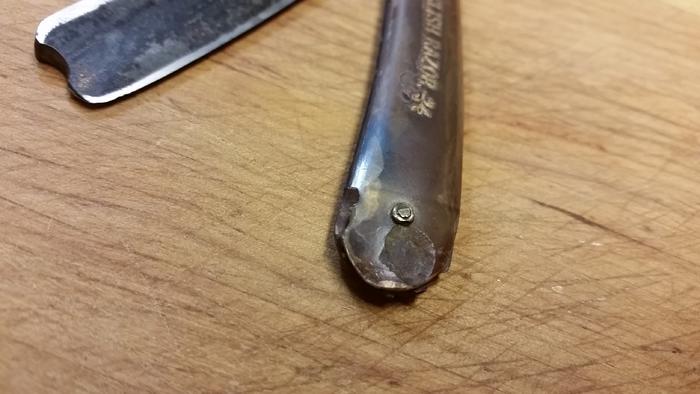
The pivot hole on the razor was way too big and out of shape, I got an ink pen tube and threaded it through the pivot and it worked surprisingly well.
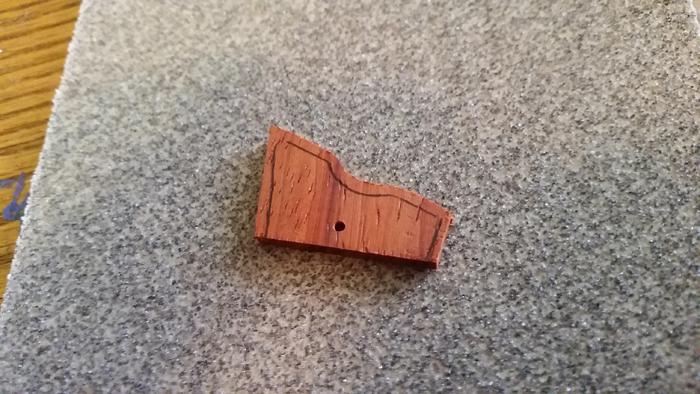 this is the wedge of bloodwood that I used and sanded into shape
Without the proper gear, i decided to just use screws and hex nuts for the pins until i can later learn to pin.
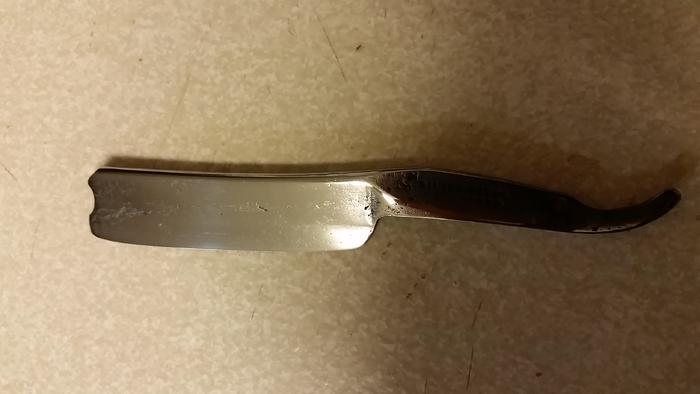
After staining and more sanding , sanding a staining.... this is my finished product.
-
09-22-2014, 03:07 AM #2Bladesmith by Knight

- Join Date
- Jun 2007
- Location
- Murrumba Downs, Queensland, Australia.
- Posts
- 571
Thanked: 203
Well done.
One thing springs to mind, and perhaps you have already considered this, is that with scales that have a lot of shape, such as yours, is how do they feel with the razor open for stropping?
the tang needs to be enclosed in the scales and they need to be comfortable to hold and roll while stropping. If you cannot comfortably keep the blade flat on the strop, and roll easily, you will not keep the blade comfortably sharp and end up with a poor shave.
That said, i like yor scales, and you may have already thought of this. Just without a pic of them fully open i could not be sure. But lookin' good. Well Done.
Adamseanreum1 likes this.Respectfully,
Adam.
-
The Following User Says Thank You to Adam G. For This Useful Post:
seanreum1 (09-22-2014)
-
09-22-2014, 03:49 AM #3Senior Member
- Join Date
- Jul 2014
- Location
- Boise ID
- Posts
- 102
Thanked: 8
Adam, thank you for your concern and bringing that to my attention. I'll have to admit that it was not something I considered when designing the scales, thankfully I lucked out and it strops beautiful and very comfortable.
Unfortunately, before I knew what to look for and now I realize that the spine has a slight twist that is giving me hell on the stones. So even if it's just a show piece until I can look into having it fixed, I'm happy with how it turned out.
Thanks for the insight!
Greatly appreciated
Sean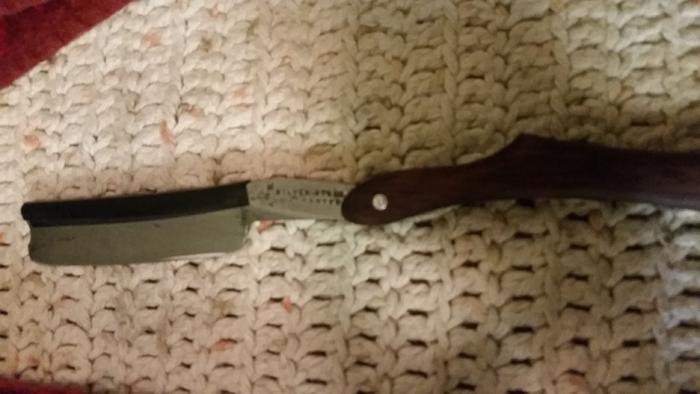
-
09-22-2014, 04:31 AM #4Senior Member


- Join Date
- Nov 2012
- Location
- Across the street from Mickey Mouse in Calif.
- Posts
- 5,320
Thanked: 1184
Nice flair to it. Makes my wrist hurt looking at the amount of sanding you did :<0) I didn't see any thrust washers. If your blade is tight then your handling should be easiest.
Lots of old scales around need fiixen. Crazy (CA) glue will fill those cavities I think. Some sanding and polishing and nice again.
Peening just takes a little practice.seanreum1 likes this.Good judgment comes from experience, and experience....well that comes from poor judgment.
-
The Following User Says Thank You to 10Pups For This Useful Post:
seanreum1 (09-22-2014)
-
09-22-2014, 04:54 AM #5Senior Member
- Join Date
- Jul 2014
- Location
- Boise ID
- Posts
- 102
Thanked: 8
10pups,
I have a lot to learn, what are thrust washers? I didn't put any washer between the tang and the scales if that's what you meant. This is a semi permanent set up, I plan on actually setting the pins properly soon.
-
09-22-2014, 05:24 AM #6Senior Member
- Join Date
- Nov 2012
- Location
- Across the street from Mickey Mouse in Calif.
- Posts
- 5,320
Thanked: 1184
Generally thrust washers are 1/4 or bigger outside dia. and yes they go between the scales and tang. This is so you can tighten the scales down and still let the razor move under a desired tension. So the blade stays were you open it and doesn't flop open and closed.
Good judgment comes from experience, and experience....well that comes from poor judgment.
-
09-22-2014, 05:32 AM #7Senior Member
- Join Date
- Jul 2014
- Location
- Boise ID
- Posts
- 102
Thanked: 8
Oh gotcha! Surprisingly they actually stay tight and in place and are not a bother to open and close. For now.
-
09-22-2014, 06:05 AM #8Senior Member

- Join Date
- Feb 2014
- Location
- California
- Posts
- 463
Thanked: 51
A thrust washer is kinda like a bearing. Keeps your steel from wearing away the material around it. Its a protective measure. If your steel is softer than the surrounding material..dont worry about. If your steel is harder...use a thrust bearing (washer) Just use a thrust washer...if the surrounding material is harder than the tang...it will wear down the tang. Edit..If you had hard steel opening and closing against ...plastic..well the plastic is gonna wear away and your steel will start wobbling. If you had hard steel scales and a plastic blade...bye bye blade after a while. Wobble. Your thrust washer should be harder than the scales but softer than the blade..You'll figure it out..Think about a bearing around a camshaft..durrible.but replaceable at some point.
Last edited by HaiKarate; 09-22-2014 at 06:32 AM.


 Reply With Quote