Results 1 to 6 of 6
Thread: Restoration Redo
-
10-28-2014, 07:28 PM #1
 Restoration Redo
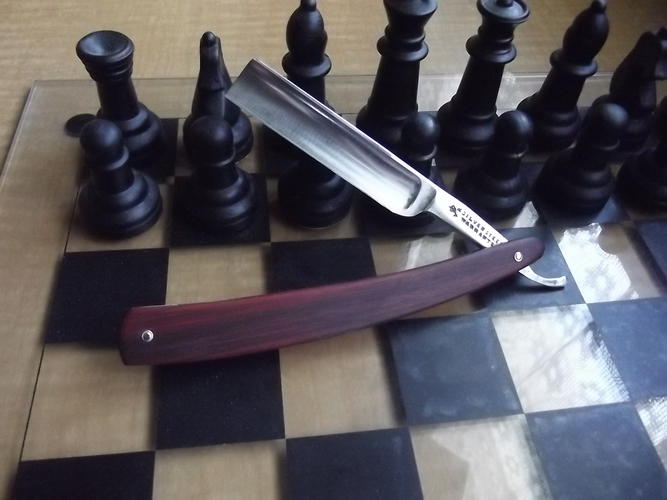
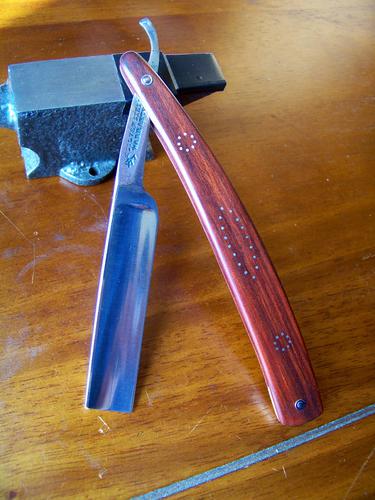
This one has been in my rotation for quite awhile now and was one of the first razors I did a rescale on. I grabbed it the other day and noticed that it still had some rough scratches from shaping it on my belt sander and thought I should smooth everything out. I don't know why, but I like the look of this razor. Nothing special about it, but I just like it. I decided to give it alittle extra so I put nickel silver pins in the scales to give it alittle design. Went with a tung out finish this time to add some shine from the dull fuzzy finish from before. I like the looks of the redheart. It is a darker red in person with black streaks. I should have been worried about the razors that are sitting around waiting for me to do something with, but I couldn't leave this one as it was. Before and After.


-
The Following User Says Thank You to JSmith1983 For This Useful Post:
williamc (10-29-2014)
-
10-28-2014, 08:23 PM #2

nice! tell us how you did the inlays please!
-
The Following User Says Thank You to tintin For This Useful Post:
JSmith1983 (10-28-2014)
-
10-28-2014, 09:00 PM #3

I traced the scales on paper and marked out the pivot and wedge pin holes so I could place it on top of the scales and bolt it in place. I measured where I wanted the inlays to go so they would be centered. Placed the dots where I wanted them and used a scribe to punch through the paper to mark the scales and used a pin vise and a drill bit slightly smaller than the nickel silver. I tapped the pins in place with alittle glue for extra support and then filed them flush. You can see some of the pins aren't perfectly placed. That happened when I went to mark the holes and didn't line up perfectly centered with my marks. I used 20g nickel silver. I was going to use some 26g sterling silver that I have, but it is alot thinner so decided not to use it. I am planning on saving the silver to try and copy some of the vintage scales I've seen with really tiny pins some time in the future. I have used 1/32 brass rod that I got at a hobby shop that turned out pretty well. I was thinking of doing a wire inlay, but I am still working out how to get that to look nice and smooth. That is alot harder to do.
-
-
10-28-2014, 09:29 PM #4

its the little extras that make all the difference,
the dot inlays really set it off & just add that extra wow factor,
from the already nice looking but a bit Utilitarian Str8, to something sophisticated looking the extra polish on the new finish just help it all pop too
nice remix for the better indeedSaved,
to shave another day.
-
The Following User Says Thank You to Substance For This Useful Post:
JSmith1983 (10-28-2014)
-
10-28-2014, 11:53 PM #5Senior Member


- Join Date
- Feb 2013
- Location
- Haida Gwaii, British Columbia, Canada
- Posts
- 14,443
Thanked: 4828
That is a great inspiration to those of us who have contemplated such things. This may be a new trend.
It's not what you know, it's who you take fishing!
-
The Following User Says Thank You to RezDog For This Useful Post:
JSmith1983 (11-04-2014)
-
11-04-2014, 12:20 AM #6

Love the new look. Great work!
Motivation alone is not enough. If you have an idiot and you motivate him, now you have a motivated idiot.
Jason
-
The Following User Says Thank You to jasontg99 For This Useful Post:
JSmith1983 (11-04-2014)


 16Likes
 LinkBack URL
 About LinkBacks


 Reply With Quote