Results 1 to 10 of 19
Thread: My first build
Hybrid View
-
02-10-2015, 05:11 PM #1

Very nice! I like it a lot. What is the blade edge length? As Trimmy said a picture of the rind would be helpful. Thanks for sharing.
-
02-10-2015, 05:30 PM #2

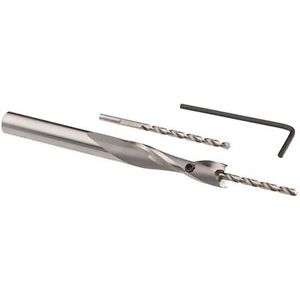
Very nice looking blade! Just a thought; most razors I have rescaled that had rounded shanks had a flat carefully ground on both sides at the pivot pin, allowing better use of thrust washers to stabilize the blade in it entire range of swing. Careful use of a counter bore before hardening could make a difference in future works. They are basically a larger drill ground to smooth minor diameter to assure the larger diameter flat portion is centered on the small diameter hole.
Any who! You done very well!
~Richard Be yourself; everyone else is already taken.
- Oscar Wilde
-
The Following User Says Thank You to Geezer For This Useful Post:
MikeB52 (02-10-2015)
-
02-11-2015, 02:27 AM #3Junior Member

- Join Date
- Jan 2015
- Location
- Tucson az
- Posts
- 14
Thanked: 3
Thanks you guys. Today I ground the blade down a little so it isn't as wide. All the handles I was trying to make were weird looking with how big the blade was. It is now about 3/4 inch wide. I forgot to measure how long it was. Believe it was right at 2.5" iirc. Geezer, thanks for the tip I will definitely have to look into getting some of
them.
-
02-11-2015, 02:44 AM #4Junior Member

- Join Date
- Jan 2015
- Location
- Tucson az
- Posts
- 14
Thanked: 3
Here's some pictures from today. The razor along with the narrower blade and the scales I'm making for it.
-
02-15-2015, 01:56 AM #5Junior Member

- Join Date
- Jan 2015
- Location
- Tucson az
- Posts
- 14
Thanked: 3
Heat treated the razor today. I'm kind of scared I think I got it to hot and it split right at the edge in the middle of the razor. I'm going to finish grinding the blade tomorrow and hopefully it will come out.
-
The Following User Says Thank You to mykylj1995 For This Useful Post:
Geezer (02-15-2015)
-
02-15-2015, 10:13 PM #6

That looks waaaaaay too hot. Did you quench it like that?
Til shade is gone, til water is gone, Into the shadow with teeth bared, screaming defiance with the last breath.
To spit in Sightblinder’s eye on the Last Day
-
02-16-2015, 01:28 AM #7Junior Member

- Join Date
- Jan 2015
- Location
- Tucson az
- Posts
- 14
Thanked: 3
Yes I did. I don't have a heat treat kiln or furnace so I am stuck using a torch for now. (I know I know)
-
02-16-2015, 03:30 AM #8Thread derailment specialist.


- Join Date
- Dec 2011
- Location
- Republica de Tejas
- Posts
- 2,792
Thanked: 884
Been my experience that cherry red is as hot as you want to go for heat treat. Quenching from there should make the steel as hard as it will go. Only wootz type steel I ever used was cable that I forged myself. Rest of the time I made my blades from L6 and oil quenched. Your quench medium should depend on the steel.
If the colors are close to true on your picture, it was way past cherry.
Best I recall another quick test is to heat it to where it's non-magnetic. That happens in the red zone.
I hope it didn't crack.Last edited by Wullie; 02-16-2015 at 03:32 AM.
Member Tonkin Gulf Yacht Club, participant SE Asia War Games 1972-1973. The oath I swore has no statute of limitation.
-
02-16-2015, 06:54 PM #9
 Til shade is gone, til water is gone, Into the shadow with teeth bared, screaming defiance with the last breath.
To spit in Sightblinder’s eye on the Last Day


 22Likes
 LinkBack URL
 About LinkBacks


 Reply With Quote


