
Results 11 to 20 of 26
 60Likes
Thread: W&B Rattler / Faux Frameback
 LinkBack URL
 About LinkBacks
-
05-23-2015, 07:57 PM #11barba crescit caput nescit


- Join Date
- Jul 2013
- Location
- Toronto, Canada
- Posts
- 9,664
Thanked: 2693
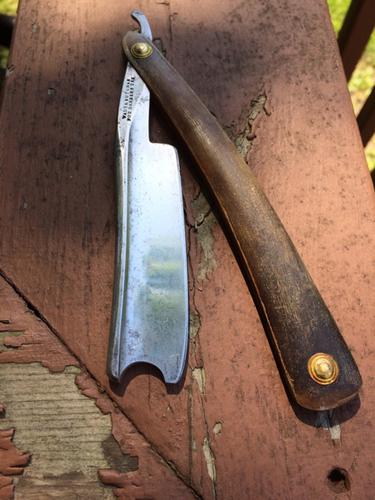
Here's after another soak in Evapo-Rust and about 15 minutes of 1000 grit sanding with some WD40.
The razor will go into a soak now for a few days in some Neatsfoot Oil to re-condition the scales.
The razor has revealed some pitting, which is a disappointment, but after the neatsfoot, will go 2000 grit, 3000 grit and then final polish with some crox and WD40.
I don't have any power tools, would prefer to stay hand only, so any suggestions to get rid of some of this pitting, or any other suggestion would be appreciated and I will use after the Neatsfoot Oil.
Last edited by Phrank; 05-23-2015 at 08:01 PM.
-
05-23-2015, 10:05 PM #12Senior Member

- Join Date
- Mar 2014
- Location
- Romulus, Michigan
- Posts
- 1,352
Thanked: 332
Well I use 220 grit sandpaper. Use any standard kitchen sponge dry and folded in half. Wrap your sandpaper around the outside and go in one direction only up and down most will tell you works best. See how deep the pits are, work your way back up the grits.
http://straightrazorpalace.com/works...tml#post809470
Other proven methods are in this link.
http://straightrazorpalace.com/works...wers-here.htmlPhrank likes this.Your only as good as your last hone job.
-
The Following User Says Thank You to ultrasoundguy2003 For This Useful Post:
Phrank (05-23-2015)
-
05-23-2015, 10:09 PM #13Senior Member


- Join Date
- Feb 2013
- Location
- Haida Gwaii, British Columbia, Canada
- Posts
- 14,444
Thanked: 4828
I rarely drop below 400. YMMV The backing the sandpaper helps to keep lines straight, I use a cork and some pieces of wood, depending on where on the razor I am sanding.
cheetahmeatpheonix and Phrank like this.It's not what you know, it's who you take fishing!
-
The Following User Says Thank You to RezDog For This Useful Post:
Phrank (05-23-2015)
-
05-24-2015, 02:57 AM #14Senior Member
- Join Date
- Nov 2010
- Location
- Pequea, Pennsylvania
- Posts
- 2,290
Thanked: 375
Looks like that one is turning out to be a great find. I would have passed it up looking at that first pic.
markbignosekelly likes this.CHRIS
-
05-26-2015, 12:59 PM #15King of the Shorties

- Join Date
- Aug 2014
- Location
- Columbia, Maryland
- Posts
- 547
Thanked: 64
I had one of those... it was a great shaver once Glen got rid of the frown and put an edge on it!
Good luck with the resto... looks like it's coming along nicely!Recovered Razor Addict
(Just kidding, I have one incoming...)
-
05-26-2015, 01:18 PM #16Senior Member

- Join Date
- Feb 2012
- Location
- West Midlands, UK
- Posts
- 1,263
Thanked: 360
On the basis that you don't get rid of pits - you remove all the metal surrounding them - take a long hard look and decide just how much work it will take. As others have said, they start at much lower grit abrasive - so your 1k will take a long, long time, especially if you want a perfect finish under the spine area.
Phrank likes this.My service is good, fast and cheap. Select any two and discount the third.
-
05-26-2015, 01:27 PM #17barba crescit caput nescit
- Join Date
- Jul 2013
- Location
- Toronto, Canada
- Posts
- 9,664
Thanked: 2693
Thanks for the advice, I was actually just going to go down and take the razor out of the neatsfoot oil - don't think I want to remove that much metal, some scars from aging don't bother me that much - I'll give it some more time on the 1k, then 2k, 3k and some polish and get her ready for a shave. Originally Posted by UKRob

-
05-27-2015, 01:54 PM #18barba crescit caput nescit
- Join Date
- Jul 2013
- Location
- Toronto, Canada
- Posts
- 9,664
Thanked: 2693
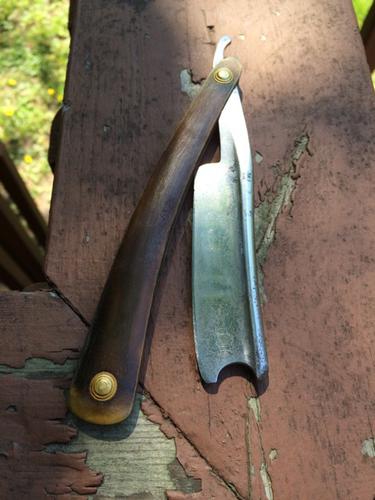
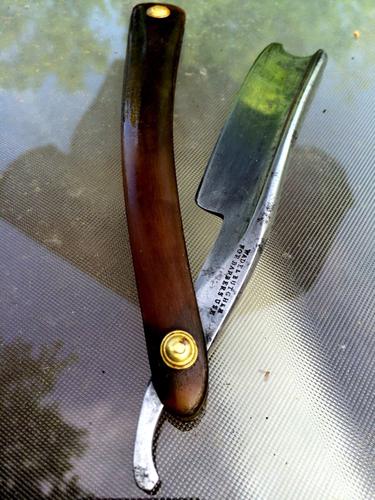
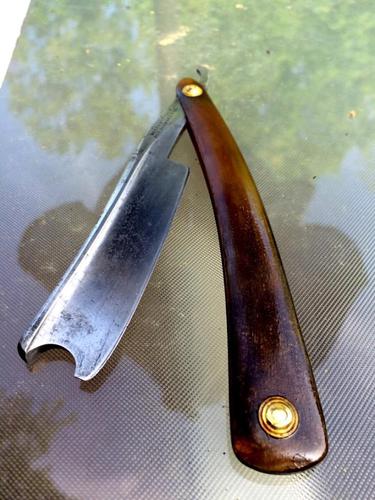
Couple of shots after a soak in Neatsfoot Oil...little more polishing and then to the stones!
-
05-27-2015, 02:42 PM #19Senior Member

- Join Date
- May 2014
- Location
- Canberra, Australia
- Posts
- 257
Thanked: 43
wow! its coming up something extra special!
just wowPhrank likes this.
-
05-27-2015, 03:18 PM #20Senior Member
- Join Date
- Feb 2013
- Location
- Haida Gwaii, British Columbia, Canada
- Posts
- 14,444
Thanked: 4828
One of the things that I really like is when I take an obviously very old set of horn scales and clean them with WD-40 and 0000 steel wool. The color comes back as the deep ground in gunk comes off and the fine lines become visible. It is impossible to show in pictures but the depth and texture is so incredibly rich. Those are great scales on a fantastic razor Andrew.
It's not what you know, it's who you take fishing!


 Reply With Quote