
Results 1 to 10 of 14
 44Likes
 LinkBack URL
 About LinkBacks
Hybrid View
-
08-21-2015, 07:31 PM #1
 Antique Tamahagane razor work in progress
This one is the 2nd razor I am making from the 16th century sword.
This piece came from a lower part of the sword, so it was a bit wider, allowing for an easier grind. And of course, the fact that I have worked with this material before helps. Grinding differentially hardened steel is a challenge. It is very similar to grinding suminagashi, so that helped as well. It is pretty jumpy on the grinding wheel. Only difference is suminagashi is easily replaceable, and this isn't.
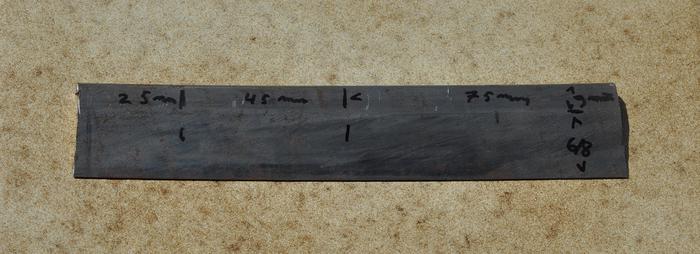
First I cut the correct part from the sword.

Closeup of the blank
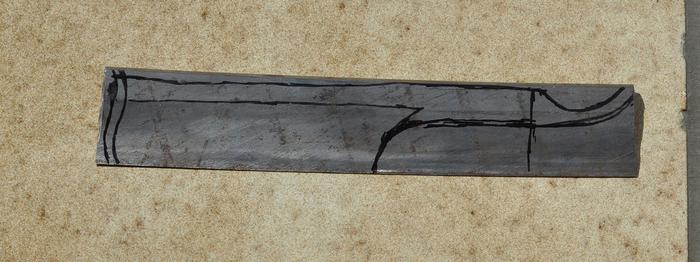
Rough outline of the razor. No detail yet, just the outer shape
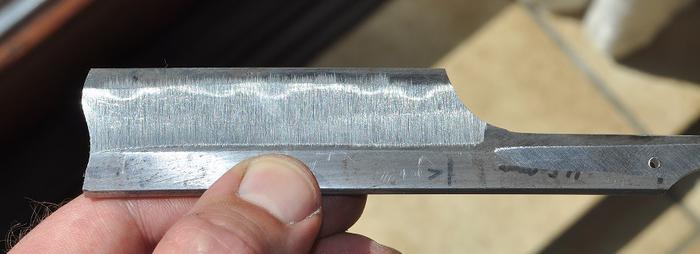
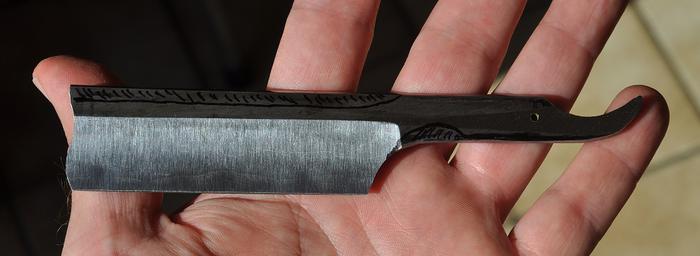
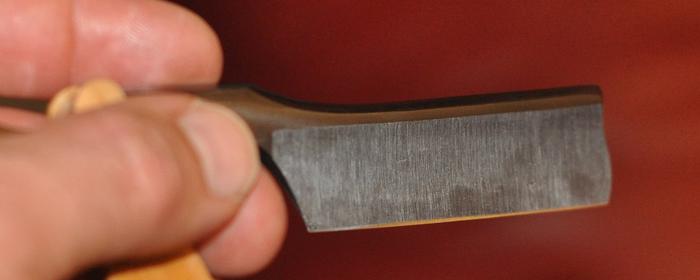
During grinding, the hamon came out. This is also where grinding became a true challenge.
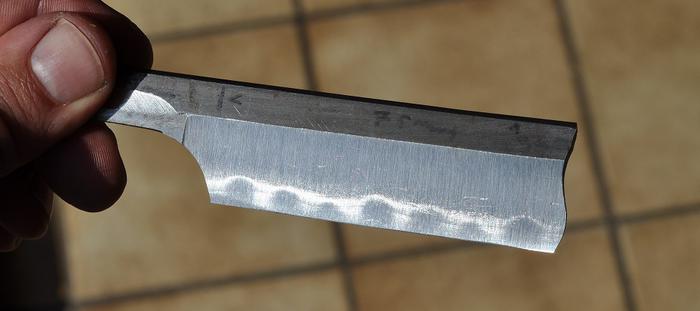
This is with the hollows ground to final shape.
And this is without lighting, but with the areas marked that I want to grind down. The spine has to be made less wide. And I have noted where I would make a thumbnotch. I can also make a shallow fingernotch on top of the tang, between the tang and the spine. But that has yet to be confirmed.
 Til shade is gone, til water is gone, Into the shadow with teeth bared, screaming defiance with the last breath.
To spit in Sightblinders eye on the Last Day
-
The Following User Says Thank You to Bruno For This Useful Post:
lz6 (08-21-2015)
-
08-21-2015, 07:56 PM #2Senior Member

- Join Date
- Feb 2014
- Posts
- 225
Thanked: 36
I truly can't wait to see the final product! Fantastic job so far.
lethalgraphix likes this.
-
08-21-2015, 10:42 PM #3Senior Member


- Join Date
- Jun 2013
- Location
- Gladstone QLD AUSTRALIA
- Posts
- 3,245
Thanked: 804
Another great project to follow
Full Post HT hollow grinding, I bet you are enjoying this one Bruno
Can't wait to see the finished productSaved,
to shave another day.
-
10-03-2015, 10:08 PM #4
This weekend I finished the razor. I mirror finished the body of the razor, and left the hollows at 120 grit satin finish. this way the hamon is really visible when held in natural light. The finer the finish, the harder it is to see. The scales are wild Japanese Cherry wood, with CA coatings inside and out to protect it against moisture. The wedge is made from ebony.
I really dig this model of razor.
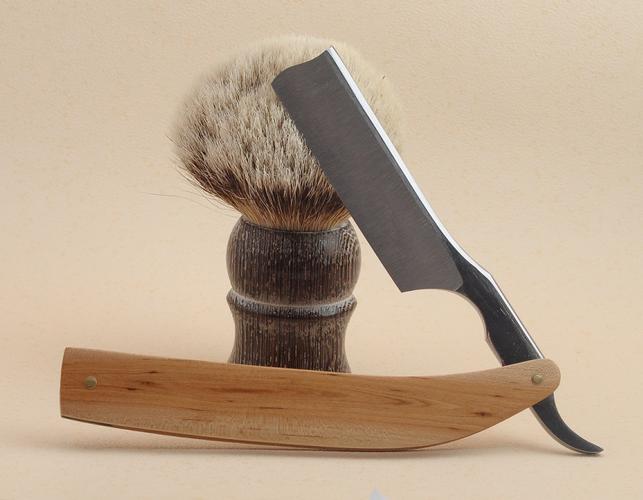
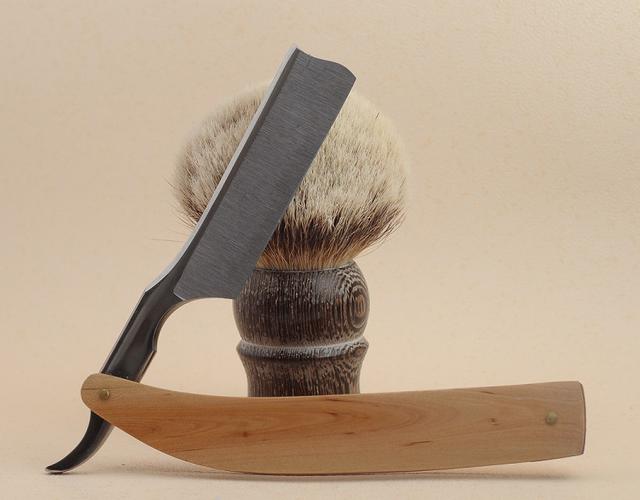
Without etching or natural light, hamon on razors are notoriously hard to make pictures of. You can see a better hamon pic higher up in this thread.
 Til shade is gone, til water is gone, Into the shadow with teeth bared, screaming defiance with the last breath.
To spit in Sightblinders eye on the Last Day
-
The Following User Says Thank You to Bruno For This Useful Post:
rolodave (10-03-2015)
-
10-03-2015, 10:37 PM #5Senior Member
- Join Date
- Feb 2014
- Posts
- 225
Thanked: 36
It's a beauty! It turned out great!
-
10-06-2015, 05:59 PM #6Senior Member

- Join Date
- Jun 2007
- Location
- North Carolina, USA
- Posts
- 558
Thanked: 6
Very nice!
-
10-07-2015, 03:14 PM #7
No the holes are in the soft part of the steel and i used a cobalt drill
 Originally Posted by Gipson

-
10-07-2015, 03:16 PM #8
Keep in mind that aftet hollow grinding, most of that detail is gone. Nioi etc are surface artefacts Originally Posted by Jakeonthekob
-
10-07-2015, 04:10 PM #9Junior Member
- Join Date
- Oct 2015
- Location
- California, USA
- Posts
- 13
Thanked: 0
Oh sorry, I should have been clearer. I was referring to the original sword, not your awesome razor blade hehe.
That also brings up another question in my mind. Do you think that the type of lamination could affect your blade? I can't really tell from the pics but perhaps it is made in kobuse lamination? And I think your razor is made with the oldest steel here lol.
-
10-07-2015, 10:03 PM #10
Excellent question!
The answer is yes and no
I knew up front that there were different way Japanese swords were laminated. And indeed, this has a big influence in grinding. Although in reality, no matter what type of construction, the top part of the blade is always soft, which means the hollows (will) have differential hardness, which sucks to grind. Especially since I had to do all grinding post HT. Challenging to say the least, considering the blade contact is jumpy and always feels like the wheel of a car slipping in sand and alternating between grip and no grip. From that perspective, the construction does matter.
However, there is 1 constant in all Japanese swords: the edge is hard
As long as you keep the edge of the razor where the edge of the sword was, you are guaranteed to have a razors edge made from good steel, regardless of which exact construction was used.
One important thing to keep in mind is that Japanese sword steel is shallow hardening, so unless you keep the edge where the edge used to be, it is very uncertain whether you can work with the original heat treatment. Technically I could re-do the heat treatment. However, a huge part of the attraction for me to work with a genuine sword, is that the edge you will be shaving with will be the work of the smith who hardened it almost 500 years ago!Til shade is gone, til water is gone, Into the shadow with teeth bared, screaming defiance with the last breath.
To spit in Sightblinders eye on the Last Day


 Reply With Quote