Results 1 to 10 of 57
Thread: Tightening pins
Hybrid View
-
09-02-2015, 10:34 AM #1
 Tightening pins
Hi, I need some advise please.
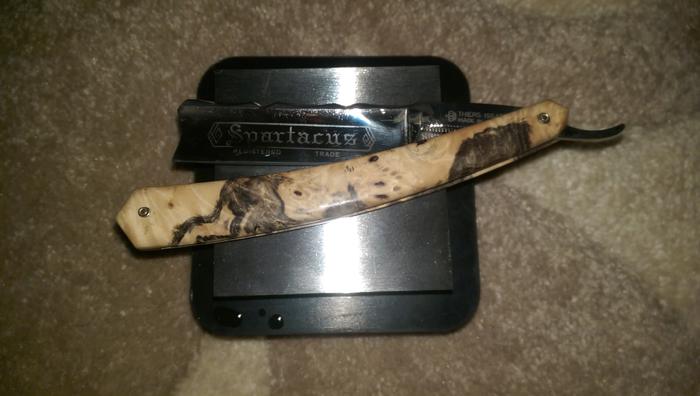
I've been tightening up my brothers straight. It was so loose that honing and stropping it was awkward.
I did some light tapping on the pin and tightened it up.
Now I've noticed that the blades edge just misses the scales on one side when closing .
It might have already been like this before I started the fix but I doubt it.
Is there a way to remedy this?
Many thanks

-
09-02-2015, 11:07 AM #2

It appears to me that you have slightly bent the pin while tightening which as caused the blade to slightly move off center, you will have to repin the razor, I've noticed many of those TI's have no internal washers either so you can sort that out at the same time.
“Wherever you’re going never take an idiot with you, you can always find one when you get there.”
-
09-02-2015, 11:26 AM #3

That's the problem with TI and other modern mass produced razors - they use a 'nail' type fitting rather than rod - it will really only tighten from one side so, as Jamie said, it may now be bent. Take it out and replace with rod and washers but mock it up first to make sure the blade alignment is OK.
My service is good, fast and cheap. Select any two and discount the third.
-
09-02-2015, 11:31 AM #4
-
09-02-2015, 12:53 PM #5

Not necessarily. Closing the blade will force it into the scales just because the tang is the widest part and will ensure the rest of the blade closes. However, you could get to a stage where the scale alignment is so far out that the edge catches the scales - that can obviously damage the edge.
If you are inexperienced with fitting scales and re-pinning, this might not be the best place to start - the TI scales are burl which can be easily broken. You might want to see if there is anyone who will do it for you.My service is good, fast and cheap. Select any two and discount the third.
-
The Following User Says Thank You to UKRob For This Useful Post:
JOB15 (09-02-2015)
-
09-02-2015, 11:29 AM #6

Many thanks.
I can see that both sides of the pin are skew whiff. A few months ago when I first tightened it I was bashing it quite hard so I must have bent it then.
I just hope I don't destroy his buckeye scales trying to remove the pin otherwise he'll be stuck with some cheepo ebay scales
Would this do? :: http://www.ebay.co.uk/itm/Straight-R...item4aeea9baa0Last edited by JOB15; 09-02-2015 at 11:32 AM.
-
09-02-2015, 11:39 AM #7Plausibly implausible


- Join Date
- May 2011
- Location
- Mount Torrens, South Australia
- Posts
- 5,979
Thanked: 485 Stranger, if you passing meet me and desire to speak to me, why should you not speak to me? And why should I not speak to you?
Walt Whitman
-
09-02-2015, 12:01 PM #8
-
09-02-2015, 12:12 PM #9Plausibly implausible


- Join Date
- May 2011
- Location
- Mount Torrens, South Australia
- Posts
- 5,979
Thanked: 485
Oh, so it's OK to bash someone else's razor?
Just joking. I've never removed pins, sorry, but I'm sure someone will let you know how. BTW, I have razors where the blade does not close centrally in the scales. For me, as long as the blade doesn't hit the sides when closing I'm OK with that. I feel that I'd rather pay a little more attention closing the razor than try and re-pin it myself as my handyman skills are pretty non existent.
Hope you get some help with the razor. Sorry about the quips; couldn't help it
CarlStranger, if you passing meet me and desire to speak to me, why should you not speak to me? And why should I not speak to you?
Walt Whitman
-
09-02-2015, 12:16 PM #10Senior Member


- Join Date
- Dec 2012
- Location
- Egham, a little town just outside London.
- Posts
- 3,857
- Blog Entries
- 2
Thanked: 1083
Before you unpin try lightly tapping the pin from the other side to where the blade touches the scale. This will hopefully pull it back to the center, although as said if it is the nail type of pin it might not help.


 39Likes
 LinkBack URL
 About LinkBacks


 Reply With Quote


