
Results 1 to 9 of 9
 13Likes
Thread: First woodworking project and light restore!
 LinkBack URL
 About LinkBacks
-
09-26-2015, 08:49 PM #1Tradesman


- Join Date
- Aug 2014
- Location
- Sault Sainte Marie
- Posts
- 1,719
Thanked: 245 First woodworking project and light restore!
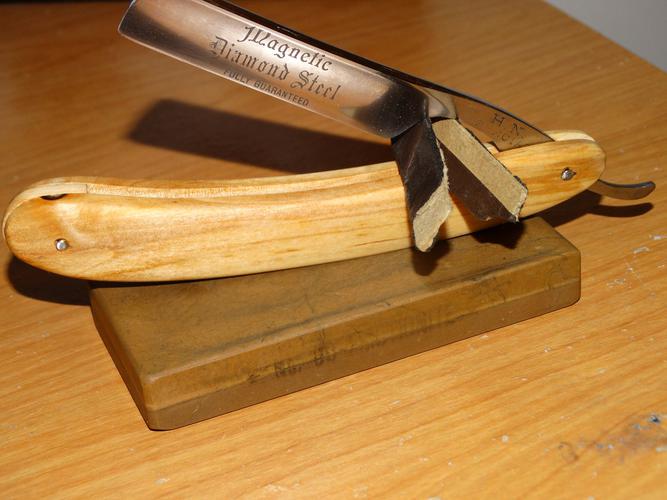
So the other day I was looking in my garage at my belt/disc table top sander. I bought it this summer with the intentions to use it but never had. I've never done any wood working in my life save a few times trying to carve.
Remember this is my first time making anything. So be gentle!
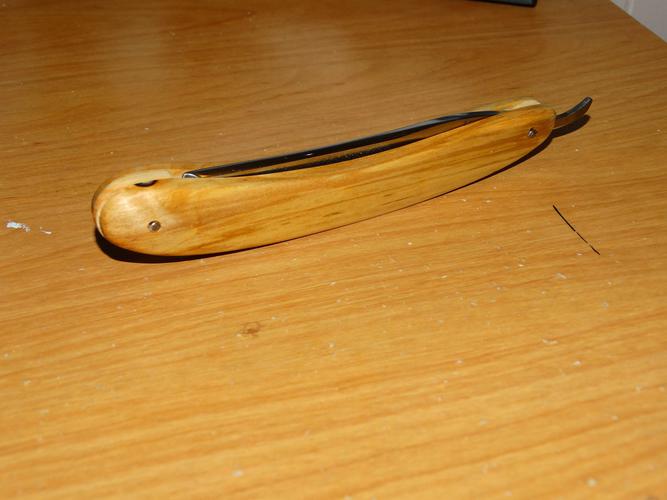
I found a roughly 2 inch diameter branch of birch wood. I cut it in half and proceeded to belt sand it until I had achieved a rough shape. I then sanded through grits until they were perfect to me. I then made a wedge out of a home depot paint stir stick. The wedge was the worst part of the process. I struggled a bit with that and in the end I ended up with a barely tapered wedge. It isn't the greatest but it works. Then pinning I used a nail to do it. It turned out decently, I wish I had gotten them a bit tighter but it was my first time.
I then cleaned the blade up and polished it a bit.
Tips for next time?
A big thanks to Charlie Lewis!! His tutorial helped tremendously. Although starting with a 2 inch diameter branch is different then a 1/8 piece of wood I used parts of his process here and there where it worked for me. I can only imagine how much faster I would have been done if I had a 1/8 piece. On a side note I bought a piece of wood at leevalley today so more scales to come
Last edited by s0litarys0ldier; 09-26-2015 at 08:53 PM.
-
The Following User Says Thank You to s0litarys0ldier For This Useful Post:
HARRYWALLY (09-26-2015)
-
09-26-2015, 09:33 PM #2I love Burls....... and Acrylic


- Join Date
- Mar 2012
- Location
- Baden, Ontario
- Posts
- 5,475
Thanked: 2284
For your first go.... not terrible, you gotta start somewhere. If it's functioning properly then you've done well in that department. Some blades take a lot of work to get centering properly.
Tips for next time, get the scales thinned down to your desired thickness before rounding the edges out. Don't try and do it all at once. You said you have a belt/disc bench sander, get a 220 belt for it. They remove massive amounts of material, and there's no need to make that worse by using a coarse belt. Even a 220 belt removes a ton of material very quickly. For the wedge, get a rough shape using the bench sander, and then fine tune it by hand on a flat surface with 120 grit. Crazy glue it in place first, leaving it stick out the sides. Then use the bench sander to blend it all together making it flush.
Paint stick??? PM me when you feel your ready for some fancy wood and I'll send you some to mess around with.Burls, Girls, and all things that Swirl....
-
09-26-2015, 09:53 PM #3Tradesman
- Join Date
- Aug 2014
- Location
- Sault Sainte Marie
- Posts
- 1,719
Thanked: 245
I was using what ever belt came with the sander it was a mastercraft from CT. Originally Posted by HARRYWALLY

Next time I believe I am going to start with a 1/8th piece of material not 2". That would save hours. This is kind of the reason I didn't make them any thinner. It took a long time to get them like that. I liked the look a little thicker and then it was the pinning. I wanted to leave a little room for forgiveness if I swung the hammer to hard!! So i left it a little thicker.
I will work on getting a 220 belt. The belt I have isn't super coarse as is.
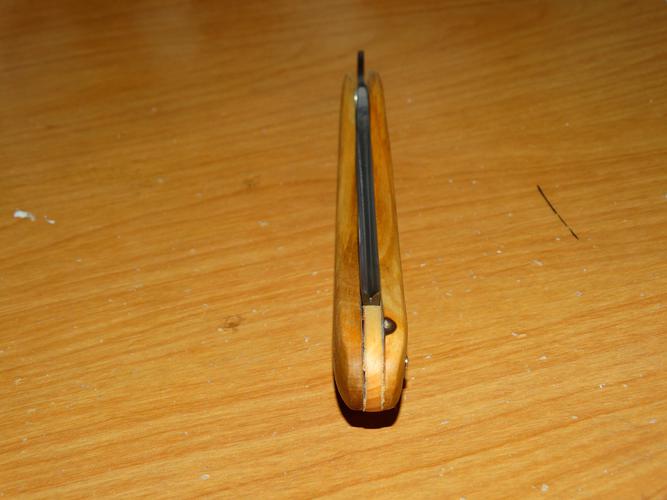
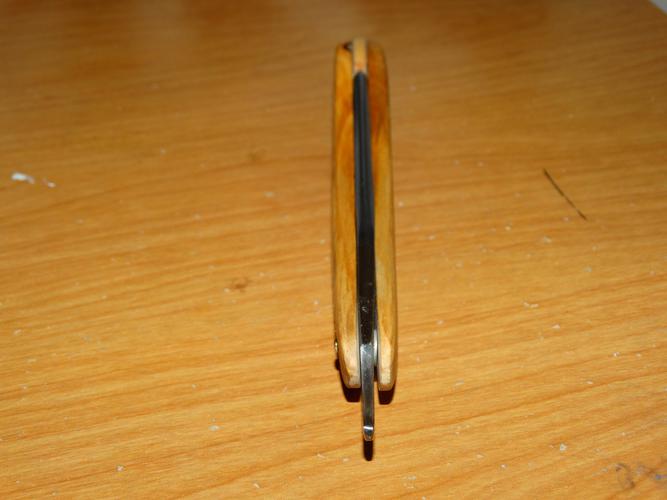
It is functioning properly and gives the blade a little more protection then normal scales. It also is centered very nicely but as you can see in the picture I had to shim it with a washer...
And finally.... yes the paint stick. I don't know why but I looked around and that was on the bench also. So all in all I paid 0 for supplies.
What are your thoughts on Bubinga? I don't know if it's called that exactly but I think that's what it said on the receipt when I bought it. 24 x 3 x 1/8.
-
09-26-2015, 10:11 PM #4I love Burls....... and Acrylic
- Join Date
- Mar 2012
- Location
- Baden, Ontario
- Posts
- 5,475
Thanked: 2284
Bubinga is great wood and once finished will be very pretty. Here's a little about it.
Bubinga | The Wood Database - Lumber Identification (Hardwoods)
If you plan on doing more rescaling, maybe you want to get some proper pins and washers. I get mine from Maggard, he has a nice little kit containing everything you need. He also has nickel and brass.
Restoration Supplies | Product Categories | Maggard Razors - Straight Razor Restoration, Custom Scales and Wet Shaving Products
I'm betting your belt is either 80 or 100 grit. Very coarse when it comes to power sanding. There's tons of videos on youtube about making scales, and lots of threads on here as well that you can read that will help a lot.
In no time you'll be punching out fancy scales, my first attempt was somewhere around yours too. The more you do, the more you'll learn what not to do, and what to do.
Lastly, watch those finger nails and fingertips on that belt sander...
s0litarys0ldier likes this.Burls, Girls, and all things that Swirl....
-
09-26-2015, 11:10 PM #5Senior Member
- Join Date
- Jul 2015
- Posts
- 143
Thanked: 9
If you dont have one... Get a coping saw... with quality blades... it will cut hours of sanding down from wherever you are with little noise... they really cut fast - if my bandsaw doesnt have the right blade init at the time and it is not massive amounts of cutting, i just use the coping saw... it is quicker than setting up the bandsaw...
and you can make long narrow cuts, curvy cuts and you do this quietly...
-
09-26-2015, 11:23 PM #6Tradesman
- Join Date
- Aug 2014
- Location
- Sault Sainte Marie
- Posts
- 1,719
Thanked: 245
Thank you, Originally Posted by AndreGrobler
I couldn't figure out what that was called. A little strapped for cash now but when I do get some that's on my list!!
P.S
Thanks for the links HARRYWALLY.HARRYWALLY likes this.
-
09-26-2015, 11:25 PM #7Senior Member
- Join Date
- Jul 2015
- Posts
- 143
Thanked: 9
I'd be surprised if a saw and blades amount to more than 30 or 20 usd... second hand stores or pawn shops are your friend...
-
09-26-2015, 11:30 PM #8Tradesman
- Join Date
- Aug 2014
- Location
- Sault Sainte Marie
- Posts
- 1,719
Thanked: 245
Originally Posted by AndreGrobler
20-30USD holy whack that's like 60 bucks CAD
-
09-26-2015, 11:38 PM #9Senior Member
- Join Date
- Jul 2015
- Posts
- 143
Thanked: 9
I got lucky paid what amounts to 10usd 2nd hand for mine and 8usd for 10 good quality blades... but this was in SA... i need some more soon but these 10 lasted more than a year... and did mostly tropical hardwoods... dense stuff
You could find something cheaper i guess...
So is that a lot of money for quality tools? Mine is probably older than me... so a lifetime or two of use should be doable


 Reply With Quote