
Results 1 to 10 of 16
 28Likes
 LinkBack URL
 About LinkBacks
Threaded View
-
11-16-2015, 02:17 AM #1Senior Member


- Join Date
- Sep 2013
- Location
- Tucson, AZ
- Posts
- 1,031
Thanked: 176 Pair of Clarks, Exeter Change in Ivory
The tale of two Clarks, Exeter Change.
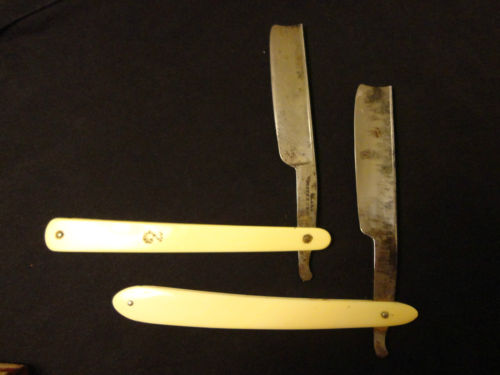
I bought these two from a guy in France. I was not really sure what I was getting (or getting into) but I knew that the scales were ivory, the blades looked ok and were stub tails. Clearly these razors were part of a set originally...how many and the fate of their mates, is lost to history.
They were originally made in North London at Exeter Exchange (Exeter Change). The building had small workshops on the first floor and a menagerie established by Thomas Clark on the second. The building was demolished in 1829.
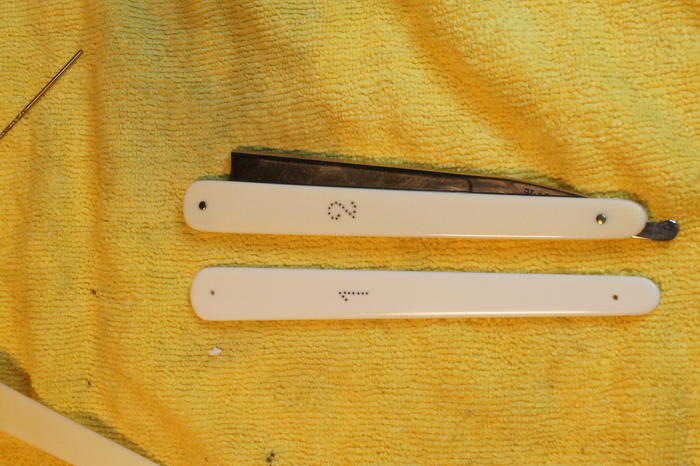
When they arrived, I realized that the worst of the blades actually didn't look too bad. I was faced with what to do about the cracked rear scale on the No. 2 and what to do with the other razor in the very nice but very wrong ivory scales.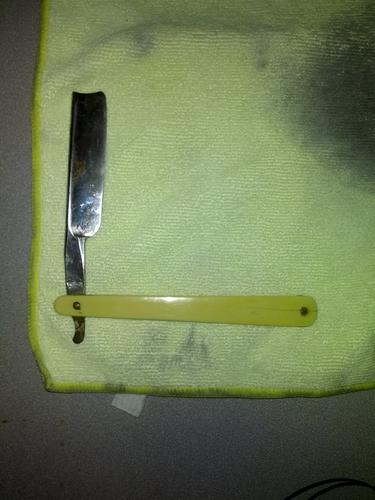
Finally, I decided to attempt some sort of restoration. I didn't want to use ivory but the faux stuff just doesn't look or perform the same way. I had Mazecraft's on a previous project and found it too soft/ flexible. Resigning myself to there is no real alternative, I searched for ivory for a while and finally found a guy that had some piano key blanks, 6x1x.100. I decided that I would afford to buy 4.
The ivory arrived and sat with with razors while I thought about working with it. The finished scales are very thin and my fears took control of the project...collarless pinning on a frangible, not inexpensive and increasingly rare material. How to do piqué. Color matching, etc. Lots to learn
I finally started with the simplest task, the No.2 cracked scale. I disassembled the razor.
Surprise number one. The pins were considerably thicker than 1/16.
I cleaned up the blade, hand sanding (wet) and polishing. A nice shiny blade resulted.
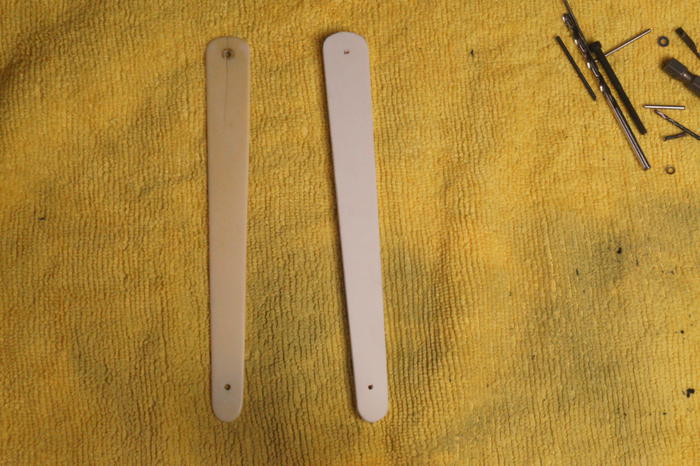
I used the cracked scale as a pattern for a new one. Rough cut it on my scroll saw. Taped it to the original, shaped and thinned it on my disk sander. I worked through the sandpaper grits by hand through 1500 finish sanding wet. The finished piece was VERY white and after clean up the original face scale was still considerably yellow.
With some guidance from Bill, I dyed the finished scale with strong coffee with a few splashes of white vinegar and a drop of dish soap added. The ivory took the color very quickly and I arrived at an equivalent depth of color but shifted subtly to the brown side. I finished polishing the scale and it looked pretty good.
I prepared a couple of 1/16 brass pins then went to clean up the wedge.
Surprise number 2, the wedge is nickel silver...not lead.
I went ahead and assembled the razor with the too small brass pins and worked them slowly until the heads developed enough to hold it all together. Honing was straight forward. The finished razor was surprisingly heavy but it is a great shaver.
Then I put the project on hold as I contemplated making the complete set of scales for what would become Number 1. I did research on what font would be appropriate, using the single example of the numeral 2, I came up with Copper Plate font 8. I measured the diameter of the pins in the piqué with a dial caliper and came up with 22 ga (about .025 diameter). as the closest modern size. I had thought the pins were sterling silver but they did not tarnish over time so I supposed they were nickel silver, as the wedge. I got some 22 ga. wire and a set of tiny number drills (61-80).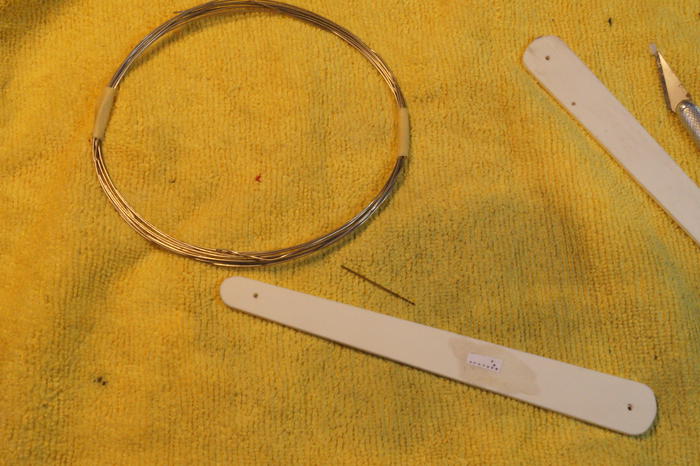
There the project sat as I thought about the drilling. The pins on the original scale do not go all the way through but are so close that you can see the end of the pin through the ivory. I would need to be able to set an accurate depth, have a great view to position the drill very accurately, and could not tolerate any walking of the bit.
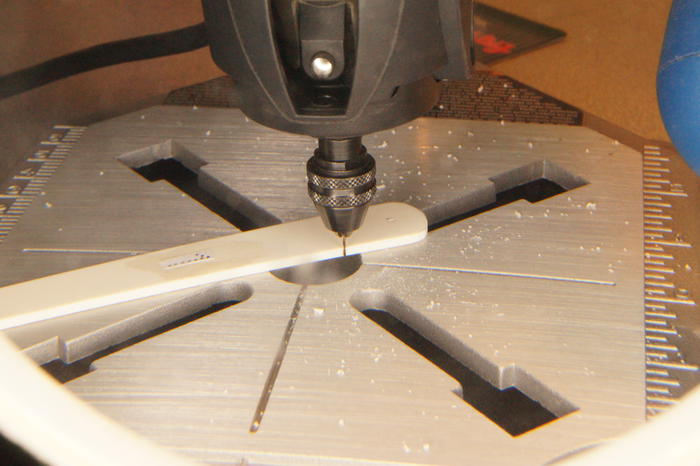
One day I saw a drill press fixture for my dremel, in the Ace hardware store. They also had a tiny chuck that goes down to nothing..perfect for tiny drill bits. With those under my arm, I headed home to do some testing on a scrap from the first scale.
I found the drill did not wander at all. The drill press is small enough to sit on my desk and have my light magnifier right up to it to see what I am doing. The wire I have is dead soft and I knew that I wanted the pins to drive like rivets (swell to fill the hole), not peen like assembly pins. I found a number 74 drill (.0225) left a hole that a deburred pin would just fit in. If cut just a few thousandths longer than the hole depth, a pin will set in the hole just by pushing with my hammer.
I cut a couple of scales from the ivory, taped them together, disk sanded them to shape and drilled for the assembly pins. 1/16 for this set.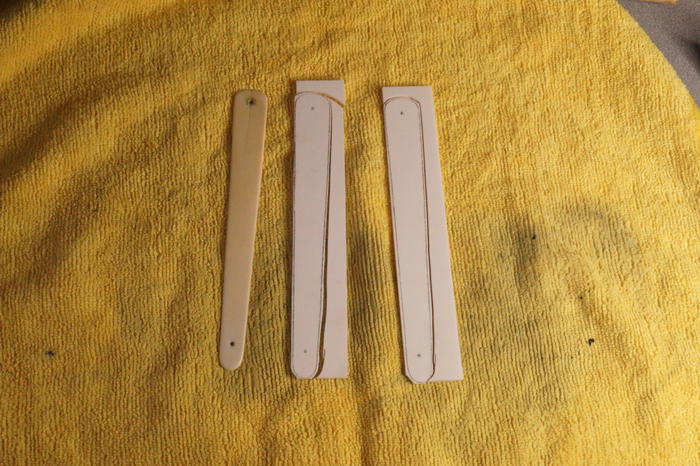
I drew a pattern for the numeral one on a piece of paper, After a couple comparisons to the other scale and fine tuning, I cut it out and rubber cemented it in place on the full thickness scale. I set the depth stop on the drill and drilled the holes. I made the pins one at a time and set them into the ivory. They are so small I needed to use tweezers to handle them. The pins took about 10 minutes each.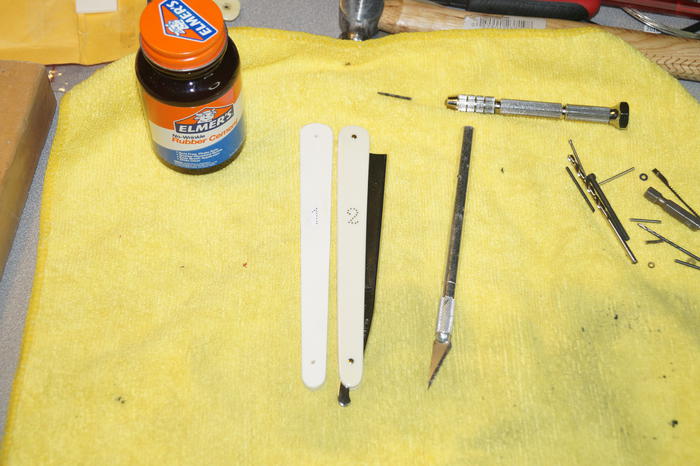
With the pins set, back out to the disk sander where I thinned the scales down, leaving a fair amount for hand finishing. Ivory sands away quickly...even by hand. Again finishing at 1500 wet. I dyed these two the same as the prior.
I made a nickel silver wedge to the same dimensions of the original wedge. (I will do a how to on a tool I made for wedge making.)
I assembled the razor, polished the scales, and honed it. I was upset that it came out noticably lighter and a different shade (not nearly yellow enough) than number 2. I agonized over taking it apart! What now? Finally, I decided to re-dye it assembled. Worst case was that the vinegar would mess with the steel and I would have to take it apart anyway to refinish the blade. This time around I added a teaspoon or so of Turmeric to the coffee to amp up the yellow. The result was very very close to the color of number two. A thorough rinsing, alcohol wash, blow dry and some silicone followed by a light polishing.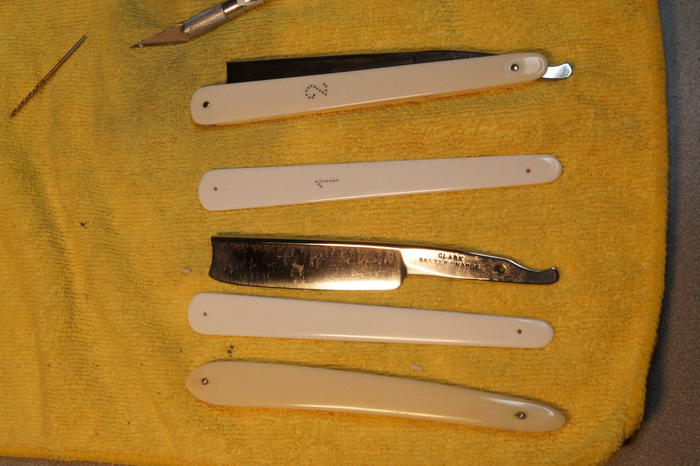
Number 1 gives a good shave but perhaps needs a fine tuning on the hones. Over all I am happy with the result and ready to tackle another piqué project.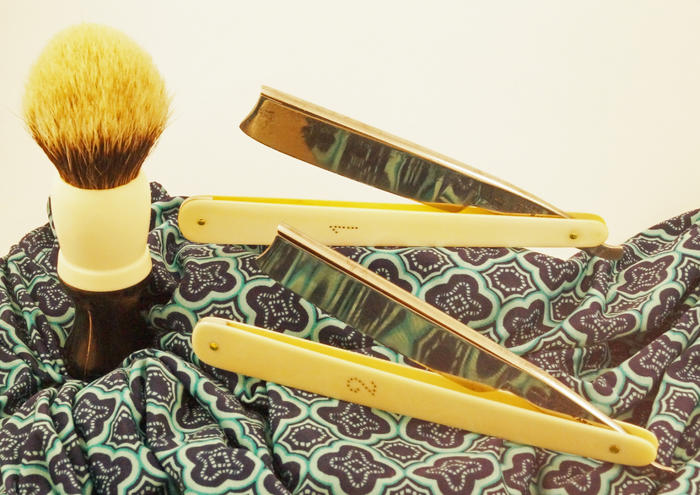 The easy road is rarely rewarding.
-
The Following 13 Users Say Thank You to Splashone For This Useful Post:


 Reply With Quote