
Results 1 to 10 of 37
 126Likes
Thread: Birth of a new custom razor
 LinkBack URL
 About LinkBacks
-
12-23-2015, 07:14 PM #1Senior Member


- Join Date
- Feb 2012
- Location
- Budapest, Hungary
- Posts
- 326
Thanked: 152 Birth of a new custom razor
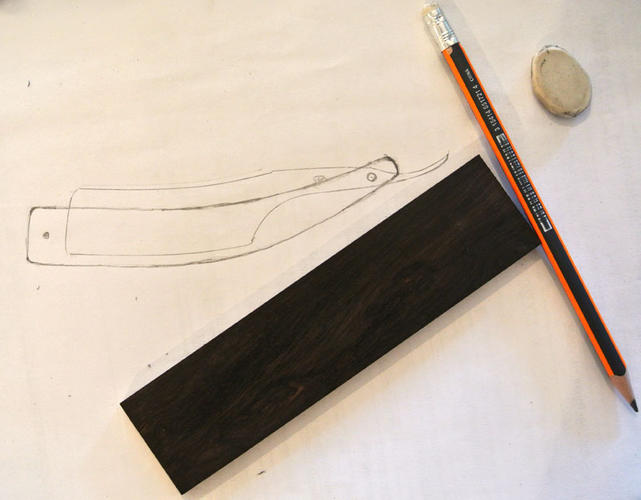
I would like to show you how I make a custom razor. It was made for a buddy in Hungary.
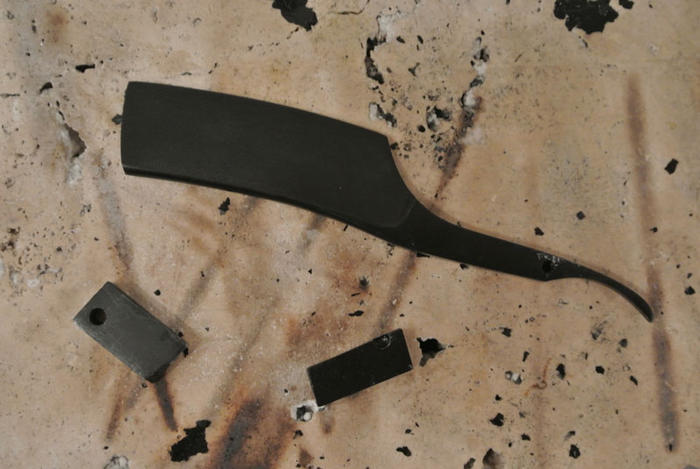
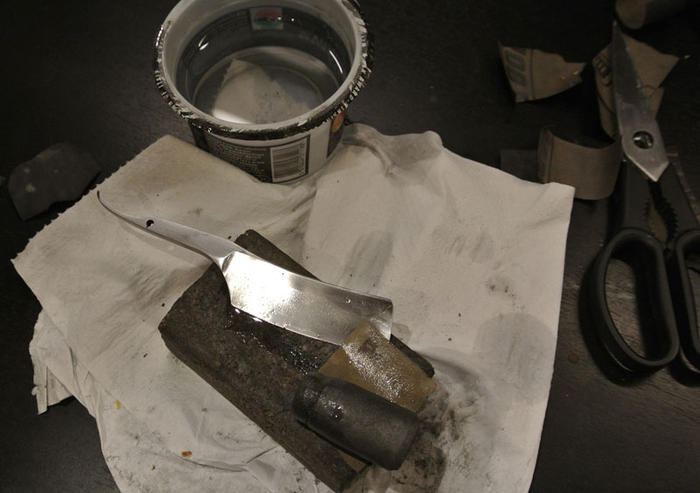
After the planning I cut the razor from the steel and shaping it.
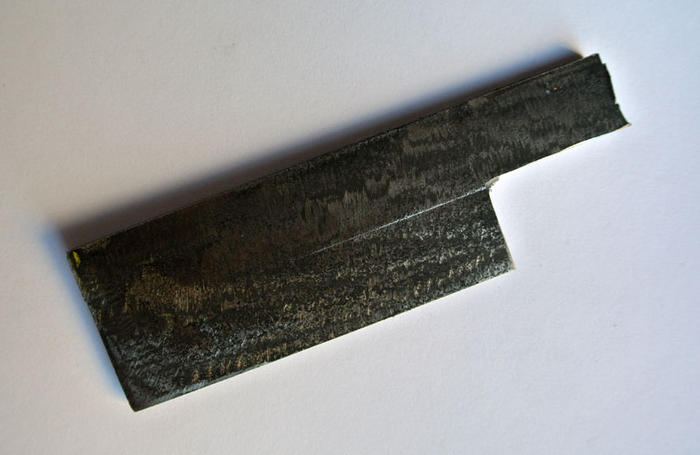

To be continued...gregg
-
-
12-23-2015, 07:22 PM #2Senior Member
- Join Date
- Feb 2012
- Location
- Budapest, Hungary
- Posts
- 326
Thanked: 152
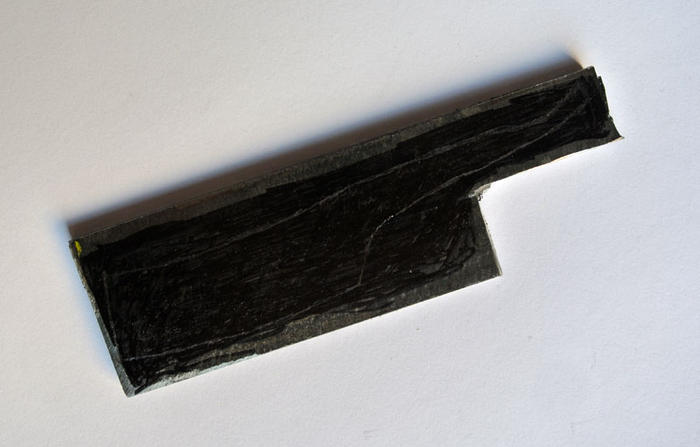
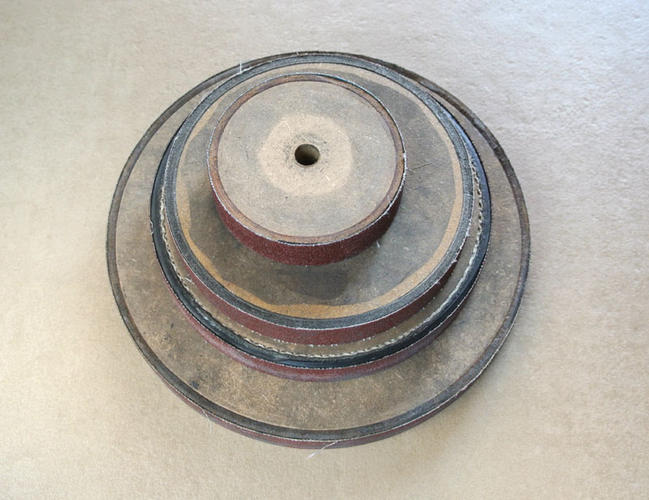
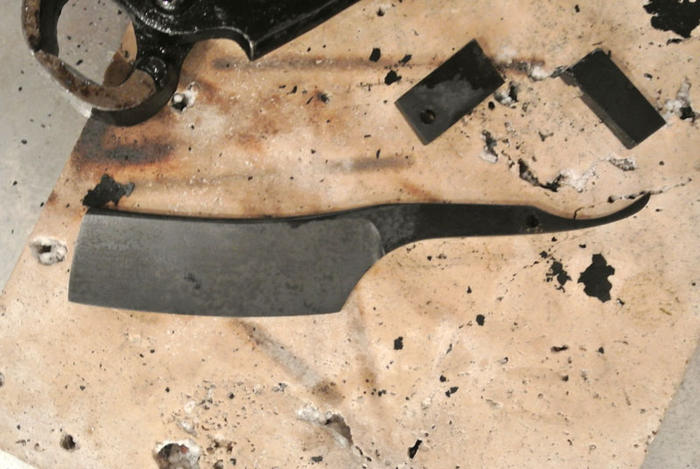
The grinding process before the heat treating.
I have a simple machine but next year I can work with a professional grinder.

To be continued...gregg
-
The Following 9 Users Say Thank You to gregg71 For This Useful Post:
engine46 (12-24-2015), jmercer (12-24-2015), MJC (12-26-2015), nipper (12-24-2015), puketui41 (12-26-2015), RezDog (12-23-2015), ScottGoodman (12-24-2015), spazola (12-23-2015), Thisisclog (01-06-2016)
-
12-23-2015, 07:44 PM #3Senior Member
- Join Date
- Feb 2012
- Location
- Budapest, Hungary
- Posts
- 326
Thanked: 152
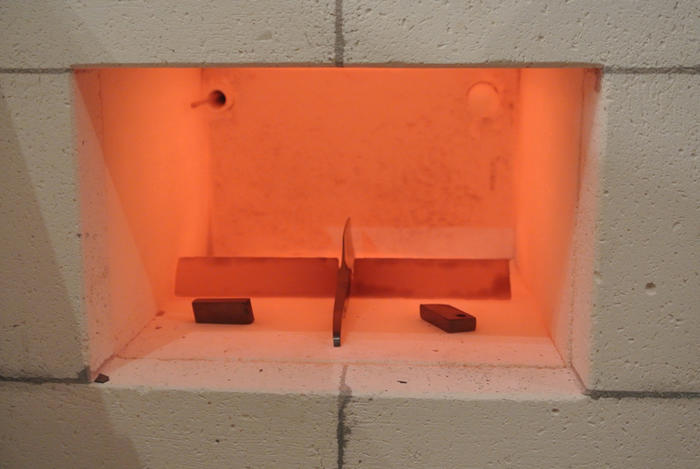
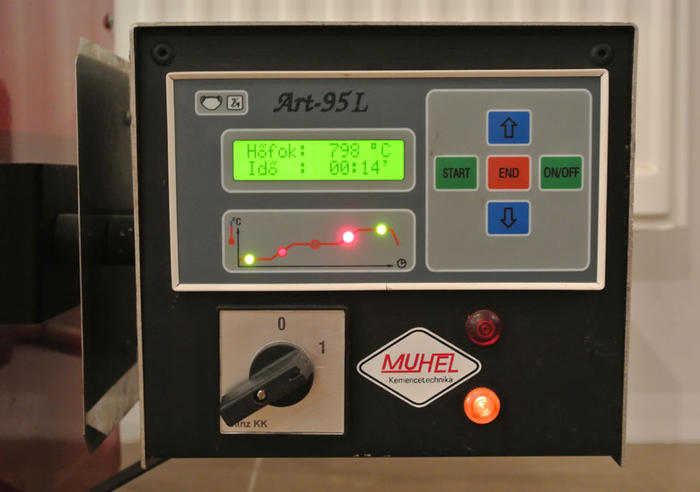
Heat treating process. I would like to say thanks to the guys in The Forge topic for their help!

My process:
I leaved 1.5 mm thikness of the edge.
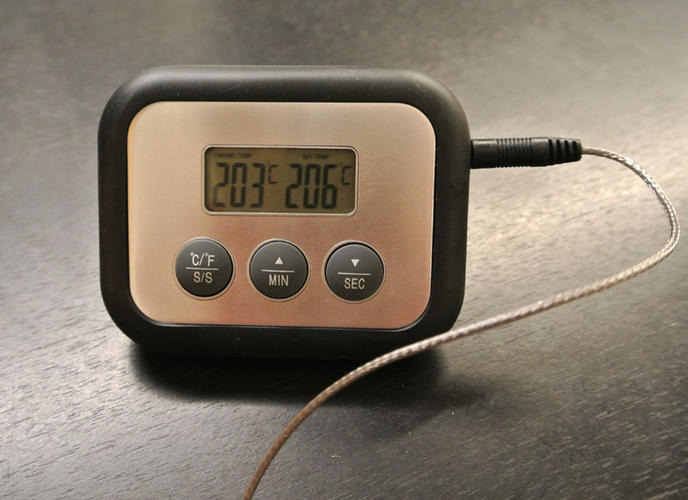
soaking: 805C / 1480F, 8 min.
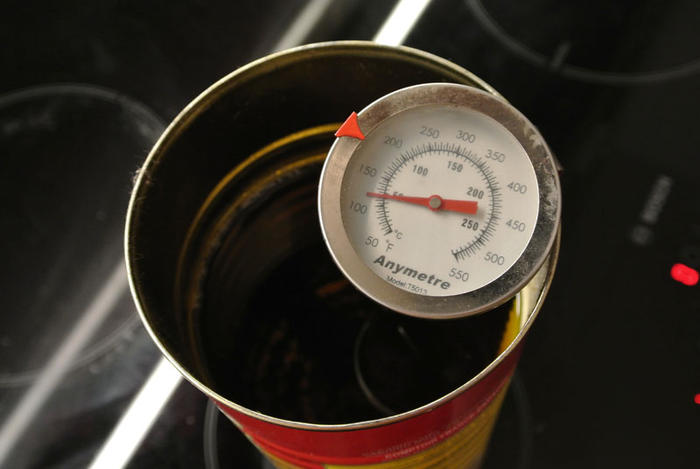
quenching oil: 55C 20 sec
tempering: after cooling to room temperature, 210C 2x1h (between cooling to room temperature)
After this I sanded a few tenths of millimeters from the edge.
To be continued...gregg
-
The Following 5 Users Say Thank You to gregg71 For This Useful Post:
engine46 (12-24-2015), nipper (12-24-2015), RezDog (12-23-2015), ScottGoodman (12-24-2015), Thisisclog (01-06-2016)
-
12-23-2015, 07:48 PM #4Senior Member
- Join Date
- Feb 2012
- Location
- Budapest, Hungary
- Posts
- 326
Thanked: 152
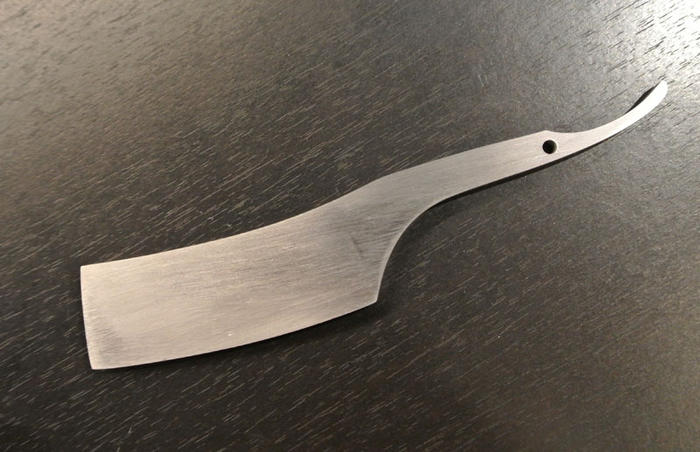
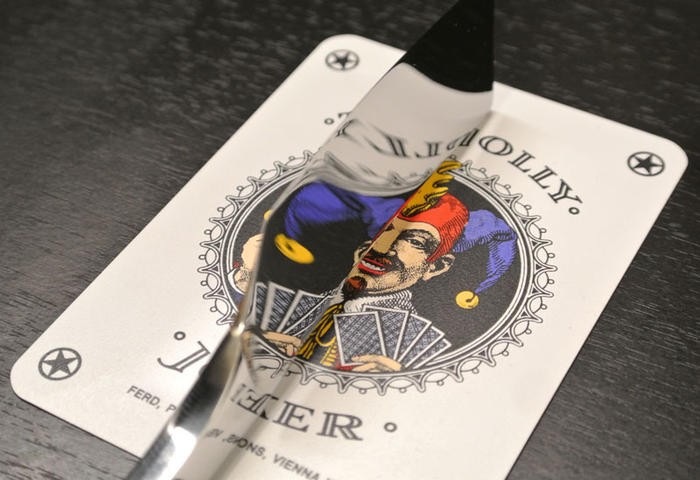
Hand grindig for the mirror polish.
Mirror polish.
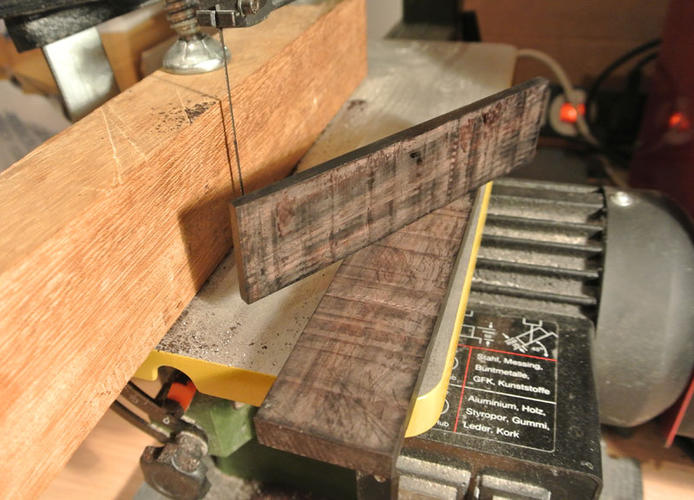
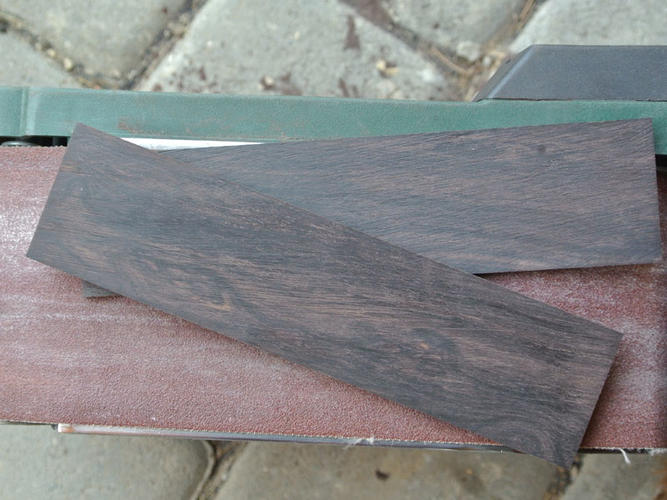
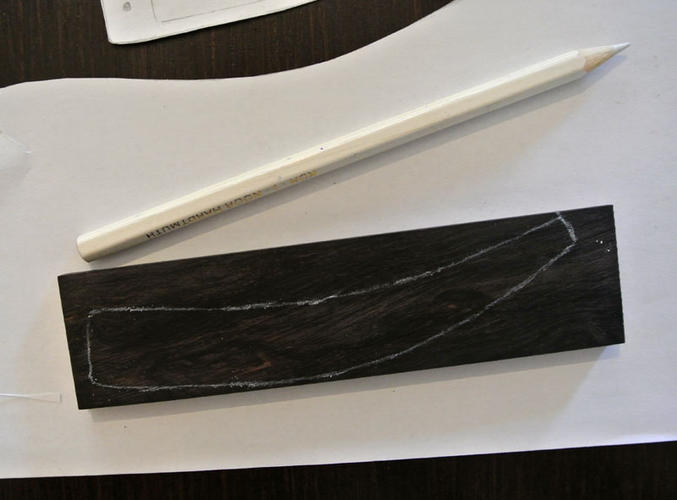
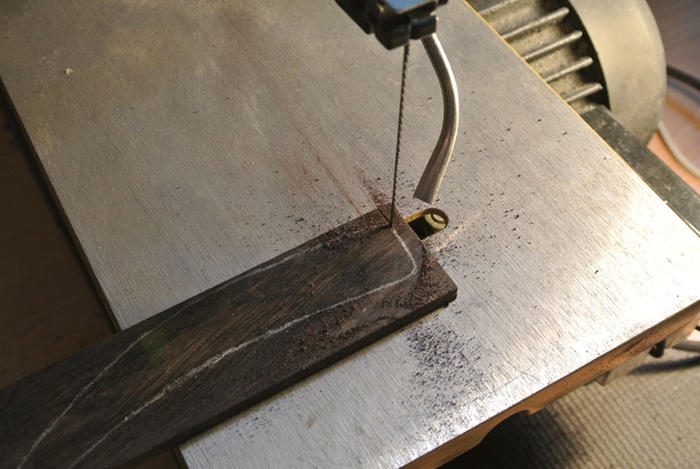
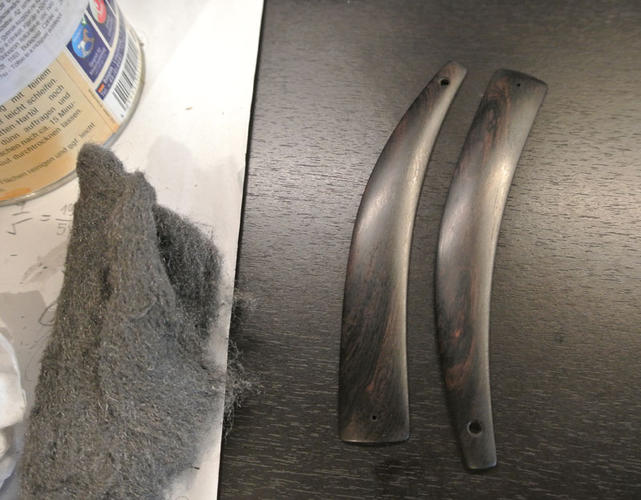
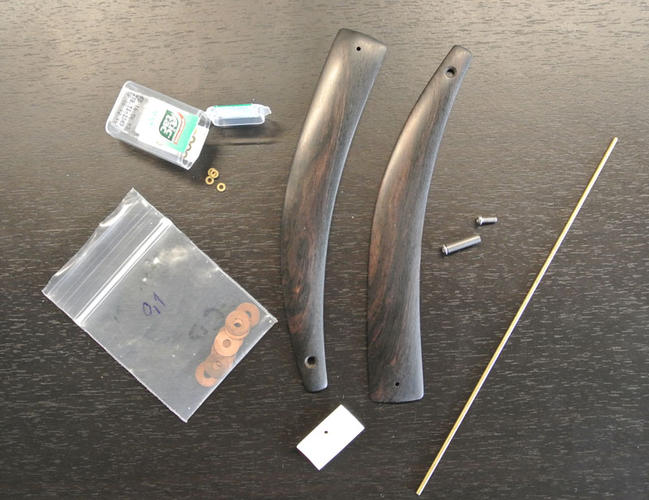
Making the scales.
To be continued....gregg
-
The Following 7 Users Say Thank You to gregg71 For This Useful Post:
ajkenne (08-15-2016), engine46 (12-24-2015), jmercer (12-24-2015), nipper (12-24-2015), RezDog (12-23-2015), ScottGoodman (12-24-2015), Thisisclog (01-06-2016)
-
12-23-2015, 07:53 PM #5Senior Member
- Join Date
- Feb 2012
- Location
- Budapest, Hungary
- Posts
- 326
Thanked: 152
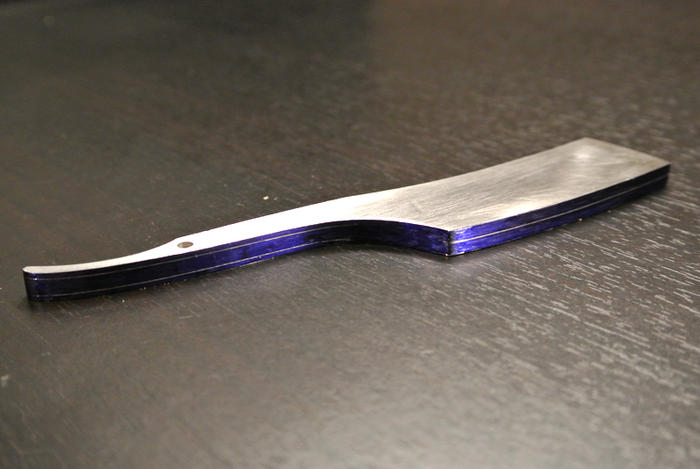
Honing process. As a finishing step I use Japanese natural stones and Kanayama Cordovan Strop.

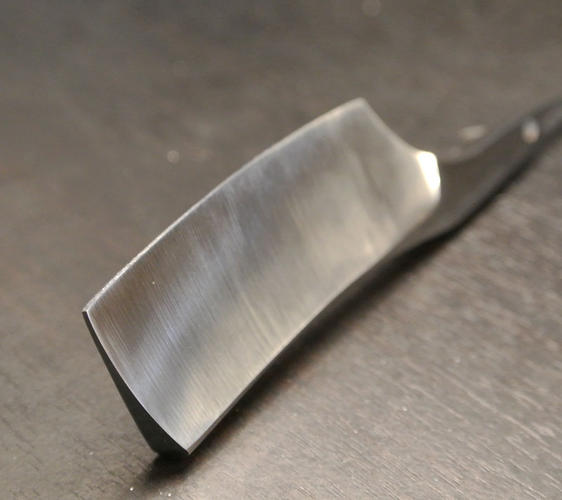
The finished product.
- O1 tool steel hardened to HRC 61
- 7/8" (23mm) wide blade
- Quarter hollow grind
- Mirror polish blade including the hollow ground
- Grenadil scales and camel bone wedge
- Phosphor-Bronze pivot bearing washers
- Nickel-silver wedge/spacer pin with stainless steel washers
- Adjustable stainless steel pivot pins
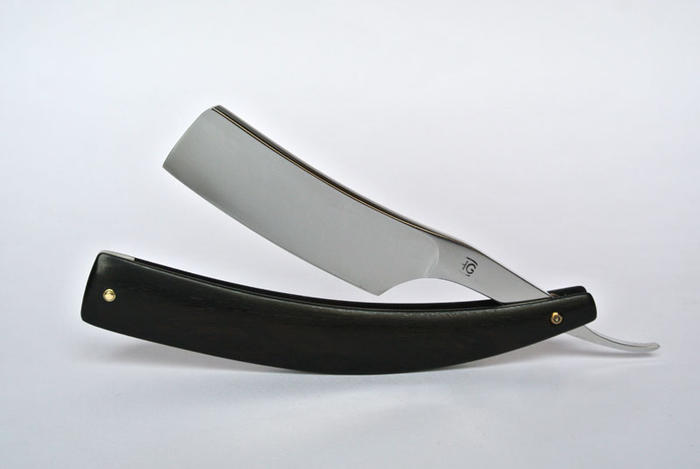
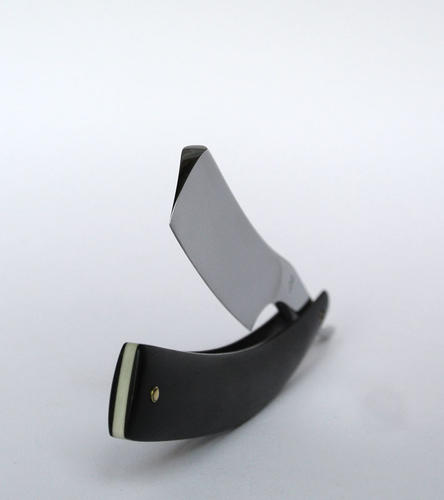
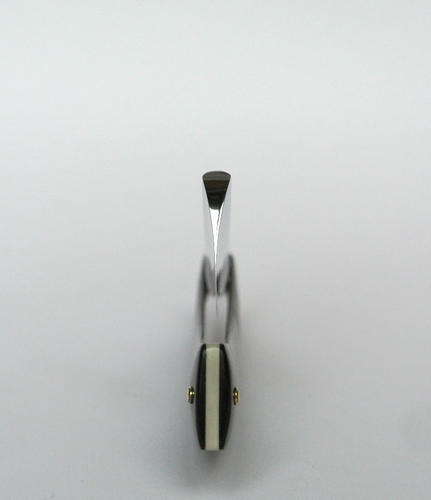
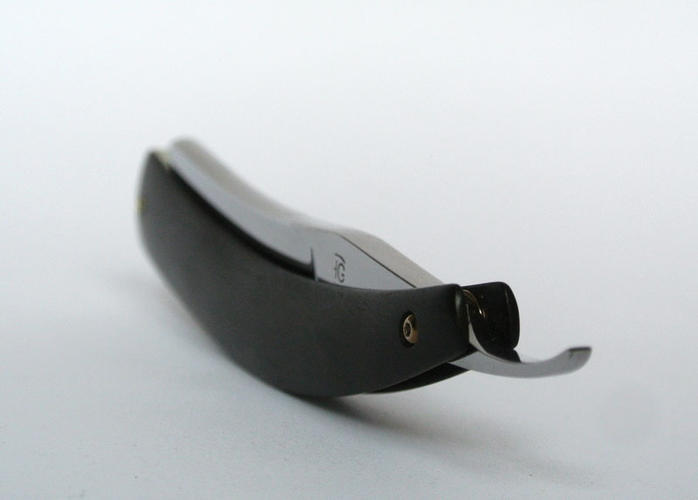
Thanks for watching.gregg
-
The Following 25 Users Say Thank You to gregg71 For This Useful Post:
bluesman7 (12-25-2015), BobH (12-23-2015), ChopperDave (12-24-2015), dooey (01-14-2016), engine46 (12-24-2015), evnpar (12-23-2015), Gipson (12-24-2015), HARRYWALLY (12-24-2015), JAK (06-15-2016), jfk742 (12-23-2015), jmercer (12-24-2015), lz6 (12-24-2015), MattCB (12-25-2015), MichaelS (06-10-2016), MJC (12-26-2015), nipper (12-24-2015), RezDog (12-23-2015), ScottGoodman (12-24-2015), spazola (12-23-2015), Substance (12-27-2015), Thisisclog (12-26-2015), tintin (12-23-2015), Walterbowens (12-23-2015), Wolfpack34 (12-23-2015), WW243 (01-06-2016)
-
12-23-2015, 08:09 PM #6Senior Member


- Join Date
- Apr 2015
- Location
- Johannesburg
- Posts
- 2,498
Thanked: 410
Great job.
Tremendous pictorial, thanks for sharing.gregg71 likes this.Tony
-
The Following User Says Thank You to Thug For This Useful Post:
gregg71 (12-23-2015)
-
12-23-2015, 08:18 PM #7Senior Member

- Join Date
- May 2011
- Location
- wishaw, scotland
- Posts
- 366
Thanked: 54
That is amazing! Great craftmanship
gregg71 likes this.
-
The Following User Says Thank You to monkeypuzzlebeefeater For This Useful Post:
gregg71 (12-23-2015)
-
12-23-2015, 08:19 PM #8Senior Member


- Join Date
- Apr 2014
- Location
- Portland, Oregon
- Posts
- 3,350
Thanked: 664
A beautiful razor than anyone would be proud to own. Thanks so much for sharing the process in such detail. I really enjoyed it.
gregg71 likes this.Richard
-
The Following User Says Thank You to evnpar For This Useful Post:
gregg71 (12-23-2015)
-
12-23-2015, 09:23 PM #9Senior Member

- Join Date
- Jan 2015
- Location
- Pinole, ca
- Posts
- 1,526
Thanked: 339
Thanks for the read along. The razor looks good and I really like finish on the scales.
gregg71 likes this.
-
The Following User Says Thank You to jfk742 For This Useful Post:
gregg71 (12-23-2015)
-
12-24-2015, 03:30 AM #10~ Life is but a Dream ~

- Join Date
- Dec 2014
- Location
- Oakham, Ma.
- Posts
- 3,844
Thanked: 1218
Super interesting pictorial.
It's great to study different build techniques and methods.
The outcome is one heck of a razor!
Thanks for sharing.
Pete <:-}gregg71 likes this."Life is short, Break the Rules. Forgive quickly, Kiss Slowly,
Love truly, Laugh uncontrollably, And never regret ANYTHING
That makes you smile." - Mark Twain
-
The Following User Says Thank You to petercp4e For This Useful Post:
gregg71 (12-24-2015)


 Reply With Quote