
Results 1 to 10 of 14
 15Likes
 LinkBack URL
 About LinkBacks
-
03-30-2016, 06:43 AM #1Junior Member


- Join Date
- Mar 2016
- Location
- Shelton, WA
- Posts
- 8
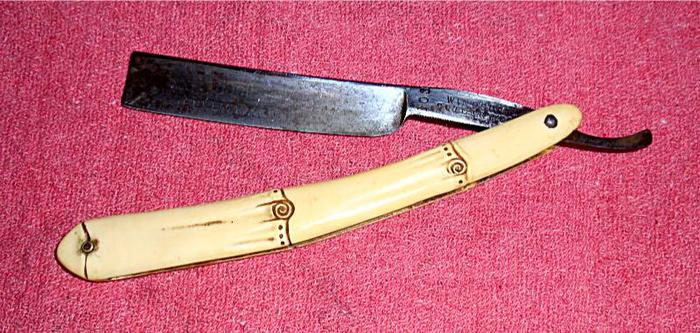
Thanked: 0 Partial restoration of a family antique
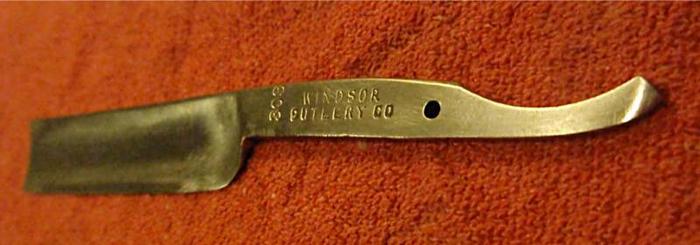
This razor was owned by my wife's great-great-grandfather Boone. May have been part of a set, but the razor is all that's left. I don't know if anyone has used it since Boone, but it seems in pretty good condition considering its age. For some reason, it found its way to me, and when I see a rusty thing, I gotta polish it.
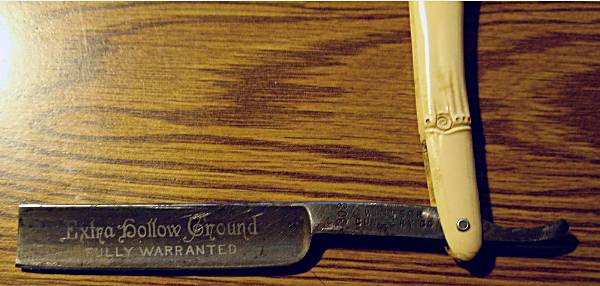
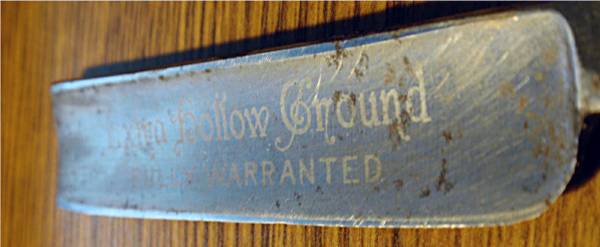
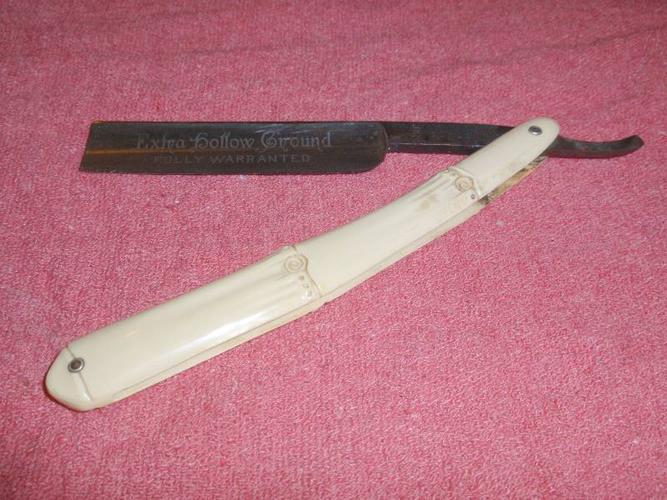
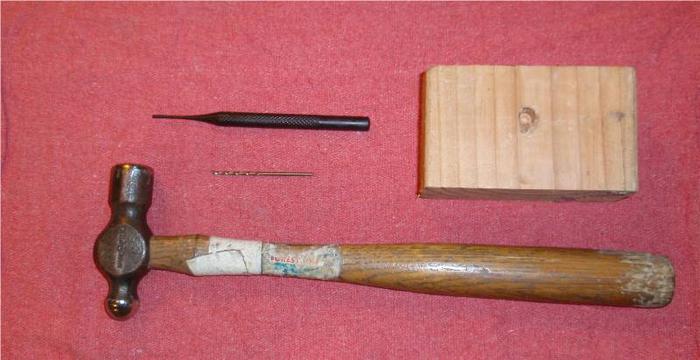
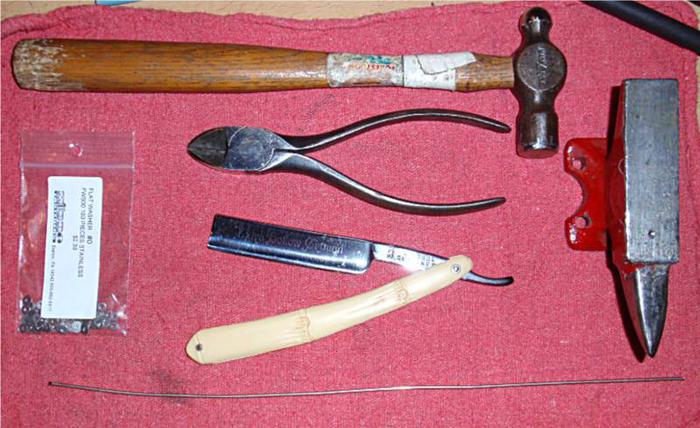
The handle is in good shape. Just needs a bit of cleaning. The rust isn't too bad, but I'm leaving a few pits and scores in order to preserve as much metal and engraving as I can. Got a few tools together for handle removal.
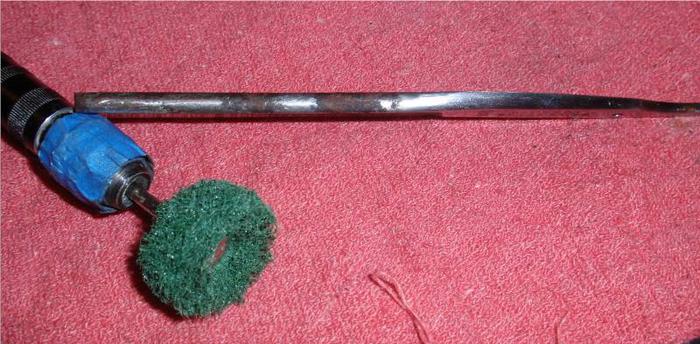
I went over the blade with green scotchbright material to remove most of the rust. I had to use a coarser one for the two really bad spots on the spine.
After the wheels, I went over the whole thing with aluminum oxide wet/dry sand paper. I like to use oil with mine instead of water. Doesn't dry out. Started with 320 grit, and moved up in increments of about 200, until I got to 1,200.
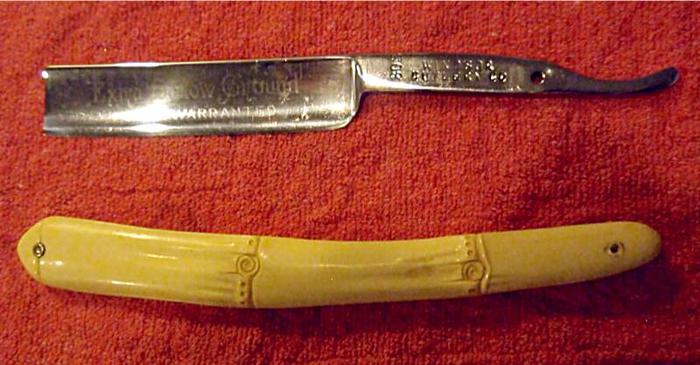
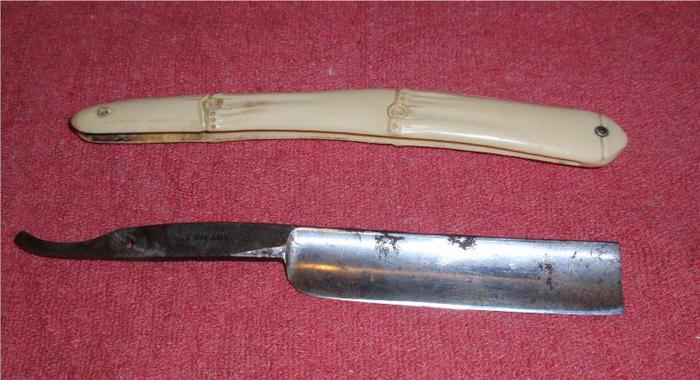
Polished with emery, tri-poly, white, and green compounds. For small objects, I use 3" wheels on my drill press at about 3,200 rpm. Not a perfect mirror finish, but still very nice. The handles I just cleaned up with dish soap and water, and put a new pin in place.
Still collecting tools for honing and sharpening, but it should be usable again soon.-Mike
-
03-30-2016, 07:26 AM #2Truth is weirder than any fiction..

- Join Date
- Jun 2012
- Location
- Land of the long white cloud
- Posts
- 2,946
Thanked: 580
Very nice, looks near brand new again.
Into this house we're born, into this world we're thrown ~ Jim Morrison
-
03-30-2016, 03:06 PM #3Senior Member


- Join Date
- Feb 2013
- Location
- Haida Gwaii, British Columbia, Canada
- Posts
- 14,441
Thanked: 4827
For your 4 post it looks as though you have done your homework well. Nice job on saving an heirloom. It is not the route I would have suggested, but so far so good. Is this your only razor? You have done a very good job.
Steel likes this.It's not what you know, it's who you take fishing!
-
03-30-2016, 03:12 PM #4Senior Member

- Join Date
- Jan 2012
- Location
- Waukesha, Wisconsin
- Posts
- 1,943
Thanked: 390
I cringed when you mentioned wheels and grits with that etch. However, you were able to keep it. Great job!
TwistedOak likes this.
-
03-30-2016, 04:53 PM #5Senior Member


- Join Date
- Jul 2013
- Location
- Kitsap County, WA USA
- Posts
- 1,549
Thanked: 351
Nicely done!
The older I get the more I realize how little I actually know.
-
03-30-2016, 09:30 PM #6Junior Member
- Join Date
- Mar 2016
- Location
- Shelton, WA
- Posts
- 8
Thanked: 0
Thanks everyone!

This is my first razor restoration, but I do have some experience sanding and polishing metal. This was also my first time working with stainless steel. I mostly work with aluminum, and sometimes mild steel.
I was hoping to preserve the engraving on the blade, so I was not as aggressive as I normally would be. The green scotch bright wheel was on very low speed. I've found that higher speeds will cause these weird tracks to get gouged into the metal as bits of the wheel wear off.
Also, the sanding was all done by hand. I've found that power tools are just too aggressive for this sort of thing. I've seen YouTube vids of folks completely sacrificing the etching in favor of a more perfect mirror finish, but I really wanted to preserve as much as I could.Wullie and dinnermint like this.-Mike
-
04-03-2016, 02:29 PM #7Junior Member
- Join Date
- Jan 2016
- Location
- east central Illinois
- Posts
- 13
Thanked: 1
Looks good!
Why do you say "stainless steel"? That appears to be a simple carbon steel blade.
-
04-03-2016, 09:56 PM #8Junior Member
- Join Date
- Mar 2016
- Location
- Shelton, WA
- Posts
- 8
Thanked: 0
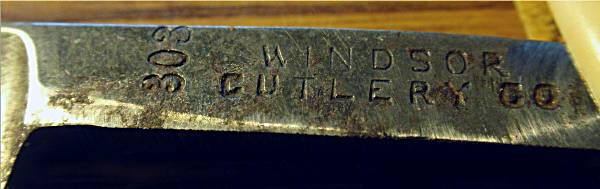
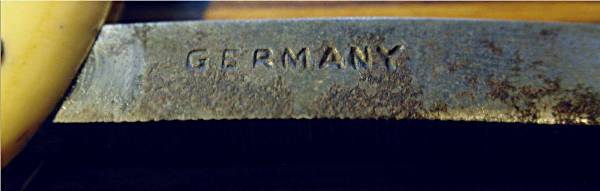
I could be wrong, but the tang is stamped 303, and when I looked up 303 steel, the internet told me it was a type of stainless.
I found a near duplicate on eBay for $25. Its in worse condition. I think someone may have tried to restore it before. More rust, and the etching on the blade is pretty much gone. I'll be working on this one too, and see if I can get it sharpened properly.
 Substance likes this.-Mike
-
04-03-2016, 10:07 PM #9Senior Member

- Join Date
- Apr 2008
- Location
- Saint Paul, Minnesota, United States
- Posts
- 2,944
Thanked: 433
Very nice job!!
One thing to worry about is over heating the steel causing loss of temper, if you used slow speed or it didn't feel really hot to the touch it's probably fine.
I would guess it is carbon steel and the "303" is just a model number
-
04-03-2016, 10:21 PM #10Junior Member
- Join Date
- Mar 2016
- Location
- Shelton, WA
- Posts
- 8
Thanked: 0
Thanks!
Yeah, I do the power tool work with bare hands. If it gets uncomfortably hot (for me, that's around 120F), time for a break. I just use the abrasive wheels to get the rust off. I do the sanding by hand.-Mike


 Reply With Quote